Tag: food

  • Supply Chains…And a Challenge for Pemberton’s Non-Gardeners

    Supply Chains…And a Challenge for Pemberton’s Non-Gardeners

    How is everyone doing? I have been thinking about so many of our assumptions lately. That the tourists will come. That Whistler Blackcomb will open. That our kids will be in school. That I can get on a plane and fly to Italy. That I can ride the ferry. That I can go to the store and purchase what I need.

    Our supply chains:

    I read a locally published book about a decade ago called The Cucumber Tree – a memoir by a man growing up in Vancouver in the 1940s and 1950s. He recalled evenings with his family; dinner was always at home. Never would they go out for dinner or even out to other people’s homes for dinner parties. Dinner was prepared and eaten at home, every night.

    We just have assumptions that we can go out for dinner and that we will be able to travel. And this is a new assumption. It has only been since I was growing up that going out with the family was a thing. And to recall, it only occurred on a special occasion. I do not remember too much of it going on but if we did eat out, it was to a family-run pizza restaurant in my neighbourhood in Vancouver. We have so many lifestyle assumptions under fire right now.

    Back when my parents were growing up food supply chains were different and going back further your family and your home was a big part of the supply chain. You ate what you grew. You preserved what you could for the winter.

    Here in Pemberton yes, we are very lucky to have farmers and so we would assume that we will always have access to good healthy food. Yet…

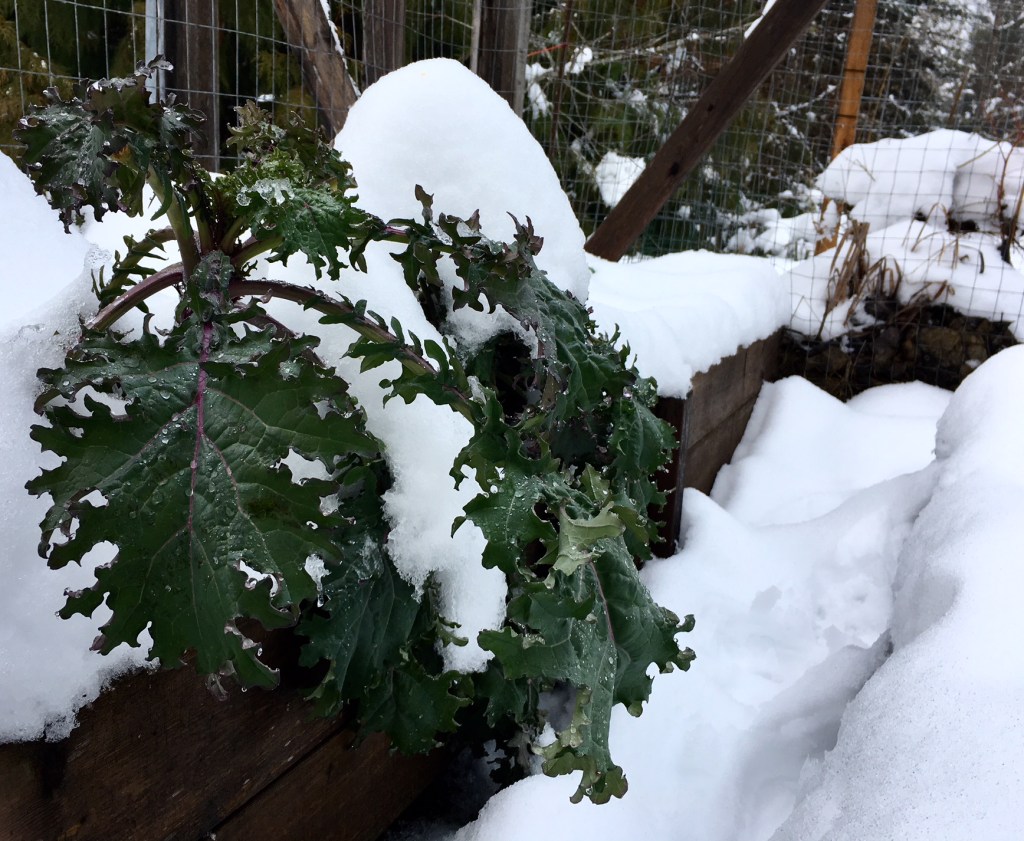
    Many articles are being written lately about growing a “Victory Garden” and that if you can you should be more food secure within your own backyard. It is time to get cracking. If we are not gardeners then this would be the time to start. If you don’t grow anything then maybe this year grow one thing – one thing that you aren’t going to be reliant on anyone else for. If you live in a townhouse or condo in town, can you grow your own herbs? Sprouts? Micro greens? If you have a yard but simply don’t garden, start with one, two, or three items that will sustain you. I would lean towards items that are hardy like chard, kale and spinach. Fresh herbs – parsley, cilantro, dill, basil, chives – make a meal.

    A Note on Veganism:

    I am thinking vegans and vegetarians are pretty pissed off at the world, with Covid-19 originating from the filthy Wuhan, China wet markets and the disgusting treatment of wild animals caged for human consumption there. I think we owe vegans and vegetarians enormous respect, and I think they have every right to be angry. Maybe this is that time to pursue veganism or vegetarianism, or to pursue this way of eating as best we can.

    I read all the Little House on the Prairie books by Laura Ingalls Wilder when I was a kid. My favourite was Farmer Boy and how the Wilder family grew all their own food, spun their own yarn from the merino sheep they raised, and were successful in their efforts. Do you think there were any vegans back then? When the supply chain began and ended with you and your family throughout the year, where did alternative eating come in? Something to chew on. Respect the planet, have knowledge of where your food comes from, and if you can, raise it, grow it, hunt it yourself.

    What would you eat if you had to grow, raise or hunt it yourself?

    A meal from my own yard, by a minimal gardener (who may become a proper gardener this year):

    Sautéed garlic scapes (sautéed in hazelnut oil, which I would have to learn how to make)

    Spinach salad garnished with cilantro, dried saskatoons, and toasted hazelnuts, with a dressing of hazelnut oil and minced garlic

    Fruit salad of chopped apples, cherries, plums, and apple-pears

    Barbequed deer steaks (hunted locally by my spouse)

    If I were to get serious about my victory garden I would plant spuds, beans, hardy greens and romaine lettuce. I am considering a small backyard chicken coop. It would be a lot of work, but individual food security is a worthy goal. I consider weeding back-breaking labour after about 15 minutes of crawling around in the dirt, mosquitoes buzzing in my ears, and the relentless Pemberton sun beating down on me. Again, I salute the farmers. We are lucky to live among them, now more than ever.

  • Herbal Hallucinations: is this all a dream?

    Herbal Hallucinations: is this all a dream?

    Earlier in the New Year, I was examining the contents of my “witch’s cabinet” (as the friend who gifted me the antique armoire named it), taking note of the herbs that should ideally be used up before spring foraging starts up again.

    IMG_20170501_084636_934

    I pondered starting a micro-dosing program. Not with psychedelics, of course, but I was playing with the concept using herbs, spices and novelty. This seemed a good alternative for those of us who cannot—or don’t want to—ingest consciousness-altering substances, but who still enjoy playing with our lived realities by changing patterns of consumption.

    IMG_20190913_163957_909

    It would also serve my fondness for do-able projects—taking on something subtle, like opening a window to let in fresh air rather than taking down a wall in order to build an addition to the house. Where the idea eventually landed was here: I would make at least one new recipe a week for the year.

    IMG_20180824_184239_013

    Fast forward a few weeks into late February. I returned to Whistler from Japan; COVID-19 was just beginning its global sweep out of China, and Japan was one of the early hard-hit countries. A few days after returning I developed a cough and sore throat, and was suddenly quarantined with the fear that I would be patient-zero in Whistler. After testing negative for the coronoavirus, however, I remained in quarantine with Influenza-A.

    Because of the flu, I couldn’t eat, but nevertheless started poking around the kitchen more intently. What exactly did I have in here to support health and immunity? (What did I have, given that the Canadian government was recommending we have two weeks worth of food and limit visits to the grocery store).

    OLYMPUS DIGITAL CAMERADue to a tiny pantry that comes with townhome living, I don’t have stocks of dried legumes and flour (yet!) but there is a substantial stash of otherwise semi-filled jars. There are herbs and spices galore, both from my personal interest in flavours and foraging, and because one of my sisters is a certified herbalist.

    20190706_190434

    In the fridge I found elderberry syrup and a stash of liquorice root and juniper berries (anti-virals). There was a jar of chaga from my parents property in the Cariboo, as well as clover flowers from their yard. My mother dehydrates kale by the wagon-load to crumple into soups, rice, or casseroles, and I found two bags as well as her dried apple-slices. The freezer contains steamed nettle that I’d completely forgotten about and a bag of chopped rhubarb to boot. My mini-stash was actually awash with interesting bits & bobs. Dandelion root, yarrow, calendula… harissa, nasi goreng mix and lemongrass. Local and exotic side by side.

    Now, what to do with it all?


    Screen Shot 2020-03-24 at 4.03.54 PM

    These are strange and stressful times. Most days I feel a strong need to create something— anything. And I’ll call it a win for the day even if it’s just making a nice cup of herbal tea or trying out a new soup recipe (**disclaimer, I don’t have young children; a friend with a young one told me her goal for the day was just peeing by herself, so fair enough**).

    OLYMPUS DIGITAL CAMERA

    Making all these concoctions is my way of coping with unprecedented circumstances. I know others are coping and working it out differently. Some need to chill out, eat chips and ice- cream, and soak up the stillness. I do that, too, but it seems that right now, tiny influxes of new flavours are foodie medicine for my beleaguered soul. Sage-and-lemon-balm tea. Cauliflower taco bowls. Lemony lentils. And yes, banana bread.

    My most recent experiment—a hibiscus infusion with ginger and citrus—is from a cookbook that I’ve had for years but have never used as much as in the past two weeks: Amy Chaplin’s At Home in the Whole Food Kitchen. That one book alone has delivered to my plate smashed baby potatoes with garlic & caper sauce, corn-grit blueberry muffins, a coconut curry and turmeric lemonade.

    I’ve even taken time to write the author to thank her for her recipes.

    What is happening to me? I didn’t even like to cook until I was 30 years old… but it turns out I’m a Taurus through and through. Ruled by the sensual. Now that I’ve got the time to appreciate the gifts of the senses, it’s grounding me. A little less news, a little more time to breathe in the smell of garlic, grind up coriander seed, or drop a bit of cardamom into my morning coffee.

    IMG_20180429_111422_544

    It’s simple, effective and delivers the variety I crave while we’re all house-bound more than normal.

    I wish you all well on your own journeys through this… oh, and please send any recommended recipes my way!

  • The Do Over

    The Do Over

    My favorite strip in the ol’ daily commute is in full bloom: Dogwood Row aka the false flat of Nairn Falls. When this magical time finally happens I know spring has officially arrived. These native beauties symbolizes this time of the year perfectly: rebirth and resurrection, durability and reliability, strength and resilience.

    So, life has felt a little backwards lately and I’ve been dormant like the bulbs I planted in the fall: slowly growing in hibernation, slowly surfacing to flower. While the green glow of spring delivers a healthy dose of new beginnings there will always be things that don’t survive the winter.

    The beauty is, you can always replant.

    Spring offers up a chance to do over everything from last year… literally, start fresh, change the pattern and do it better. Prune away the dead to promote new growth, leaving some things the same (they’re called perennials for a reason) and don’t forget to tend to your evergreens as they are there for you every season.

    IMG_8308

    It’s not always as simple as it seems: a large puzzle with small pieces. Sometimes you’re rewarded beyond expectation in an instant and sometimes patience is a virtue.

    But by saying yes to growing new things and experimenting with new varieties we can create a new palette to work with.

    There is little risk in gardening if you’re willing to fail and get your hands dirty. Notable and new to my garden this year are Jerusalem artichokes, shiso and fennel (which will actually be nowhere near my garden because it’s friends with no one). Oh, and way more flowers! Because why not? And pollination is key to life. Other plants are bound to sneak their way in too.


    When supported by a cast of usual suspects: beets, carrots, cabbage, cauliflower, cucumber, tomatoes, brussel sprouts, squash, cantaloupe, onions, garlic, strawberries, raspberries, blueberries, peppers, peas, beans, all the herbs, chard, radish, daikon, celery, kale, romaine, greens, kohlrabi, leeks etc, one can be nourished and flourish quite well.

    There is a good chance I’ve already said this but I’m just going to keep saying it:

    Grow what you love, try new things, revisit old favourites and savour the process.


  • The Last Squash

    The Last Squash

    Bittersweet times are upon me these days as my personal stock levels of fresh garden produce dwindle down to the last survivors. Luckily seed ordering is in full effect to keep the dream alive! Yet, even though the light at the end of the winter tunnel grows brighter every day, you can still guarantee there will be times when we feel the need to: bundle up, get adventurous, come home and devour a hot bowl of soup.

    But I’ll reiterate before continuing that… #summeriscoming.

    Feeling inspired from an Instagram post by my “neighbor” Anna for a mega hearty vegetable broth and a recipe from My New Roots, I set forth to honor my last butternut squash with a soup so full of nutritional goodness that would make the new Canadian Food Guide salivate.

    So here we go – Butternut Miso Soup.

    Step Uno: Make Anna’s stock.

    • Once you’ve got all the goods simmering away go out and adventure for a few hours then come home to the most AMAZING smell, ladle up yourself a cup and savor the goods! Freeze what you don’t use in different sized containers for later. (I added in some carrot and celery because I had it on hand and well, I’ve never made a stock with out either!)


    Step Two: Start making the soup.

    Butternut squash, peeled & diced into ½“ pieces (approx. 3 cups), roasted at 375°F with some coconut oil, salt and pepper – one medium sized onion, diced – 3-4 cloves garlic, minced – 2-3 Tbsp fresh grated ginger (I keep mine in the freezer for easy grating and its keeps longer) – miso paste (Fuji Market in Whistler has a great selection, I used AWASE Miso)

    • Add some coconut oil into a Dutch oven over medium heat, then add the onion and cook until translucent then add in the garlic and ginger; allow everyone to mingle until fragrant. Then add in the butternut squash and cook for 5 minutes to absorb the flavors. Top the lot with the veggie stock and allow to simmer for 10-15minutes. Use one cup of water and combine with ¼ cup miso paste, whisking to combine then add to the pot. Remove from the heat and use an immersion blender to smooth out the soup. Add more stock or water to obtain your desired consistency and season with salt & pepper.

    Step 3: Wasabi cream.

    1 Tbsp wasabi powder – 1 Tbsp water – 2 Tbsp mayo – squeeze lemon or lime juice – dash of tamari

    • Whisk everything together and get ready to be addicted, and willing to putting this sauce on everything.

    Step Quatro: Eat the soup.

    • Serve the soup drizzled with the wasabi cream, sprinkled with black sesame seeds and topped with some pea shoots, micro greens or whatever is on hand. That is all.

    img_7124

    Simple. Delicious. Nutritious. Most importantly: made and grown with love.

    And remember… always trust a Swede.


  • Food and Feelings: Intentions for 2019

    Food and Feelings: Intentions for 2019

    Oh hello, 2019! I’m not someone who’s all about the “new year, new me” mantra but I do like to use the new year as a time to remind myself about the things that I love. I also use this time to set achievable intentions. To be honest, I celebrate my actual new year on my birthday (August 8th) and that is when I set bigger BHAG-ish goals. For 2019, I’ve set some intentions that will help inspire my happiness and that may require guidance from the community. I don’t have a very green thumb, I’m a creature of habit and I love being outside.

    If you have any suggestions or tips on any of the below intentions, please comment below this post or email. #help

    Pemberton on Christmas Day.

    Intention one:  Try something other than Pad Thai at Barn Nork

    I’m a frequent diner at Barn Nork (and also a frequent eater of their take out). I always switch up the starters but I can’t seem to deviate from their delicious Pad Thai. HELP! My goal for 2019 is to provide my taste buds a new experience via the Barn Nork train.

    Intention two: Always have local farm fresh eggs

    My name is Blair and I’m an egg-aholic. I start off every single day with a delicious breakfast that 99.9% of the time includes eggs. Since moving to Pemberton in 2012, I discovered how delicious farm fresh eggs are. Sometimes they are easy to buy and sometimes I feel like Sherlock Holmes trying to hunt down someone who will sell me at least a dozen. Over the years I’ve collected a few different resources for farm fresh eggs and I’ve learned to buy two dozen at a time. When I can’t find the eggs I desire, I buy them from the store and they just don’t have the same taste (in my opinion). Why should I let my eggs dip below my taste bud’s standards? I shouldn’t and I won’t! So, 2019, bring on the farm freshies!

    Intention three: Grow my own flowers (to cut)

    I’ve always been a sucker for fresh cut flowers. They are pretty and smell divine. I realized that during 2018 I spent a lot of money on purchasing flowers. Because I enjoy flowers so much, and I have the space to grow them, why try growing them? My husband has a greener thumb than I do and he’s agreed to help me out with this intention. I’m looking to grow flowers that are cat-friendly AND that are low maintenance. What do you think I should grow?

    One thing to note is that this past summer was the first summer (ever) that I managed to keep my lavender plant alive. GO ME!

    Intention four: Pick my raspberries, every day

    When I moved to town I shared with Shayne my love for raspberries and that I’ve always wanted my own raspberry bush. So, we planted a raspberry bush and we seemed to plant them in the right spot because they love to grow! Usually, halfway through the season, I seem to slip away from picking them daily and eventually forget about them. I usually have a moment where I remember (when I’m no where near Pemberton) and call a neighbour to send their kids to pick the berries. I have NO REASON to not pick the raspberries on a daily basis (unless I’m out of town, which, I guess, is a reason). I should also freeze them if I have too many. So, backyard bush, bring it on!

    Because it’s now January 10, 2019, and I’ve shared my intentions publicly with you, please hold me accountable. Also, if you have any words of encouragement or advice, please send them my way. Cheers to an awesome 2019 full of new menu choices, fresh cut flowers, raspberries galore and eggies from my neighbours.

    Blue sky in Pemberton on Christmas Day.

    P.S. Want to drop me a line? My email is blair@blairkaplan.ca.

  • Growth

    Growth

    “Life is like a box of chocolates. You never know what you’re going to get.” Forrest Gump

    Without a shadow of a doubt I can say this has been one of my most challenging years to date.

    Thus, I’ve been quick to say, “Peace out 2018, thanks for nothing!” But really, deep down I’m actually saying, “Thanks for everything. “

    Having suffered a bad concussion earlier this spring I was forced to slow down and smell the roses. My garden became my sanity through it all and I re-kindled my love affair with the soil under my nails. (If only the confidence I feel within those walls projected throughout all aspects of my life.)

    But if kale can weather harsh conditions and continue to grow then so can I. My roots are strong; I’m just feeling bound. All I need to do is prune back some dead shit, be re-potted and I’ll bloom.

    For years I’ve reached for the cheat sheet in a box of chocolates because I wanted to know what I was getting (otherwise known as the Comfort Zone). Bite into something “gross”: no thank you. But life for the most part doesn’t give us something to follow and you just have to be ready to ingest anything.

    All of this being said; learning will nourish my new year as I deepen my love for all things horticulture. The second step is sharing it with those who need some inspiration or want to learn more or just need a little nudge.

    Here are your first tips:

    Grow your own food: it’s the best way to get what you want.

    Experiment: maybe you’ll discover that something you thought you hated you actually love.

    As we grow in the life we’ve been gifted we begin to learn we love some flavors more then others. Breaking away from the comfort of our favourite flavors is when we will be most rewarded but it’s key to keep some classics in your back pocket.

    In the end if we keep sowing our own seeds, growth is inevitable.

  • Old Fashioned Egg Nog

    Old Fashioned Egg Nog

    I grew up in rural Ontario, and every New Years Eve my family and I would drive 3 miles down our snowed-in gravel road to the farm of Joanne Cowling. Having come to Canada from England many years earlier, Joanne kept her meticulous British accent and a series of beautifully maintained gardens, complete with goats, sheep, pigs, geese, ‘chooks’ (chickens) and a pony named Sandman. Upon entering the red brick farm house my brother and I would remove our winter clothes and make a beeline for the kitchen where Joanne would ladle out a hand-thrown clay goblet of homemade egg nog for each of us. As I sipped its heady creamy goodness, I always wondered what made the adults laugh so loud as they drank theirs. (I suppose I did not see the brandy making its way from goblet to goblet, how conversation slipped more easily in its presence). Then my brother and I would weave between the legs of neighbours to get to the large table that was laid out with hundreds of Joanne’s famous hors d’ourves: crab wrapped in filo pastry, thin slices of marinated beef tongue, smoked salmon sprinkled with capers, warm brie cheese, and Christmas cookies cut into the shapes of animals, decorated with fancy icing and tiny silver balls. But in the collage of these most delicious morsels, it is the egg nog that I remember most; that rich impossible creaminess.
    About 10 years ago, through a series of arm wrestles, afternoon coffees, and barn chore trades, my mom finally convinced Joanne to write her recipe down, and the ‘nog became part of our family tradition. Every year when I go home for Christmas there is the requisite jug of thick, creamy (and quite boozy) ‘nog chilling in a snowdrift outside the back door.
    Over the years I’ve sampled many attempts at the enigma that is egg nog. And I have to tell you that nothing, and I mean NOTHING has come close to the velvety indulgence of this homemade ‘nog. It takes a little bit of time and effort, a little bit of coaxing and folding and stirring and chilling. But the results are worth it: a rich, milkshake-thick ‘nog, meant to be sipped, savoured, and shared- or stirred into your morning coffee.

    Recently, concern had been expressed over the consumption of raw eggs (which are essential to traditional egg nog’s frothy texture) because of the possibility of exposure to Salmonella bacteria.
    The Canadian Food Inspection Agency states that “Although Salmonella is rarely found in eggs in Canada… foods made from raw or lightly cooked eggs may be harmful to vulnerable people such as young children, the elderly, pregnant women and people with weak immune systems.” (A study conducted by the USDA in 2002 showed that only one in every 30,000 eggs in the national food system was contaminated with Salmonella bacteria).
    In quest of an opinion closer to home, I visited Trout Lake farmers market and talked to vendors selling local eggs. “An egg is an egg.” One farmer told me. “I’m a big believer in cooked food. But I’ve got a friend who gulps them down raw all the time, and never seems to have a problem.”
    “The big thing is to know your farmer” another told me, restating the mantra of the local food movement. “You want to know that the flock has no history of salmonella, and that the eggs have been properly washed and stored.” Eggshells themselves form a hermetic seal, which means they are impervious to contamination once they have been laid, unless the shell has been cracked or compromised. So when sourcing eggs for this recipe, choose ones with shells that are clean, uniform, and unbroken, that have been refrigerated as soon as possible after laying, and that are not past the best before date. (If 3141194799_9e84cca519_zyou’ve bought undated eggs from a local farmer, use them 3-4 weeks after purchasing, and don’t be afraid to ask if he or she ever eats them raw.) If you want to be extra cautious you can always buy cartons of pasteurized egg yolks and whites from any large grocery store. I personally prefer the full-bodied taste of eggs from organic free-run hens, and believe that chickens who’ve had a chance to scratch in the dirt and get splashed with the occasional raindrop lay healthier, more nutrient-rich eggs. I also like knowing the name of the person who hands me my carton, rather than selecting one from the cold glare of a supermarket display case.                         Whichever source of eggs you choose, after you’ve whipped, mixed and folded a batch of this incredible egg nog into being, take a moment to send a few thoughts to the chickens that have made all of this possible. Then take a sip. Let the holidays begin!


    Old Fashioned Egg Nog

    Makes approx. 2 litres

    I find it easiest to separate eggs by cracking the whole egg into the palm of a clean hand, and then letting the white drain out between my fingers. You can also use an egg separating tool, or pour the yolk from shell to shell until all the white has drained away. Be careful not to get any yolk in with the whites, or they will not whip as well.

    If you wish to make a non-alcoholic ‘nog, substitute 1 ½ cups whole milk and 1 tsp vanilla in place of the brandy or rum.

    10 Egg Yolks
    3 1/2 cups white sugar
    1 1/2 cups Brandy or Rum
    10 egg whites
    1 litre whipping cream
    ½ tsp fresh grated nutmeg

    Put a bowl in the freezer to chill for making the whipped cream.

    Whip the yolks together with the sugar using an electric mixer until they are light in colour and a consistency similar to buttercream.

    Add the alcohol a little at a time, mixing all the while. Continue to mix until all the sugar has lost its granular texture.

    In a clean stainless, ceramic, glass or copper bowl, whip the egg whites until they form stiff peaks. Room temperature whites whip best. Fold the egg whites into the yolk/sugar/alcohol mixture.

    Whip the cream in the bowl that has cooled in the freezer until it is stiff. Gently fold it into the ‘nog along with the grated nutmeg.

    Store in the freezer for a milkshake-like consistency, as the alcohol will keep the ‘nog from freezing. Or keep refrigerated. Either way, the ‘nog is better if allowed a few hours for the flavours to mingle. Stir before pouring, and grate additional nutmeg over the top of each glass before serving. Enjoy!

    *Author’s note: this article originally appeared in Edible Vancouver’s Winter 2011 issue, but as the online edition is no longer available in its entirety, I though it was worth a repost. 🙂

  • Obsession

    Obsession

    Lately I’m having a hard time drawing the line between what should get more attention: my new Le Creuset Dutch oven or planning out my garden for next year. What to cook vs what to plant. Either way both schools of thought provide me with a constant mind game and humor my co-workers. Not to mention, a day wandering through the Van Duesen Gardens, tackling Julia Child’s ‘Beef Bourguignon’, absorbing the concepts I’ve been studying in an ‘Intro to Landscape Design’ course and an evening with Stevie (MF’in) Nicks – basically, my mind has been on overload.

    Stimulation: it’s a blessing and a curse.

    The Internet was slow as molasses for Cyber Monday sales as people consumed their lives away. It’s also made my normal routine of scouring through sites for new recipes to cook during the week near impossible. So, I decided to kick it old school and take to my graph paper, apply some new design techniques and start planning out my garden. Nothing like thinking in colour on a grey day: Julia Child inspirations can wait… lasagna is on the menu tonight and that recipe is engraved in my mind.

    The process for me starts by making a list of what I loved and what did well, knowing full well that next year might bring completely different growing conditions. But I don’t dwell on that. Just like I’m not dwelling on the fact that last year we were shredding deep snow at this time and this year it’s warm and wet with the lowest base we’ve seen in years. Gross – but c’est la vie.

    The second list I make is what’s sucked or I just don’t want to grow anymore. This is largely based on the fact that I can get it from someone local like Laughing Crow Organics or Helmer’s or without sacrificing my own garden space. Supporting our local farmers is equally as important in the grand equation and should not be left out!

    The third list is the experimental list AKA: my favourite.

    The other lists include; herbs, flowers and things that grow on the deck. This list will change and grow which is part of the glory of working in pencil.

    0

    Second step of the layout plan is to draft your garden space on paper, preferably graph (enter a hint of obsession here), to somewhat of an exact scale in 2D form and trace the outline with permanent marker. Then the fun begins – what grew where and where do they go next: the power of rotation.

    Be sure to sharpen your HB2 pencil and prepare your eraser for this stage. Start plopping your veggies, flowers and herbs in as you see fit. Ideas will come and go as fast as you think them and are on to the next. And to be completely honest, by the time you go to plant they’ve probably changed but hey, remember, it’s just as much fun to colour outside of the lines as within.

    IMG_6599

    Third step… sit and wait. It’s winter – the ground is frozen, you can’t plant shit but somehow your kale still seems to grow; roll with it. Pour yourself a tasty beverage, dream up new ideas, play around with your design, your ideas and aspirations. No thought is too small or unachievable. Remember, I started my current garden with nothing but a “green house”.

    IMG_6526

    To obsess over what you want to grow and eat is a healthy, sustainable step in the right direction – you just have to be willing to try.

  • Space Saving Sauerkraut

    Space Saving Sauerkraut

    I live in a barn. Between the barn and my little house is a mud room. It’s a liminal place: half barn, half house. These days, it’s where I keep all my tack, tools, and wild/crafting materials for the camps that I run. The counter is generally littered with things that need to be put away. Like that unidentified bracket fungi that smells like apricots… and the bags of sand and gravel from October’s Fairy Gardens.

    Because I keep it at about ten degrees all winter (to keep the various stored items happy and the pipes from freezing) the mud room is also where I throw all the veggies I pull out of the garden and procrastinate about dealing with. One morning a few weeks (when I had to remove 6 large pumpkins from the top of the washing machine so I could do a load of laundry) I realized things were out of hand. The pumpkins were still too intimidating. I couldn’t quite look them in the eye. Plus they were in great shape so there was no need to rush processing them. The cabbages on the other hand… and the bowl filled with unwashed root veggies… oh dear. Definitely starting to go. I cut away the rotting bits from the cabbages, washed the salvageable carrots and beets, and then did the only responsible thing: I made Kraut.

    Sauerkraut is the best way to make a large volume of cabbage store in as small a space as possible. The lactic acid fermentation process loads it with helpful wild gut bacteria, boosts its nutritional value, and enables us to store it for a long time. It also makes a boring vegetable delicious. ‘Kraut- while traditionally just cabbage, salt and water- is also flexible and can accommodate the addition of a wide variety of veggies and flavours. For mine, I used the 3 small heads of cabbage, two handfuls of carrots and beets, kale stalks and leaves from Four Beat Farm, and two wild apples that I picked on the way home from Clinton last summer. For flavour, I added a small thumb of ginger, a handful of dried Saskatoon Berries, and five Juniper Berries.

    20181115_121843
    Kraut-to-be: here you can see the texture and flavourings before salt is added

    Directions:

    • First, shred or chop your cabbage. If you are going to play with adding other veggies, make sure you keep about 75% cabbage to make sure achieve a good lactic acid ferment. You add use almost anything you can think of to flavour your ‘Kraut. Caraway seeds. Black peppercorns. Seaweed. Dried fruit. Spruce tips. Citrus zest.
    • Add salt, and mix/rub it well into the veggies with your hands. You want to macerate your cabbage, as you want the salt to break down the cell walls and begin to release water. How much salt should you add? Well… more than you think you should. The salt acts as a preservative, and will help your ‘Kraut keep its texture so it doesn’t ferment down into a goopy mess. Taste your cabbage/veggie mix. It should taste quite salty. As you rub them, the veggies should start to shine a little bit, as well as moisten and soften.
    • Pack your crock! I use a small pottery crock I found at a thrift store. You can also pack your ‘Kraut into a large mouth Mason Jar. You can use utensils for this, but I prefer to use my fist. It’s fun to punch your food, and you can put more pressure on the ‘Kraut. You want to REALLY mash it down so that all the air pockets are squished out and it starts to release water. Add more handfuls of cabbage/veggies, and press down. Continue in this way until all your Kraut-to-be is in the crock. You should have enough water that’s been released at this point that it covers the top of the ‘Kraut when you apply pressure.
    • Because you can’t stand there squishing it forever, you need to add weight to the top off your ‘Kraut. The ‘Kraut needs to stay submerged in its own juices so that it doesn’t mould as it ferments. (Fermentation=good, mould=bad.) I use a large class coaster that’s a little smaller than the diameter of my crock, topped with a Mason Jar. You can also use rocks as weights, provided they’re clean! Then you can cover the top of your crock with cheesecloth or a dishtowel to keep out dust and mould spores but still let it breathe, which is essential for the Lactic Acid fermentation process. If you don’t have enough juice that’s been released from the veggies to keep your ‘Kraut submerged, you can top it up with a little water or brine.
    20181115_1230191
    The crock and (and accompanying Mason Jar of water that acts as a weight to keep the Kraut submerged)
    • Wait and taste! How long it takes your ‘Kraut to be done depends on how warm your environment is, and how tangy you like your ‘Kraut. The usual window is one to four weeks. The longer you let the fermentation go, the stronger the flavour will be, and the more beneficial bacteria you will cultivate. However, the longer you wait the softer your veggies become. If you keep tasting the ‘Kraut as it progresses, then you will be able to stop the fermentation it when it reaches your favourite balance of flavour and texture.
    • When you’re smitten with your ‘Kraut, take it out of the crock and compost any bits with surface mould. (Sometimes a little ‘Kraut will stick to the sides of the crock and turn white and fuzzy, but the rest of the batch that is still submerged will be fine). I pack mine into clean half pint jars and keep them in the fridge. This stops the fermentation process, but does not kill any of the lactic acid and other goodness.
    • Enjoy! Yum. Cleaning up and making more space was never so delicious…


  • Monkeying Around With Dessert

    Monkeying Around With Dessert

    Okay everyone, there’s something I need to get off my chest.

    I. Love. Food.

    I absolutely love it. I love everything about it. I love the act of eating. I love the sheer variety of foods to eat. I love the challenge of creating your own. And I especially love the joy around food.

    I work at the Blackbird Bakery and one of the things I love most is when people tell us how good our food is. When their faces light up and they say things like “I haven’t had an almond croissant that good outside France,” or “That was the best muffin I’ve ever had.” Something as simple as a really tasty muffin can make someone’s day, and that makes me so happy. I love when people gather at the bakery and chat over sandwiches and turkey pies, or start their day off on a positive note with a cheesy breakfast sandwich. There is something magical about how really good food can change our whole day.

    I have a friend who is a chef in Vancouver and primarily does catering for films. On a recent visit he told me how much he dislikes food, and how much he’d prefer it if there were a pill he could take instead of eating food. That made me so sad. Growing up I always had joy around food. I have so many happy memories around the making and eating of food, especially with family. I can close my eyes right now and conjure up the joy I would feel walking into my house after school and being greeted with the warm smell of freshly baked banana bread. Our family of seven had dinner together every night and I can still hear the buzzing conversation of all of us sharing our days over chicken cacciatore or my mom’s amazing chili. For me, food, family, and joy go hand in hand (in hand).

    So recently when I learned we’d be having a quick visit by my partner’s parents I knew I wanted to make a special dinner. It felt like a perfect opportunity to break out the fall flavours and use up some items in my freezer and pantry. I pulled out a chicken I had gotten from a friend here in Pemberton and made Maple Rosemary Chicken from the New York Times Cooking, with a simple rice pilaf that wouldn’t overpower the flavour of the chicken, and some roasted Brussel sprouts with bacon (because why do I only make this dish at Thanksgiving? It’s amazing.). But the thing I was most excited about was something tasty for dessert, and I wanted to make something that would shine. Something I hadn’t done before, because experimenting with food is fun. Continuing with the fall flavour theme, I decided to go for Maple Pecan Monkey Bread that I adapted from another NYT recipe, paired with a simple cream cheese icing. I’m happy to share it with you here:

    Maple Pecan Monkey Bread

    Brioche Dough:
    1 tbsp yeast
    3 tbsp warm water
    2 tbsp maple syrup
    1 1/2 tsp salt
    3 1/2 cups all purpose flour
    4 eggs, room temperature
    1 1/2 sticks (3/4 cup) unsalted butter, softened

    Maple Brown Butter:
    8 tbsp unsalted butter
    1/2 cup maple syrup
    1 tsp salt

    1/4 cup sugar
    1 tsp cinnamon
    1 cup pecans, toasted

    1.Mix the yeast in a small bowl with 3 tbsp warm water. Add 1/2 tbsp maple syrup. Let sit 5-10 minutes to rise.

    Note: I tend to use Fleischmann’s traditional dry active yeast in my recipes, which requires a little proofing. If you are using instant yeast you can skip this first step and add the yeast directly into the flour/salt mixture, and add the warm water when you add the eggs.

    2. Combine the flour and salt in the bowl of a stand mixer. Mix on low speed using the paddle attachment to blend. Add the eggs, remaining 1 1/2 tbsp maple syrup, and yeast/water mixture. Use the paddle attachment until the dough starts to come together.

    20181027_131618
    Ready to rise!

    3. Switch to the hook attachment and continue mixing on low. Add the softened butter in small chunks, a few pieces at a time, until fully incorporated. Continue mixing, stopping and scraping any stray pieces of butter on the sides or hook as needed, until the dough is smooth and elastic. This may take up to 10 minutes. Turn the dough into a buttered bowl and cover with a clean towel. Let rise until doubled in size, approx. 90 minutes.


    4. When you’re ready to assemble, melt the butter in a small saucepan over medium heat. Cook, stirring with a wooden spoon, until the dairy solids turn golden brown and the butter smells nutty. While stirring add the maple syrup and salt. Bring to a boil while stirring, then remove from the heat. Set aside while you get your dough ready.

    5. Mix the cinnamon and sugar in a small bowl. Butter a 10-inch Bundt or tube pan. Turn your dough onto a clean work surface and roll into a thick rope, approx. 2 inches in diameter. Cut this rope into eight even pieces, and then cut each of those pieces into eight, until you end up with 64 small dough balls.

    Note: I didn’t have a Bundt pan so I used my tall tube pan that I use for angel food cake and it worked fine. You don’t need any flour for your work surface because of the amount of butter used in this dough. It should be soft and slightly greasy, but not sticky.

    6. Gently roll a piece into a small ball and dip in the cinnamon sugar, rolling it around until evenly coated. You can do multiple dough balls at the same time, but avoid overcrowding to ensure they are evenly coated with the sugar. Place the sugared balls in the pan and repeat until you have a single layer. Scatter some of the toasted pecans on top. Repeat this process until all the dough balls and pecans are in the pan.

    Note: Because I was using the large tube pan, I was only able to make two layers of dough balls. It doesn’t look like much, but when we do the second rise the dough balls will expand dramatically.

    20181027_162003
    Ready to bake!

    7. Drizzle the maple brown butter all over the tops and sides of the dough balls. Cover with a clean towel and let rise in a warm spot until puffed and the dough comes to about an inch below the top of the pan, approx. 30-45 minutes.

    8. Preheat oven to 350ºF. Uncover the pan and bake until golden brown on top, approx. 35-40 minutes. Put the pan on a wire rack for 5 minutes. Place a large plate on top of the pan, grip both together, and quickly and carefully flip. The monkey bread should come away easily from the pan. Serve warm or room temperature.

    20181027_171707

    And there you have it. Maple pecan monkey bread. I was very pleased with the way this recipe turned out. The edges are crispy and sweet, and the inside is soft and fluffy. A perfect combination. You could jazz this recipe up with some caramelized apples or bananas, or chocolate, or use almonds or hazelnuts instead.  This would be a great recipe to make with kids, who can help roll and dip the dough balls. You can serve this warm with just butter, or a little more maple syrup drizzled on top. I used a basic cream cheese icing, made with butter, icing sugar, cream cheese, and heavy cream. The possibilities are endless.

    20181027_213516

    Happy cooking everyone, and enjoy the joy!