Blog

  • Growth

    Growth

    “Life is like a box of chocolates. You never know what you’re going to get.” Forrest Gump

    Without a shadow of a doubt I can say this has been one of my most challenging years to date.

    Thus, I’ve been quick to say, “Peace out 2018, thanks for nothing!” But really, deep down I’m actually saying, “Thanks for everything. “

    Having suffered a bad concussion earlier this spring I was forced to slow down and smell the roses. My garden became my sanity through it all and I re-kindled my love affair with the soil under my nails. (If only the confidence I feel within those walls projected throughout all aspects of my life.)

    But if kale can weather harsh conditions and continue to grow then so can I. My roots are strong; I’m just feeling bound. All I need to do is prune back some dead shit, be re-potted and I’ll bloom.

    For years I’ve reached for the cheat sheet in a box of chocolates because I wanted to know what I was getting (otherwise known as the Comfort Zone). Bite into something “gross”: no thank you. But life for the most part doesn’t give us something to follow and you just have to be ready to ingest anything.

    All of this being said; learning will nourish my new year as I deepen my love for all things horticulture. The second step is sharing it with those who need some inspiration or want to learn more or just need a little nudge.

    Here are your first tips:

    Grow your own food: it’s the best way to get what you want.

    Experiment: maybe you’ll discover that something you thought you hated you actually love.

    As we grow in the life we’ve been gifted we begin to learn we love some flavors more then others. Breaking away from the comfort of our favourite flavors is when we will be most rewarded but it’s key to keep some classics in your back pocket.

    In the end if we keep sowing our own seeds, growth is inevitable.

  • L is for Lefse: a guest post by Connie Sobchak

    L is for Lefse: a guest post by Connie Sobchak

    Lefse by Connie SobchakAs Christmas neared, I thought about ways to make the season a little more special for my dad, who is in residential care in Squamish. Home baking is always a treat for him but I knew one item in particular would be most welcome: lefse. A Norwegian flatbread made with several variations, lefse was something Mom used to make for Christmas using Grandma’s recipe, which called for mashed potatoes, flour, milk, butter and a little salt. In the old cabin, she baked it on top of the wood stove after rolling it into tortilla sized rounds. Once one side cooked she flipped the lefse using an old yard stick, then made a stack of ten to twelve which were rolled up inside a tea towel. It was a sticky, floury, messy procedure but worth it when the butter and Roger’s Golden syrup came out; Dad would spread the syrup and butter over the lefse then roll it jelly roll style, holding both ends up to eat it so the syrup didn’t run out.

    Well, my attempts at recreating lefse have not been very successful – my potatoes were too wet or I didn’t add enough flour or I was too reluctant to commit to the messiness of it all. Dad ate it but I suspect he was being kind – thank goodness for the syrup. So this year, after a cousin reminded me that one could actually purchase lefse in the Lower Mainland, I phoned around to try to buy some; alas, the sources were too far away or just not feasible. Then I had a brainwave – I would post an ad on the local Buy and Sell sites: ISO someone willing to sell some lefse.  Help make an old Norwegian’s Christmas a little brighter.

    It took an hour till my inbox pinged and there was a message from a man in Squamish who was willing to trade me some lefse for Pemberton carrots and potatoes. We arranged a time and date and then I started fretting about finding the Roger’s golden syrup which has some substitutes but none that are quite as tasty, apparently. Before I could take my post down, another person responded, saying, this is the best post, ever!”  We chatted and she assured me that if I couldn’t find the Roger’s Golden Syrup, her folks had lots and she would meet me somewhere in Squamish and give me some.  People were committed to a successful completion of my mission.

    Tuesday rolled around and I texted my supplier that we were on the way and plugged the address into the GPS. They were in full production mode when I arrived; here was a couple who did not hesitate to embrace the lefse mess. He had made a round metal plate to place on top of the electric burner of the stove and they had ordered a proper ridged rolling pin and a thin flipping stick for easier manipulation of the rounds. It was his job to flip and tend the lefse while his wife prepared the dough and rolled it into the proper shape. 

    L is for Lefse

    Here, have a seat and taste it, they encouraged me, spreading one piece generously with butter.  Now, I have never really been a fan of this treat (some people say lefse tastes and feels like burnt newspaper with flour on it) but theirs was spectacular – soft and not too floury – perfectly cooked. We talked about how often they made the flatbread and what traditions they associated with it, discovering mutual friends and sharing Christmas stories. I left with twelve pieces wrapped in a napkin.  Don’t worry about the napkin, she said, I buy them at the thrift stores for nickels and dimes, then send them off full of baking.

    When I got to Hilltop House, Dad was participating in a word game wherein the participants had to offer words beginning with particular letters of the alphabet for a variety of prompts in under a minute. They were already at S Somewhere hotSedonaSomething yummySmoothiesSomething you eat at Christmas-Stollen.  I was not surprised to hear that Dad had said lefse earlier in the game for that particular prompt and the other residents were pleased to get a first hand glimpse of this item they had not heard of.  

    Mr Hellevang making lefse by Connie sobchak

    Dad and I went back to his room and I set up our little feast of lefse, butter and Roger’s Golden Syrup (which I found at Save-on.) While Dad rolled up his first piece, I relayed the story of how I’d procured it and he got a good chuckle in between bites.  Christmas season did indeed get a lot brighter because of that home baked treat.


  • Old Fashioned Egg Nog

    Old Fashioned Egg Nog

    I grew up in rural Ontario, and every New Years Eve my family and I would drive 3 miles down our snowed-in gravel road to the farm of Joanne Cowling. Having come to Canada from England many years earlier, Joanne kept her meticulous British accent and a series of beautifully maintained gardens, complete with goats, sheep, pigs, geese, ‘chooks’ (chickens) and a pony named Sandman. Upon entering the red brick farm house my brother and I would remove our winter clothes and make a beeline for the kitchen where Joanne would ladle out a hand-thrown clay goblet of homemade egg nog for each of us. As I sipped its heady creamy goodness, I always wondered what made the adults laugh so loud as they drank theirs. (I suppose I did not see the brandy making its way from goblet to goblet, how conversation slipped more easily in its presence). Then my brother and I would weave between the legs of neighbours to get to the large table that was laid out with hundreds of Joanne’s famous hors d’ourves: crab wrapped in filo pastry, thin slices of marinated beef tongue, smoked salmon sprinkled with capers, warm brie cheese, and Christmas cookies cut into the shapes of animals, decorated with fancy icing and tiny silver balls. But in the collage of these most delicious morsels, it is the egg nog that I remember most; that rich impossible creaminess.
    About 10 years ago, through a series of arm wrestles, afternoon coffees, and barn chore trades, my mom finally convinced Joanne to write her recipe down, and the ‘nog became part of our family tradition. Every year when I go home for Christmas there is the requisite jug of thick, creamy (and quite boozy) ‘nog chilling in a snowdrift outside the back door.
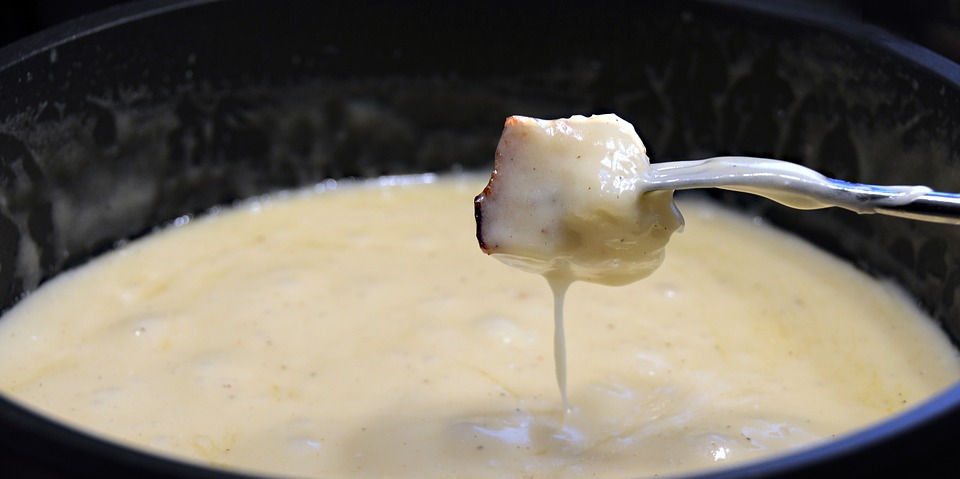
    Over the years I’ve sampled many attempts at the enigma that is egg nog. And I have to tell you that nothing, and I mean NOTHING has come close to the velvety indulgence of this homemade ‘nog. It takes a little bit of time and effort, a little bit of coaxing and folding and stirring and chilling. But the results are worth it: a rich, milkshake-thick ‘nog, meant to be sipped, savoured, and shared- or stirred into your morning coffee.

    Recently, concern had been expressed over the consumption of raw eggs (which are essential to traditional egg nog’s frothy texture) because of the possibility of exposure to Salmonella bacteria.
    The Canadian Food Inspection Agency states that “Although Salmonella is rarely found in eggs in Canada… foods made from raw or lightly cooked eggs may be harmful to vulnerable people such as young children, the elderly, pregnant women and people with weak immune systems.” (A study conducted by the USDA in 2002 showed that only one in every 30,000 eggs in the national food system was contaminated with Salmonella bacteria).
    In quest of an opinion closer to home, I visited Trout Lake farmers market and talked to vendors selling local eggs. “An egg is an egg.” One farmer told me. “I’m a big believer in cooked food. But I’ve got a friend who gulps them down raw all the time, and never seems to have a problem.”
    “The big thing is to know your farmer” another told me, restating the mantra of the local food movement. “You want to know that the flock has no history of salmonella, and that the eggs have been properly washed and stored.” Eggshells themselves form a hermetic seal, which means they are impervious to contamination once they have been laid, unless the shell has been cracked or compromised. So when sourcing eggs for this recipe, choose ones with shells that are clean, uniform, and unbroken, that have been refrigerated as soon as possible after laying, and that are not past the best before date. (If 3141194799_9e84cca519_zyou’ve bought undated eggs from a local farmer, use them 3-4 weeks after purchasing, and don’t be afraid to ask if he or she ever eats them raw.) If you want to be extra cautious you can always buy cartons of pasteurized egg yolks and whites from any large grocery store. I personally prefer the full-bodied taste of eggs from organic free-run hens, and believe that chickens who’ve had a chance to scratch in the dirt and get splashed with the occasional raindrop lay healthier, more nutrient-rich eggs. I also like knowing the name of the person who hands me my carton, rather than selecting one from the cold glare of a supermarket display case.                         Whichever source of eggs you choose, after you’ve whipped, mixed and folded a batch of this incredible egg nog into being, take a moment to send a few thoughts to the chickens that have made all of this possible. Then take a sip. Let the holidays begin!


    Old Fashioned Egg Nog

    Makes approx. 2 litres

    I find it easiest to separate eggs by cracking the whole egg into the palm of a clean hand, and then letting the white drain out between my fingers. You can also use an egg separating tool, or pour the yolk from shell to shell until all the white has drained away. Be careful not to get any yolk in with the whites, or they will not whip as well.

    If you wish to make a non-alcoholic ‘nog, substitute 1 ½ cups whole milk and 1 tsp vanilla in place of the brandy or rum.

    10 Egg Yolks
    3 1/2 cups white sugar
    1 1/2 cups Brandy or Rum
    10 egg whites
    1 litre whipping cream
    ½ tsp fresh grated nutmeg

    Put a bowl in the freezer to chill for making the whipped cream.

    Whip the yolks together with the sugar using an electric mixer until they are light in colour and a consistency similar to buttercream.

    Add the alcohol a little at a time, mixing all the while. Continue to mix until all the sugar has lost its granular texture.

    In a clean stainless, ceramic, glass or copper bowl, whip the egg whites until they form stiff peaks. Room temperature whites whip best. Fold the egg whites into the yolk/sugar/alcohol mixture.

    Whip the cream in the bowl that has cooled in the freezer until it is stiff. Gently fold it into the ‘nog along with the grated nutmeg.

    Store in the freezer for a milkshake-like consistency, as the alcohol will keep the ‘nog from freezing. Or keep refrigerated. Either way, the ‘nog is better if allowed a few hours for the flavours to mingle. Stir before pouring, and grate additional nutmeg over the top of each glass before serving. Enjoy!

    *Author’s note: this article originally appeared in Edible Vancouver’s Winter 2011 issue, but as the online edition is no longer available in its entirety, I though it was worth a repost. 🙂

  • Gifts for Soil Lovers

    Gifts for Soil Lovers

    HOE HOE HOE: a gardener’s salute to the holidays!

    The countdown is officially on to the day jolly ol’ Saint Nick gobbles up treats left by excited little people, adds a splash of rum to a glass of eggnog and leaves gifts for all. I thought it a perfect time to share a few thing that graze my wish list/need list throughout the year, in hopes it may inspire some of you stuck on stocking stuffers.

    Promise me this — you will source locally as much as possible. For the love of sustainability and supporting our community, we need to tighten up our game.

    So, here we go (in no particular order): fun ideas for the chef, gardener and wanna-be green thumb in your life.

    1. GLOVESI’m the first to admit I use them sparingly but I’m sure happy to have a set around and nothing beats a new pair; like the feeling of a fresh pair of socks.
    2. NAIL BRUSHMany of us are proud of the dirt under our nails and our calluses but sometimes life calls for clean hands. Small Potatoes Bazaar has you covered.
    3. FELCO PRUNERSMy personal favourite are the #2; an essential component to any gardener’s kit and the holster is a mandatory accessory. Available at Pemberton Valley Nursery and their Whistler location along with a great selection of gloves and number 12 on this list!
    4. GARDNER’S DREAM CREAMTreat your hands – they do so much hard work. Stay Wild keeps their shelves stocked with the goods.
    5. SCANDINAVE SPA PASS w/ MASSAGE The heavy lifting and bending is over; this gift is a no brainer.
    6. BOOKS!There are so many options out there but here are my current top three picks: Floret Flowers (Erin Benzakein, Julia Chai), Seed to Seed (Susan Ashworth) and Putting Food By (Ruth Hertzberg). The folks at Armchair Books are great. They don’t always have what you’re looking for in stock but they are amazing at getting you what you need as fast as the other guys.
    7. WEST COAST SEEDS GCTheir seed selection is top notch and their website is like a bible for home and pro-gardeners alike. Grow and eat your way to happiness.
    8. GROWOYAA self-watering terracotta pot that you sink into your garden… AKA: a pretty nifty idea that a girlfriend introduced to me as a way to deal with the summer watering restrictions. It doesn’t work for all vegetables but their website is full of information on how to get the most out of this efficient irrigation style.
    9. CRINKLE VEGGIE CUTTERWe live in Spud valley and are ruled by potatoes so why not have a cool device on hand to make some funky fries from time to time!
    10. VANDUESEN GARDEN PASSThis place is the Willy Wonka factory for plant lovers: so easy to lose track of time, so easy to get “lost”. (Insert the words to ‘Pure Imagination’ from said mentioned movie and you’ll find they’re quite fitting). Plus, you’ll forget you’re even in the city. Every season boasts new blooms and something to discover making it, easily, one of my favourite places to go and geek out.
    11. A JOURNAL note taking and random reminders are a great aid from year to year. They are also a great place to doodle, write down new recipes along with your hopes and greens.
    12. PRETTY POTSThere is always a use for a beautiful ceramic pot… be it to house an indoor plant or something outside. But since you’re at the plant store you mind as well plop a plant in there too!

     From my sleeping garden to yours… happy semi-hibernation and snow days!

  • Turbo-charged Veggie Deer Curry

    Turbo-charged Veggie Deer Curry

    This recipe is adapted from Shelley Adam’s Curried Lamb and Lentil Soup from Whitewater Cooks at Home. I turbo-charged it with way more veggies, but I owe the amazing spicing and core concept of this recipe to Shelley Adams, whose cookbooks, especially the first two, changed the way I cook, and made cooking exciting for me.

    The main difference from Shelley’s original recipe is I’ve added half an eggplant, a full 2 cups of blanched spinach, and 2 cups of chopped green cabbage. You can also add ½ a cauliflower! I also added half a parsnip and took out the garlic cloves and her can of diced tomatoes. I’ve swapped out the lamb for deer.

    I hope Shelley approves. I am driven to create hearty dishes that complement veggies. In winter I prefer my veggies well cooked and spiced. Ideally, they are in a good hearty soup!

    Turbo-Charged Veggie Deer Curry:

    2 tbs pure olive oil

    1 tbs fresh ginger, minced

    ½ tsp red pepper flakes

    1 tsp turmeric

    1 lb Pemberton deer stew meat

    6 cups water

    1.5 cups green lentils, rinsed

    2 tbs pure olive oil

    1 large yellow onion, small dice

    ½ eggplant, small dice

    2 cups chopped cilantro

    2 cups green cabbage, finely chopped

    ½ parsnip, small dice

    2 cups blanched spinach or chard, chopped

    1 red pepper, small dice

    ½ yellow pepper, small dice

    2 carrots, small dice

    ½ cauliflower, small dice (optional)

    1 tbs cumin

    1 tsp coriander

    1 tsp garam masala

    2 tsp salt

    1 tsp pepper

    Method:

    Sear deer meat in dutch oven or stainless soup pot on medium-high heat with ginger, chili flakes and turmeric until meat is well browned. Add lentils and water.

    Bring to boil, then reduce heat and simmer 45 minutes.

    In another large soup pot, add olive oil at medium heat. Add fenugreek and mustard seeds and cook until they pop. Then add ALL other veggies: onion, turnip, peppers, eggplant, blanched spinach, cilantro, etc. Sauté low and slow until soft and translucent and/or caramelised. Then add cumin, coriander and garam masala.

    Finally add the deer and lentil mix to the veggie mixture and simmer for another 20 minutes or so. Add salt and pepper to taste.

    Enjoy!


  • Food and Feelings: Fromage

    Food and Feelings: Fromage

    Bonjour*. When you think of France what do you think of? What comes to mind is probably different for everyone. For me, one of the thoughts that surface is about cheap and delicious cheese. After returning from my rock-and-roll honeymoon, I’m left missing the delicious croissants, cheese, wine and various other delightful foods.

    Anyone who knows me knows that I LOVE cheese so this trip was full of dreamy surprises. My favourite cheese experience was when Shayne and I went to Le Fer a Cheval in Chamonix, France. We were looking for the best fondue in town and this was recommended to us by a local. This restaurant is so popular that if you don’t have a reservation you most likely won’t get a table. So, we made a reservation and I then counted down the hours, minutes and seconds until fondue-ville.

    Le Fer a Cheval
    Le Fer a Cheval

    Stoked on life, we ordered the fondue with tomato sauce and potatoes. The cheese had tomato sauce in it and it came with bread and a huge basket of potatoes. I guess you can take the girl out of Pemberton but you can’t take Pemberton out of the girl. It was filling. It was delicious. It was everything that I had hoped for. After this experience, I felt inspired to create a life where fondue was present on a more regular basis.

    Fondue in Chamonix
    Fondue in Chamonix

    A few years ago, I celebrated Christmas with my in-laws in Kamloops. They decided to have a fondue dinner instead of a traditional Christmas dinner. This, my friends, was amazing. It’s was a very social experience and made dinner super-interactive. There was cheese fondue, oil, chocolate and many food options. However, there were no potatoes.

    It’s impossible to scarf down dinner because you have to wait for your food to cook, bite by bite. We did this for a few years but took a break last year. This year we are bringing it back, Pemberton style (in Pemberton) and I’ve decided to call it a Very Merry Fonduemas. And yes, there will be potatoes.

    Fondue round two, HERE I COME!

    BONUS: Did you know that fondue originated in Switzerland? Praise the Swiss.  Also, fondue recipes vary depending on the region that you are in. You can learn more about that HERE.

    *I speak very little French but do know a few words. Just ask Shayne (pictured below) because he was witness to me trying to communicate in French while in France (which, I’m sure, was a painful experience for him).

    IMG_7892

  • Obsession

    Obsession

    Lately I’m having a hard time drawing the line between what should get more attention: my new Le Creuset Dutch oven or planning out my garden for next year. What to cook vs what to plant. Either way both schools of thought provide me with a constant mind game and humor my co-workers. Not to mention, a day wandering through the Van Duesen Gardens, tackling Julia Child’s ‘Beef Bourguignon’, absorbing the concepts I’ve been studying in an ‘Intro to Landscape Design’ course and an evening with Stevie (MF’in) Nicks – basically, my mind has been on overload.

    Stimulation: it’s a blessing and a curse.

    The Internet was slow as molasses for Cyber Monday sales as people consumed their lives away. It’s also made my normal routine of scouring through sites for new recipes to cook during the week near impossible. So, I decided to kick it old school and take to my graph paper, apply some new design techniques and start planning out my garden. Nothing like thinking in colour on a grey day: Julia Child inspirations can wait… lasagna is on the menu tonight and that recipe is engraved in my mind.

    The process for me starts by making a list of what I loved and what did well, knowing full well that next year might bring completely different growing conditions. But I don’t dwell on that. Just like I’m not dwelling on the fact that last year we were shredding deep snow at this time and this year it’s warm and wet with the lowest base we’ve seen in years. Gross – but c’est la vie.

    The second list I make is what’s sucked or I just don’t want to grow anymore. This is largely based on the fact that I can get it from someone local like Laughing Crow Organics or Helmer’s or without sacrificing my own garden space. Supporting our local farmers is equally as important in the grand equation and should not be left out!

    The third list is the experimental list AKA: my favourite.

    The other lists include; herbs, flowers and things that grow on the deck. This list will change and grow which is part of the glory of working in pencil.

    0

    Second step of the layout plan is to draft your garden space on paper, preferably graph (enter a hint of obsession here), to somewhat of an exact scale in 2D form and trace the outline with permanent marker. Then the fun begins – what grew where and where do they go next: the power of rotation.

    Be sure to sharpen your HB2 pencil and prepare your eraser for this stage. Start plopping your veggies, flowers and herbs in as you see fit. Ideas will come and go as fast as you think them and are on to the next. And to be completely honest, by the time you go to plant they’ve probably changed but hey, remember, it’s just as much fun to colour outside of the lines as within.

    IMG_6599

    Third step… sit and wait. It’s winter – the ground is frozen, you can’t plant shit but somehow your kale still seems to grow; roll with it. Pour yourself a tasty beverage, dream up new ideas, play around with your design, your ideas and aspirations. No thought is too small or unachievable. Remember, I started my current garden with nothing but a “green house”.

    IMG_6526

    To obsess over what you want to grow and eat is a healthy, sustainable step in the right direction – you just have to be willing to try.

  • Lettuce Talk

    Lettuce Talk

    There has been a small uproar on social media lately regarding the price in the local stores of lettuce. Small, wilted stuff that you know has traveled a few thousand miles to get here.

    People are saying it is because of the romaine shortage.

    But really, it is just an excuse the middle man and the stores are using to falsely inflate the price.

    The only lettuce that should cost more because of the romaine shortage is romaine. Is any of that inflated cost trickling down to the romaine grower who now has to dump tons of lettuce? Doubt it.

    In the seed potato industry, when there is a shortage of one variety of potato, it is only that one variety that costs a little more, because it is in demand.

    I don’t buy lettuce in the winter. Salads are a summer thing.

    salad tomatoes kitchen cooking
    Photo by Skitterphoto on Pexels.com

    One more thing. You know that steak or hamburger you bought for your dinner? The price of that has steadily increased over the last few decades. We just shipped our beef cattle and averaged $1.80/lb. Now back up 40 years and those same cattle would have fetched us $1.00/lb. That’s is only an .80 cent or 80% increase in 40 years. Forty years, people! While the cost to produce that beef or the potatoes and vegetables that go with it has gone up 200% and the  price you pay for that beef in the store has increased 170%.

    bbq beef chopping board close up
    Photo by Lukas on Pexels.com

    I guess all I’m trying to say is all these price increases are not really getting back down the line to the producer of the food.

    People, speak up with your wallets. Buy local. Eat seasonal.

    IMG_1444


  • Winter Farming ?

    Winter Farming ?

    What do Canadian farmers do in the winter? The smart, financially stable “Snow Birds” follow the geese south. Most farmers are less fortunate and have to somehow find a way to make an income and pay the never-ending bills. I’ve heard tales of a few hardy souls eking out some form of a living on Vancouver Island selling their meat products, storage vegetables, and winter greens. For 99% of the rest of the country they are mostly shut down for many months. Sure there’s fences that may need mending, chickens to feed, and things to preserve. These chores however don’t bring home the bacon. (Hopefully their freezers are already stocked with protein). Self-employed farmers don’t qualify for EI, so most need some side seasonal jobs.

    I’m one of the lucky ones who get to farm in the snow. I’m a groomer. My Pisten Bully Snow Cat is one of the warmest, most comfortable, sophisticated state of the art tractors in the world.When it breaks, I get to grab another machine and a team of mechanics usually have it up and running the next day.

    We as a crew plough and till over 500 acres of terrain per mountain each night. What, when and how we accomplish this is very weather dictated.

    Our tractors’ accessories are referred to as implements. The blade is our shovel. The combing on the tiller is our rake. We use farming terms such as passes, windrows, berms, deposition, compaction, cut and fill. We farm snow — that’s what we call it — from the bottom of pitches, hollows, roads, snow fences and secret stashes and transport it to where it is needed. We sculpt and landscape the mountain, combining science and art. Anyone who does both mountain biking and winter sports will attest that snow is so much cleaner and softer than dirt. Grooming is a cushier, enjoyable, better compensated and less risky form of farming.

    Grooming shares lots of prerequisites with conventional farming. First of all you must be mechanically inclined, tolerate the smell of diesel, and be adaptable to changing weather conditions. It involves long hours of unsupervised solitary repetitive work. The thing I appreciate the most is the knowledge and intimacy with the natural environment that is aquirired over the long term. The sense of freedom.The privilege of getting to create something within nature using my own poetic licence. It puts me in the same semi-spiritual yet productive happy place that farming does. The greatest part of the great outdoors. Understanding microclimates, the effects of wind, sun, temperature and precipitation. The technicalities of snow vs dirt, mountains vs valley. The feeling of connectedness with my surroundings. It’s a perfect fit for both a farmer and a ski bum. I have the inside scoop on the best forecasted snow conditions in real time for every area on the slopes. In the spring I’m double dipping. I can experience my farm in full bloom, and get chores done during the day and extend my winter at night, or ski whenever its good. Bliss.

    Being a “packer” is a lifestyle more than a job.We could all make a better wage running machinery in an industrial setting. Nonetheless there is little turnover and the majority return year after year all for similar reasons. I’ve seen more winter sunrises and sunsets than most temperate rainforest mountain dwellers. My office has a constantly changing and usually spectacular view. I get 3 days off a week, can ski any afternoon and it allows me the opportunity to be a dirt farmer for 7 months. I can save a little money for the lean spring when expenses far exceed income. For half the year I get to enjoy benefits that other farmers could only dream of: a family (lifetime) Epic ski pass, extended medical and dental, short and long term disability, a small RRSP contribution as well as food and retail discounts. If I get injured or sick on or off the job in the winter I’m covered. If it happens from May to November, I’m screwed. If it wasn’t for my grooming job, I don’t think I could afford to be a farmer. Thank you ULLR (the norse God of snow) and Whistler/Blackcomb for 27 years of employment. Time flies when you’re having fun.

  • Space Saving Sauerkraut

    Space Saving Sauerkraut

    I live in a barn. Between the barn and my little house is a mud room. It’s a liminal place: half barn, half house. These days, it’s where I keep all my tack, tools, and wild/crafting materials for the camps that I run. The counter is generally littered with things that need to be put away. Like that unidentified bracket fungi that smells like apricots… and the bags of sand and gravel from October’s Fairy Gardens.

    Because I keep it at about ten degrees all winter (to keep the various stored items happy and the pipes from freezing) the mud room is also where I throw all the veggies I pull out of the garden and procrastinate about dealing with. One morning a few weeks (when I had to remove 6 large pumpkins from the top of the washing machine so I could do a load of laundry) I realized things were out of hand. The pumpkins were still too intimidating. I couldn’t quite look them in the eye. Plus they were in great shape so there was no need to rush processing them. The cabbages on the other hand… and the bowl filled with unwashed root veggies… oh dear. Definitely starting to go. I cut away the rotting bits from the cabbages, washed the salvageable carrots and beets, and then did the only responsible thing: I made Kraut.

    Sauerkraut is the best way to make a large volume of cabbage store in as small a space as possible. The lactic acid fermentation process loads it with helpful wild gut bacteria, boosts its nutritional value, and enables us to store it for a long time. It also makes a boring vegetable delicious. ‘Kraut- while traditionally just cabbage, salt and water- is also flexible and can accommodate the addition of a wide variety of veggies and flavours. For mine, I used the 3 small heads of cabbage, two handfuls of carrots and beets, kale stalks and leaves from Four Beat Farm, and two wild apples that I picked on the way home from Clinton last summer. For flavour, I added a small thumb of ginger, a handful of dried Saskatoon Berries, and five Juniper Berries.

    20181115_121843
    Kraut-to-be: here you can see the texture and flavourings before salt is added

    Directions:

    • First, shred or chop your cabbage. If you are going to play with adding other veggies, make sure you keep about 75% cabbage to make sure achieve a good lactic acid ferment. You add use almost anything you can think of to flavour your ‘Kraut. Caraway seeds. Black peppercorns. Seaweed. Dried fruit. Spruce tips. Citrus zest.
    • Add salt, and mix/rub it well into the veggies with your hands. You want to macerate your cabbage, as you want the salt to break down the cell walls and begin to release water. How much salt should you add? Well… more than you think you should. The salt acts as a preservative, and will help your ‘Kraut keep its texture so it doesn’t ferment down into a goopy mess. Taste your cabbage/veggie mix. It should taste quite salty. As you rub them, the veggies should start to shine a little bit, as well as moisten and soften.
    • Pack your crock! I use a small pottery crock I found at a thrift store. You can also pack your ‘Kraut into a large mouth Mason Jar. You can use utensils for this, but I prefer to use my fist. It’s fun to punch your food, and you can put more pressure on the ‘Kraut. You want to REALLY mash it down so that all the air pockets are squished out and it starts to release water. Add more handfuls of cabbage/veggies, and press down. Continue in this way until all your Kraut-to-be is in the crock. You should have enough water that’s been released at this point that it covers the top of the ‘Kraut when you apply pressure.
    • Because you can’t stand there squishing it forever, you need to add weight to the top off your ‘Kraut. The ‘Kraut needs to stay submerged in its own juices so that it doesn’t mould as it ferments. (Fermentation=good, mould=bad.) I use a large class coaster that’s a little smaller than the diameter of my crock, topped with a Mason Jar. You can also use rocks as weights, provided they’re clean! Then you can cover the top of your crock with cheesecloth or a dishtowel to keep out dust and mould spores but still let it breathe, which is essential for the Lactic Acid fermentation process. If you don’t have enough juice that’s been released from the veggies to keep your ‘Kraut submerged, you can top it up with a little water or brine.
    20181115_1230191
    The crock and (and accompanying Mason Jar of water that acts as a weight to keep the Kraut submerged)
    • Wait and taste! How long it takes your ‘Kraut to be done depends on how warm your environment is, and how tangy you like your ‘Kraut. The usual window is one to four weeks. The longer you let the fermentation go, the stronger the flavour will be, and the more beneficial bacteria you will cultivate. However, the longer you wait the softer your veggies become. If you keep tasting the ‘Kraut as it progresses, then you will be able to stop the fermentation it when it reaches your favourite balance of flavour and texture.
    • When you’re smitten with your ‘Kraut, take it out of the crock and compost any bits with surface mould. (Sometimes a little ‘Kraut will stick to the sides of the crock and turn white and fuzzy, but the rest of the batch that is still submerged will be fine). I pack mine into clean half pint jars and keep them in the fridge. This stops the fermentation process, but does not kill any of the lactic acid and other goodness.
    • Enjoy! Yum. Cleaning up and making more space was never so delicious…