Tag: meeshmoran

  • The Do Over

    The Do Over

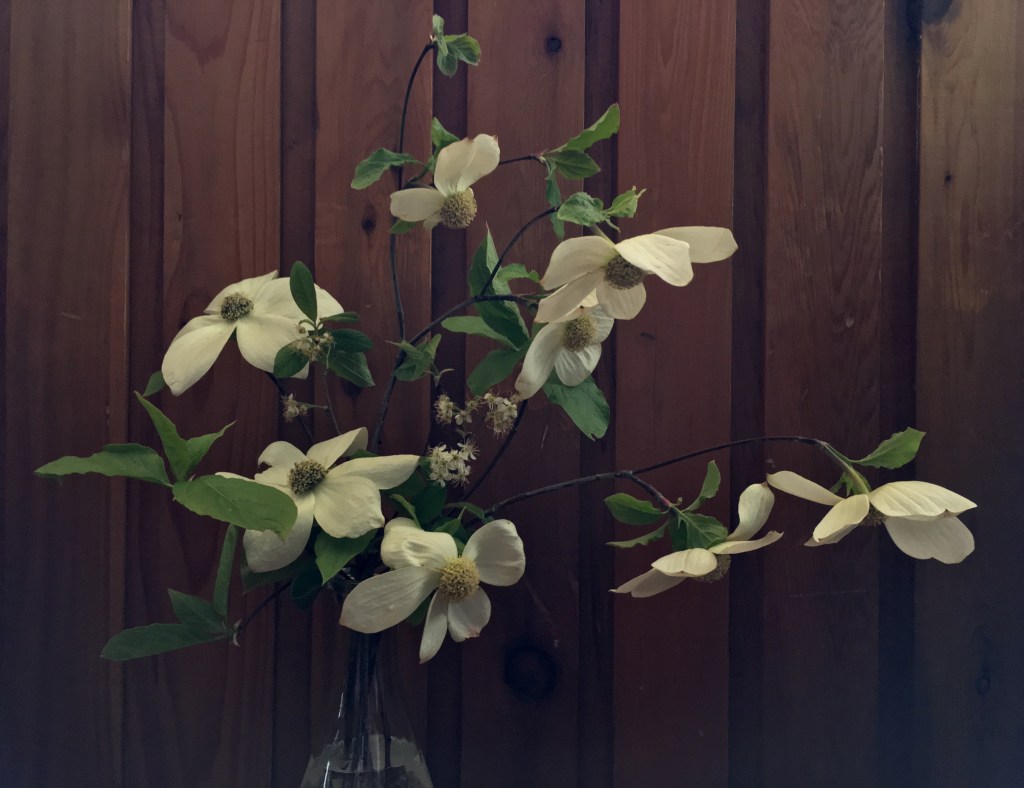
    My favorite strip in the ol’ daily commute is in full bloom: Dogwood Row aka the false flat of Nairn Falls. When this magical time finally happens I know spring has officially arrived. These native beauties symbolizes this time of the year perfectly: rebirth and resurrection, durability and reliability, strength and resilience.

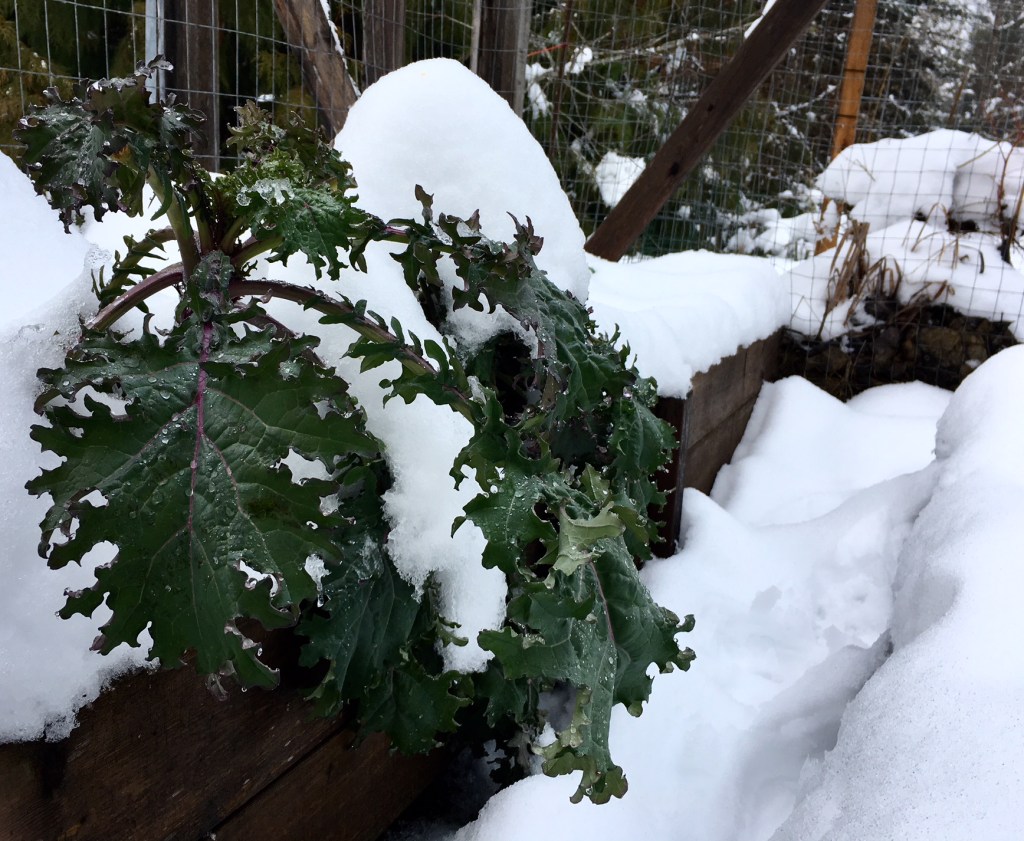
    So, life has felt a little backwards lately and I’ve been dormant like the bulbs I planted in the fall: slowly growing in hibernation, slowly surfacing to flower. While the green glow of spring delivers a healthy dose of new beginnings there will always be things that don’t survive the winter.

    The beauty is, you can always replant.

    Spring offers up a chance to do over everything from last year… literally, start fresh, change the pattern and do it better. Prune away the dead to promote new growth, leaving some things the same (they’re called perennials for a reason) and don’t forget to tend to your evergreens as they are there for you every season.

    IMG_8308

    It’s not always as simple as it seems: a large puzzle with small pieces. Sometimes you’re rewarded beyond expectation in an instant and sometimes patience is a virtue.

    But by saying yes to growing new things and experimenting with new varieties we can create a new palette to work with.

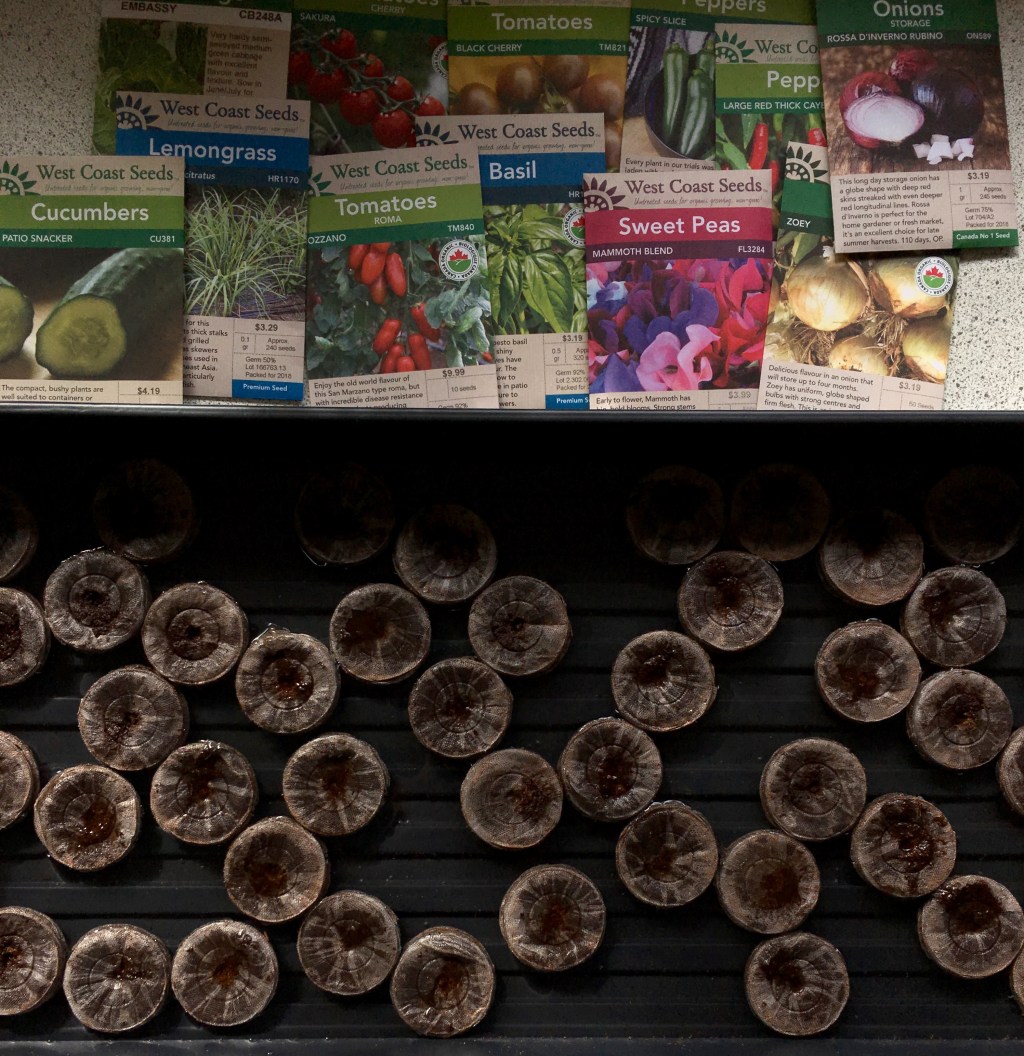
    There is little risk in gardening if you’re willing to fail and get your hands dirty. Notable and new to my garden this year are Jerusalem artichokes, shiso and fennel (which will actually be nowhere near my garden because it’s friends with no one). Oh, and way more flowers! Because why not? And pollination is key to life. Other plants are bound to sneak their way in too.


    When supported by a cast of usual suspects: beets, carrots, cabbage, cauliflower, cucumber, tomatoes, brussel sprouts, squash, cantaloupe, onions, garlic, strawberries, raspberries, blueberries, peppers, peas, beans, all the herbs, chard, radish, daikon, celery, kale, romaine, greens, kohlrabi, leeks etc, one can be nourished and flourish quite well.

    There is a good chance I’ve already said this but I’m just going to keep saying it:

    Grow what you love, try new things, revisit old favourites and savour the process.


  • Happy Anniversary, to me.

    Happy Anniversary, to me.

    It was a year ago to the day while consuming a couple tasty Steam Works IPAs in a Richmond Irish Pub en route to a family vacation in Mexico that I took the plunge and joined the Traced Elements family. Maybe it was liquid courage that egged me on because at the time I was scared to dive into a world I knew nothing about: writing. The only constant I had to offer was my deep love for gardening. As luck would have it I learned I also loved to write – or maybe this whole endeavor came into my life when I needed a new outlet more then I realized at the time.

    Regardless: it’s one of my favourite decisions to date.

    The winter’s sun, as of late, has been flooding my living space with a warming heat reminiscent of sandy beaches and margaritas while the arctic air swirls around outside. My cheeks are constantly blushed in colour having been kissed by the cold. Overall, I welcome this false warmth; it’s a perfect excuse to devour a bowl of spicy miso ramen, everyday.

    As the days get longer I look forward to my garden springing to life, even if they are currently blanketed in more snow then I can recall in the valley in years, my thoughts are hopeful, green and full of blooms. Many days I get lost and overwhelmed by the potential of things to grow as I browse numerous websites. Basically, my urge to propagate as many cool things as possible usually wins. You already know if you’ve read my other blogs that I’m a firm believer in the, “there is no harm in trying” experimental method.

    Seeds; they fuel everything. (A little bit of love doesn’t hurt either.)

    Plant anything and something good is bound to come from it. Sometimes there is growth and sometimes there are failures; either way you’ll learn something.

    I have been carrying the following quote with me for years but it is only now that I finally feel like I am acting on it (after all spring ushers in rebirth). So, in the words of Byron Pulsifer I leave you with this,

    “Passion creates the desire for more and action fuelled by passion creates a future.”

    …get ready to see some really cool things from me.

    #summerofmeesh


  • The Last Squash

    The Last Squash

    Bittersweet times are upon me these days as my personal stock levels of fresh garden produce dwindle down to the last survivors. Luckily seed ordering is in full effect to keep the dream alive! Yet, even though the light at the end of the winter tunnel grows brighter every day, you can still guarantee there will be times when we feel the need to: bundle up, get adventurous, come home and devour a hot bowl of soup.

    But I’ll reiterate before continuing that… #summeriscoming.

    Feeling inspired from an Instagram post by my “neighbor” Anna for a mega hearty vegetable broth and a recipe from My New Roots, I set forth to honor my last butternut squash with a soup so full of nutritional goodness that would make the new Canadian Food Guide salivate.

    So here we go – Butternut Miso Soup.

    Step Uno: Make Anna’s stock.

    • Once you’ve got all the goods simmering away go out and adventure for a few hours then come home to the most AMAZING smell, ladle up yourself a cup and savor the goods! Freeze what you don’t use in different sized containers for later. (I added in some carrot and celery because I had it on hand and well, I’ve never made a stock with out either!)


    Step Two: Start making the soup.

    Butternut squash, peeled & diced into ½“ pieces (approx. 3 cups), roasted at 375°F with some coconut oil, salt and pepper – one medium sized onion, diced – 3-4 cloves garlic, minced – 2-3 Tbsp fresh grated ginger (I keep mine in the freezer for easy grating and its keeps longer) – miso paste (Fuji Market in Whistler has a great selection, I used AWASE Miso)

    • Add some coconut oil into a Dutch oven over medium heat, then add the onion and cook until translucent then add in the garlic and ginger; allow everyone to mingle until fragrant. Then add in the butternut squash and cook for 5 minutes to absorb the flavors. Top the lot with the veggie stock and allow to simmer for 10-15minutes. Use one cup of water and combine with ¼ cup miso paste, whisking to combine then add to the pot. Remove from the heat and use an immersion blender to smooth out the soup. Add more stock or water to obtain your desired consistency and season with salt & pepper.

    Step 3: Wasabi cream.

    1 Tbsp wasabi powder – 1 Tbsp water – 2 Tbsp mayo – squeeze lemon or lime juice – dash of tamari

    • Whisk everything together and get ready to be addicted, and willing to putting this sauce on everything.

    Step Quatro: Eat the soup.

    • Serve the soup drizzled with the wasabi cream, sprinkled with black sesame seeds and topped with some pea shoots, micro greens or whatever is on hand. That is all.

    img_7124

    Simple. Delicious. Nutritious. Most importantly: made and grown with love.

    And remember… always trust a Swede.


  • Growth

    Growth

    “Life is like a box of chocolates. You never know what you’re going to get.” Forrest Gump

    Without a shadow of a doubt I can say this has been one of my most challenging years to date.

    Thus, I’ve been quick to say, “Peace out 2018, thanks for nothing!” But really, deep down I’m actually saying, “Thanks for everything. “

    Having suffered a bad concussion earlier this spring I was forced to slow down and smell the roses. My garden became my sanity through it all and I re-kindled my love affair with the soil under my nails. (If only the confidence I feel within those walls projected throughout all aspects of my life.)

    But if kale can weather harsh conditions and continue to grow then so can I. My roots are strong; I’m just feeling bound. All I need to do is prune back some dead shit, be re-potted and I’ll bloom.

    For years I’ve reached for the cheat sheet in a box of chocolates because I wanted to know what I was getting (otherwise known as the Comfort Zone). Bite into something “gross”: no thank you. But life for the most part doesn’t give us something to follow and you just have to be ready to ingest anything.

    All of this being said; learning will nourish my new year as I deepen my love for all things horticulture. The second step is sharing it with those who need some inspiration or want to learn more or just need a little nudge.

    Here are your first tips:

    Grow your own food: it’s the best way to get what you want.

    Experiment: maybe you’ll discover that something you thought you hated you actually love.

    As we grow in the life we’ve been gifted we begin to learn we love some flavors more then others. Breaking away from the comfort of our favourite flavors is when we will be most rewarded but it’s key to keep some classics in your back pocket.

    In the end if we keep sowing our own seeds, growth is inevitable.

  • Gifts for Soil Lovers

    Gifts for Soil Lovers

    HOE HOE HOE: a gardener’s salute to the holidays!

    The countdown is officially on to the day jolly ol’ Saint Nick gobbles up treats left by excited little people, adds a splash of rum to a glass of eggnog and leaves gifts for all. I thought it a perfect time to share a few thing that graze my wish list/need list throughout the year, in hopes it may inspire some of you stuck on stocking stuffers.

    Promise me this — you will source locally as much as possible. For the love of sustainability and supporting our community, we need to tighten up our game.

    So, here we go (in no particular order): fun ideas for the chef, gardener and wanna-be green thumb in your life.

    1. GLOVESI’m the first to admit I use them sparingly but I’m sure happy to have a set around and nothing beats a new pair; like the feeling of a fresh pair of socks.
    2. NAIL BRUSHMany of us are proud of the dirt under our nails and our calluses but sometimes life calls for clean hands. Small Potatoes Bazaar has you covered.
    3. FELCO PRUNERSMy personal favourite are the #2; an essential component to any gardener’s kit and the holster is a mandatory accessory. Available at Pemberton Valley Nursery and their Whistler location along with a great selection of gloves and number 12 on this list!
    4. GARDNER’S DREAM CREAMTreat your hands – they do so much hard work. Stay Wild keeps their shelves stocked with the goods.
    5. SCANDINAVE SPA PASS w/ MASSAGE The heavy lifting and bending is over; this gift is a no brainer.
    6. BOOKS!There are so many options out there but here are my current top three picks: Floret Flowers (Erin Benzakein, Julia Chai), Seed to Seed (Susan Ashworth) and Putting Food By (Ruth Hertzberg). The folks at Armchair Books are great. They don’t always have what you’re looking for in stock but they are amazing at getting you what you need as fast as the other guys.
    7. WEST COAST SEEDS GCTheir seed selection is top notch and their website is like a bible for home and pro-gardeners alike. Grow and eat your way to happiness.
    8. GROWOYAA self-watering terracotta pot that you sink into your garden… AKA: a pretty nifty idea that a girlfriend introduced to me as a way to deal with the summer watering restrictions. It doesn’t work for all vegetables but their website is full of information on how to get the most out of this efficient irrigation style.
    9. CRINKLE VEGGIE CUTTERWe live in Spud valley and are ruled by potatoes so why not have a cool device on hand to make some funky fries from time to time!
    10. VANDUESEN GARDEN PASSThis place is the Willy Wonka factory for plant lovers: so easy to lose track of time, so easy to get “lost”. (Insert the words to ‘Pure Imagination’ from said mentioned movie and you’ll find they’re quite fitting). Plus, you’ll forget you’re even in the city. Every season boasts new blooms and something to discover making it, easily, one of my favourite places to go and geek out.
    11. A JOURNAL note taking and random reminders are a great aid from year to year. They are also a great place to doodle, write down new recipes along with your hopes and greens.
    12. PRETTY POTSThere is always a use for a beautiful ceramic pot… be it to house an indoor plant or something outside. But since you’re at the plant store you mind as well plop a plant in there too!

     From my sleeping garden to yours… happy semi-hibernation and snow days!

  • Obsession

    Obsession

    Lately I’m having a hard time drawing the line between what should get more attention: my new Le Creuset Dutch oven or planning out my garden for next year. What to cook vs what to plant. Either way both schools of thought provide me with a constant mind game and humor my co-workers. Not to mention, a day wandering through the Van Duesen Gardens, tackling Julia Child’s ‘Beef Bourguignon’, absorbing the concepts I’ve been studying in an ‘Intro to Landscape Design’ course and an evening with Stevie (MF’in) Nicks – basically, my mind has been on overload.

    Stimulation: it’s a blessing and a curse.

    The Internet was slow as molasses for Cyber Monday sales as people consumed their lives away. It’s also made my normal routine of scouring through sites for new recipes to cook during the week near impossible. So, I decided to kick it old school and take to my graph paper, apply some new design techniques and start planning out my garden. Nothing like thinking in colour on a grey day: Julia Child inspirations can wait… lasagna is on the menu tonight and that recipe is engraved in my mind.

    The process for me starts by making a list of what I loved and what did well, knowing full well that next year might bring completely different growing conditions. But I don’t dwell on that. Just like I’m not dwelling on the fact that last year we were shredding deep snow at this time and this year it’s warm and wet with the lowest base we’ve seen in years. Gross – but c’est la vie.

    The second list I make is what’s sucked or I just don’t want to grow anymore. This is largely based on the fact that I can get it from someone local like Laughing Crow Organics or Helmer’s or without sacrificing my own garden space. Supporting our local farmers is equally as important in the grand equation and should not be left out!

    The third list is the experimental list AKA: my favourite.

    The other lists include; herbs, flowers and things that grow on the deck. This list will change and grow which is part of the glory of working in pencil.

    0

    Second step of the layout plan is to draft your garden space on paper, preferably graph (enter a hint of obsession here), to somewhat of an exact scale in 2D form and trace the outline with permanent marker. Then the fun begins – what grew where and where do they go next: the power of rotation.

    Be sure to sharpen your HB2 pencil and prepare your eraser for this stage. Start plopping your veggies, flowers and herbs in as you see fit. Ideas will come and go as fast as you think them and are on to the next. And to be completely honest, by the time you go to plant they’ve probably changed but hey, remember, it’s just as much fun to colour outside of the lines as within.

    IMG_6599

    Third step… sit and wait. It’s winter – the ground is frozen, you can’t plant shit but somehow your kale still seems to grow; roll with it. Pour yourself a tasty beverage, dream up new ideas, play around with your design, your ideas and aspirations. No thought is too small or unachievable. Remember, I started my current garden with nothing but a “green house”.

    IMG_6526

    To obsess over what you want to grow and eat is a healthy, sustainable step in the right direction – you just have to be willing to try.

  • Pumpkin Gnocchi

    Pumpkin Gnocchi

    The rainy days of fall have come at last and today even a bit of the white stuff. But thanks to our extended August weather my garden saw yet another expansion complete with an Asian pear tree, perennials, and flowering bulbs; plus I finally got the garlic planted. My focus has taken a small hiatus from planning out next year to filling my freezer with quick dinner options for the dark hibernating nights of winter.

    I don’t have kids but I ended up with pumpkins and carving them didn’t happen. I also had potatoes – go figure. So, I thought I’d channel my inner nonna, combine the two and make some gnocchi. To say I followed a single recipe would be far from the truth… more like scoured through a ton of websites and drew on certain elements from each to make one. Biased opinion or not I think it turned out pretty delicious. They are in no way gluten-free or dairy-free but rich in flavour and love.

    Step Uno: Roast your pumpkin – cook your potatoes

    • Cut your pumpkin into half, gut it and then cut it into wedges (save the seeds to roast). Place on a cookie sheet skin side down, drizzle with a bit of olive oil and season with salt & pepper. Bake at 350°F for about an hour then remove from the oven and set aside to cool. Scoop out all the flesh and keep aside 1½ cups – freeze the rest for a rainy day. While your pumpkin is cooking place 3 medium sized russet potatoes into a pot and start to boil them. There is no need to cut or take the skin off just place them in whole! This will help you achieve the perfect texture – fork tender no more no less. Remove them from the water and allow to cool completely. When they’re ready peel the skin off and either grate the potatoes or use a potato ricer to process them.


    Step Two: Prepare your dough

    • In a large bowl add your pumpkin, prepared potato, 2 egg yolks, some fresh grated nutmeg, 1 cup of ricotta, ¼ cup grated parmesan, salt and approximately ½ cup+ of oo Italian flour. Now some of you are probably wondering; what the hell is oo flour? Basically, it’s more refined then normal flour and while it’s not necessary for this recipe I think it creates a superior, silkier dough and helps the pasta maintain chewiness once cooked. But use whatever you have on hand. I’d also like to mention that the flour amount will vary and this is where “channeling your inner nonna” comes in. As a friend recounted to me from her recent trip to Italy where she learnt to make pasta with a real live nonna, “they don’t measure – they feel; and just know when it’s enough.” Start with only ½ cup of flour and use a wooden spoon to bring all the mixture together, adding in flour as you go until the dough does not feel wet any more. Turn the dough onto a floured surface and knead until smooth.

    Step 3: Make your gnocchi


    • Cut a slice of dough off and roll it out into a rope about ½” thick. Using a sharp knife cut your rope into 1” pieces. Keep flour on hand for this stage as well, you don’t want your gnocchi sticking to the counter. Use a fork or a gnocchi board to gently roll your pieces, creating texture on top and a small indent on the bottom to catch your sauce. Continue this formula until all the dough is used.


    IMG_6497

    Step Quatro: Cook & eat!

    • Bring some salted water up to a boil, working in small batches to cook your gnocchi. When they float to the surface they are done… it does not take long – do not leave them unattended. At this point the rest is up to you: skies the limit. Sauce them up with whatever your heart is craving. For this round I used A LOT of butter then some sage, chili pepper, garlic and toasted hazelnuts (plus a little extra pancetta I had on hand). Like with pasta I added a bit of the water the gnocchi was cooked in to make it extra saucy.


    Step 5: Freeze your extras

    • This recipe produces a lot of little gnocchi so I froze the extras in a single layer on cookie sheet lined with parchment (as seen in the featured image).

    In my kitchen I experiment just as much, if not more, as I do in my garden. I did not nail this recipe on the first try and it’s still not nonna’s gnocchi but it’s mine. It’s really about how the more I cook, the more I learn, the more I love to do it and the more I eat! And, let’s be honest, there are way worse problems to have then a full stomach and heart.

    Buon appetito!

  • An Apple a Day

    An Apple a Day

    You already know that fall is my favourite time of the year. It also happens to be one of the busiest times of year for me at work. So busy that sometimes it feels hard to find a full breath. A breath that I can get behind: my normal rhythm. Yet one thing that constantly replenishes my soul is when my house if full of friends and family. It’s then that my breath returns to normal – no matter what. This is why every year I muster up some energy to host Thanksgiving dinner, even if all I want to do is sit in silence.

    Initially I thought I’d post some great, amazing Thanksgiving recipe the day after dinner but I could not find any words and you can’t force something that’s not there. Instead I chose to harness the good vibes from a room full of laughter, sing-a-longs, amazing food and love, to put my garden to sleep. It was the perfect remedy and the bonus? – I got to do it with my dad. However, I thought I’d share a recipe for a pie that usually graces my Thanksgiving feast but just didn’t have time to make. I mean I barely got the turkey in the oven on time and that only happened because my mom did it!

    This is apple season. When your parents show up with a massive bag of said fruit from a friend’s tree on the Island and you’re eating at minimum and apple a day, or two, but barely making a dent in the stock, you make pies.

    So, without further ado… here is Apple Cheddar Pie: an instant crowd pleaser and a delicious breakfast supplement.

    Step Uno: make your crust.

    2½ cups all purpose flour – TBSP sugar – TSP salt – 1½ cups grated white cheddar (kept cold in fridge until ready to use) – ¾ cup grated butter (frozen) – ½ cup ice-cold water (maybe a bit more)

    • Add the flour, salt and sugar to your mixing bowl and combine them. Then grate your butter into the bowl and add in your cheddar. Next start gently rubbing the ingredients through your hands; you’re aiming to get a “pea like” texture (you may recall me using this method in my previous pie recipe). Pour the water in and use your hands to bring the dough to together. I always end up turning it out onto my counter to finish kneading it. Separate the dough into two balls with one slightly larger then the other. Flatten them out to resemble small saucers and a place in the fridge for at least an hour.

    Step Two: prepare your apples.

    8-9 apples peeled, cored & cut into eighths – juice of half a lemon – cinnamon, nutmeg, ground clove – a sprinkle of cornstarch

    • Place your apples in a bowl, add in your preferred amount of spice, squeeze the lemon on top and sprinkle that cornstarch… then toss.

    Step 3: build your pie.

    • Preheat your oven to 375°F. Roll out the smaller disc on a floured surface, place it in your pie dish then add your apple mixture. Before rolling out your second dough disc and topping the apples with it, dot them with a bit of butter. Seal the edges together and then cut some shapes in the top crust or keep it simple with a few little knife slits that will allow the air to escape. Brush the pie with an egg wash (I forgot but you should really do it).

    Step Quatro: bake & wait.

    • Place the pie on a baking sheet and pop it in the oven. Let bake for a least an hour or until the crust is golden brown. Allow it to cool on a wire rake for an hour or more… I am not capable of this step. Not even a little bit.

    Step Five: consumption.

    • Serve this bad boy with some ice cream or nothing at all.


    So if you’re wondering what to do on this rainy weekend and have a bunch of apples, you should make this pie and fill your house with people to share it with.

    And don’t forget to breathe.

  • #falltimealltime

    #falltimealltime

    It’s the most wonderful time of the year – or at least it’s MY favourite time of the year.

    Colours start to pop as the foliage begins its natural, beautiful progression to death and my appreciation for the warmth of the sun on my back is revived. Praise arises for the rainy days as reason to stay in, make soup and stock the freezer with food. Then there is also the rush of the game to see who gets to the fruit trees first – me or the bears. I go to bed with an extra blanket but leave the windows wide open while the coyote’s howl echoes through the night. Of course the dusting of snow on Mount Currie gets me pretty excited too! And, most importantly, my garden is still delivering the goods.

    This time of the year, I also sit back and think about my garden; what worked, what I want to do more of and what I can do away with next year. Journaling for the win: do it, do it now. So, what I thought I would do is share some of my favourite photos of the summer complete with commentary.

    First up is purple daikon radish. I pickled the shit out of these guys while in season. When a vegetable randomly forms heart shape upon cutting into it you really can’t help loving it. More will be planted in my garden next year, their spicy flavour is beyond delicious.


    Melons. Who doesn’t love a good melon. Previously I had tried watermelon but with little success there, this year I tried cantaloupe. Gave it a sunnier spot and was rewarded big time. Go figure: #shadowruffruff loved it too… juicy and flavourful beyond both our expectations!


    I have mentioned that kohlrabi was the undisputed heavy-weight champion in my garden but my Borage babes blew my mind; turns out they’re MASSIVE! They helped pollinate my butternut squash and many other things in my garden, plus the flowers were delicious in salads. This year I trained my squash to grow along the fence in hopes it would take up less space overall. As it turns out this move was a game changer. I will incorporate this method next year as well, perhaps to even shade something that requires less sun. And for the bee’s sake, borage will forever be in my garden regardless of the space it takes up.


    You know you’ve made it to the big time when your whole pasta sauce has been sourced from your backyard… I mean it’s SO good you want to share but really not really. Last season was the first year where I grew my own Roma tomatoes, celery, carrots, garlic, onions, basil, rosemary, thyme, oregano and cayenne peppers. I basically vowed from then on this was the way forward every year; always plant enough to make sauce for Dbot. I will also openly admit I have a love affair with fried green tomatoes served with soft poached eggs – you would too, if you’ve had it. Never underestimate the power of a green tomato.


    Does your cilantro bolt like crazy in the heat of the summer even if you’re giving it shade from the hot afternoon sun? No problem. Let them bolt and go to flower. The coriander seeds born from the delicate white flowers will produce the best ground version of this spice you’ve ever had. I guarantee you’ll start to plant cilantro just to let it go to seed!


    Fall is also the time when members of the brassica family shine. I remember being amazed when I learned how Brussel sprouts grew, so they became a yearly addition to my garden (just be sure to give them plenty of space). New this year was Savoy cabbage grown from seed and it’s sure to make my cabbage rolls go from A+ to A++. Another tip for cabbage is to space out their planting times then you don’t end up with a whole bunch at the same time even though they keep quite well.


    Flowers… I will plant way more flowers in my garden next year both perennials and annuals. Some of my perennials are ready to split which benefits both the plant and my wallet. Plus, having fresh cut blooms in my house just makes me smile.


    I feel like I could carry on for a long time but as I write the weeds are still growing and they sure aren’t picking themselves! So I’ll just leave you with this last photo that I call, “The Mushroom that had all the Thyme in the World”. #dadjoke #sorrynotsorry

    IMG_5862

  • Sky Camp Kohlrabi

    Sky Camp Kohlrabi

    There’s something to be said for being in the right place at the right time.

    Over the consumption of tasty beverages at the Beer Farmers, my girlfriend was casually asked if she’d like to host a bunch of mountain bikers at Sky Camp (one of Tyax Adventures’ most balling backcountry locations). She was quick to mention that I could cook and would be a great addition to the hostess-with-the-mostest team and it took me about 0.01 seconds to agree to this union. As of yet I had only heard the tales of this remote location and recognized that it was an opportunity one should not shy away from.

    Allow me to create a visual for you: Board a floatplane that takes you deep into the South Chilcotin range to a fully set-up cabin. This location comes complete with wood-burning sauna, canoes/kayaks/paddle boards, hot showers, the sound of loons atop a lake full of trout, adventure Crocs, old school board games, guest tents stocked with flannel sheets & duvets and nothing else but the silent sounds of the forest. Everyone in favour of glamping, raise his or her hand! Easily 90% of you just did.

    A simple, delicious menu was drawn up for us and I couldn’t help but raid my garden for a few extras to tie in to the plan. My spare time has taken a hard hit lately (aka neglected garden) and there are a few species that have gotten massive due to this lack of maintenance – or someone has secretly been feeding them steroids. So, may I introduce to you the current, uncontested, and very underrated, heavy weight champion of my garden… kohlrabi.

    Out came the biggest bulb, a leek, the dried coriander seeds from my bolted cilantro plants and a cured garlic bulb; all grown in my backyard and all destined to become a side-dish served with salmon. What follows is a rough outline of how I cooked it via an old school propane oven.


    • Pre heat oven to 375°F. While that is happening, lightly toast your coriander seeds then grind them with a mortar & pestle to desired texture.
    • Cut the kohlrabi into ½” cubes and place them into a medium-sized mixing bowl.
    • Add in some sliced leeks, minced garlic, the ground coriander, salt & pepper to taste and then drizzle with olive oil; tossing to combine.
    • Pour the mixture into a cast iron pan and place in the oven for 30-45 minutes. Make sure to take the kohlrabi out of the oven and stir it around every so often to avoid burning.


    The key ingredient for making this dish tremendous, aside from the fact it was grown with love, is the company it was shared with. For some it was their introduction to kohlrabi and that alone makes it a success.

    Sky camp is a magical place: you arrive unplugged and leave fully charged.

    IMG_5580