Tag: food

  • #falltimealltime

    #falltimealltime

    It’s the most wonderful time of the year – or at least it’s MY favourite time of the year.

    Colours start to pop as the foliage begins its natural, beautiful progression to death and my appreciation for the warmth of the sun on my back is revived. Praise arises for the rainy days as reason to stay in, make soup and stock the freezer with food. Then there is also the rush of the game to see who gets to the fruit trees first – me or the bears. I go to bed with an extra blanket but leave the windows wide open while the coyote’s howl echoes through the night. Of course the dusting of snow on Mount Currie gets me pretty excited too! And, most importantly, my garden is still delivering the goods.

    This time of the year, I also sit back and think about my garden; what worked, what I want to do more of and what I can do away with next year. Journaling for the win: do it, do it now. So, what I thought I would do is share some of my favourite photos of the summer complete with commentary.

    First up is purple daikon radish. I pickled the shit out of these guys while in season. When a vegetable randomly forms heart shape upon cutting into it you really can’t help loving it. More will be planted in my garden next year, their spicy flavour is beyond delicious.


    Melons. Who doesn’t love a good melon. Previously I had tried watermelon but with little success there, this year I tried cantaloupe. Gave it a sunnier spot and was rewarded big time. Go figure: #shadowruffruff loved it too… juicy and flavourful beyond both our expectations!


    I have mentioned that kohlrabi was the undisputed heavy-weight champion in my garden but my Borage babes blew my mind; turns out they’re MASSIVE! They helped pollinate my butternut squash and many other things in my garden, plus the flowers were delicious in salads. This year I trained my squash to grow along the fence in hopes it would take up less space overall. As it turns out this move was a game changer. I will incorporate this method next year as well, perhaps to even shade something that requires less sun. And for the bee’s sake, borage will forever be in my garden regardless of the space it takes up.


    You know you’ve made it to the big time when your whole pasta sauce has been sourced from your backyard… I mean it’s SO good you want to share but really not really. Last season was the first year where I grew my own Roma tomatoes, celery, carrots, garlic, onions, basil, rosemary, thyme, oregano and cayenne peppers. I basically vowed from then on this was the way forward every year; always plant enough to make sauce for Dbot. I will also openly admit I have a love affair with fried green tomatoes served with soft poached eggs – you would too, if you’ve had it. Never underestimate the power of a green tomato.


    Does your cilantro bolt like crazy in the heat of the summer even if you’re giving it shade from the hot afternoon sun? No problem. Let them bolt and go to flower. The coriander seeds born from the delicate white flowers will produce the best ground version of this spice you’ve ever had. I guarantee you’ll start to plant cilantro just to let it go to seed!


    Fall is also the time when members of the brassica family shine. I remember being amazed when I learned how Brussel sprouts grew, so they became a yearly addition to my garden (just be sure to give them plenty of space). New this year was Savoy cabbage grown from seed and it’s sure to make my cabbage rolls go from A+ to A++. Another tip for cabbage is to space out their planting times then you don’t end up with a whole bunch at the same time even though they keep quite well.


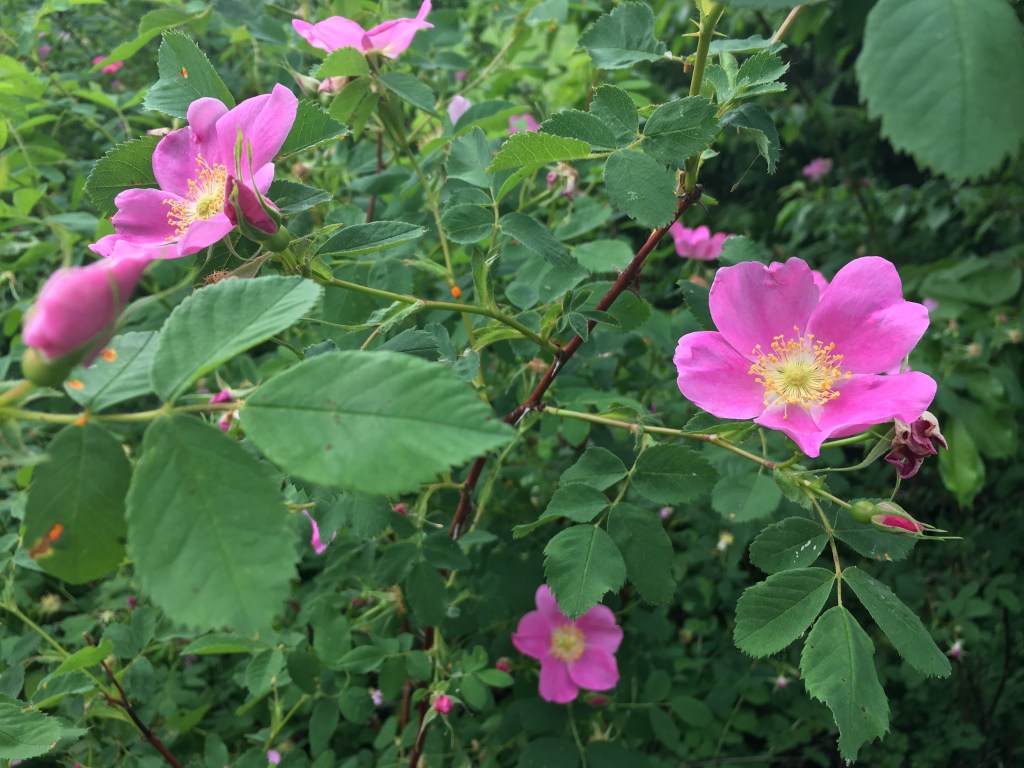
    Flowers… I will plant way more flowers in my garden next year both perennials and annuals. Some of my perennials are ready to split which benefits both the plant and my wallet. Plus, having fresh cut blooms in my house just makes me smile.


    I feel like I could carry on for a long time but as I write the weeds are still growing and they sure aren’t picking themselves! So I’ll just leave you with this last photo that I call, “The Mushroom that had all the Thyme in the World”. #dadjoke #sorrynotsorry

    IMG_5862

  • Sunny Sunny Days

    Sunny Sunny Days

    We are all ruled in someway or another by the big burning circle in the sky; we crave it after days go by with out it and we curse it away when it’s too hot. Sweltering days call for cool delicious foods high in water content – as beer and bubbles only keep us mildly hydrated no matter what we tell ourselves.


    Enter watermelon poke.


    If you eat at anyone of our amazing local sushi joints you will probably recognize the “poke” part as a dish commonly made with ahi tuna marinated in a sesame-soy dressing. (Personally, it’s one of my go to’s and I can easily crush an entire bowl to myself.) So when on a blistering hot day one of my favourite blog sites posted a recipe replicating this traditional Hawaiian dish using watermelon I was beyond excited. I immediately biked to the grocery store, bought a watermelon, got extremely sweaty in the process and ate the crap out of the final product… and so has everyone else I’ve fed it too.


    Here’s my take on 101 Cookbooks recipe: the link will take you to the actual recipe if you don’t like free balling like me. I also prefer to make it a day or few hours before consumption to allow the watermelon to marinade and soak up all the sauce.


    Step Uno: Deal with your watermelon.


    • Slice a bunch into small cubes ½“ – 1” cubes, I like a good variety of sizes. Use a small to medium sized melon depending on how many folks your feeding.


    Step Two: Make your sauce.


    • Combine the zest & juice of one lemon (or lime whatever is on hand), some ponzu, rice wine vinegar and sriracha (to taste) then whisk in some sesame oil and avocado oil.


    Step 3: Combine everything together and let sit in the refrigerator until you’re ready to eat!

     IMG_5090

    Step Quatro: Dress it up.


    • Serve topped with green onions, sesame seeds and long ribbons of cucumber or daikon radish.

    IMG_5096

    Don’t forget to save some slices of watermelon for the kids and the hound!

  • A summer pot luck staple – Broccoli Salad

    A summer pot luck staple – Broccoli Salad

    Summer is well and truly here! (I can say that with conviction as it’s currently 37˚C!). And with summer comes backyard bbq parties and the dilemma of what to take with you as your pot luck offering.

    Well, worry no more! This month’s recipe, borne out of the need to find a salad not imported from the US of A (I’m on a Trump boycott AND trying to buy less produce wrapped in plastic), has a dressing that tastes exactly like the one in the Kale and Brussel Sprout pre-packaged salad kit you can get from Pemby’s grocery store. So it’s delicious, and it’s also so easy to make you’ll be left wondering why you ever bought a ready made salad in the first place!

    DSC00088

    So here it is, the tastiest, easiest Broccoli Salad ever. And make sure to tell everyone you made it yourself! 😉

    Ingredients:

    • 8 cups broccoli cut into bite sized pieces
    • 1/3 cup red onion diced
    • 1/2 cup dried cranberries
    • 1/4 cup sunflower seeds
    • 1/2 cup bacon bits (I used turkey bacon because I don’t eat the other variety!)
    • 3 tablespoons cider vinegar
    • 2 tablespoons sugar
    • 1 cup mayonnaise
    • Salt & pepper

    DSC00083

    Directions:

    1. Whisk together cider vinegar, sugar, mayonnaise, salt and pepper in a medium bowl. Set aside.
    2. In a large bowl, combine broccoli, onion, cranberries, sunflower seeds, and bacon bits.
    3. Pour the prepared dressing over and mix well.
    4. Refrigerate for an hour before serving.
    5. Preparation time = 15 minutes.
    6. Yields 8 servings.

    DSC00084

  • Save Your Fork

    Save Your Fork

    My need to forage continues. This week’s victim: Saskatoon berries. Just try walking past the currently loaded bushes of perfectly plump, deep purple berries – I dare you. Even Shadow comes to a complete skid stop to forage on the lower quarters of these native shrubs. Our mission over the last week was to beat the bears to the berries around our place and hit up a few other spots I’d been scoping. We were more than successful; stained fingers, a full bucket and swelled bellies. I figured the best way to capture these jewels was by channeling my inner Julia Child and baking a pie. So, here we go!


    Step Uno: make your crust. Use your favourite double crust recipe or try mine.

    2½ cups flour – tsp salt – 1 cup unsalted butter (frozen) – 6 to 8 tbsp ice cold water

    • Combine the flour and salt in a medium sized bowl. Then grate the butter into the flour. I cut the butter into two halves and grate one at a time, leaving the second in the freezer until I’m done the first. Once both blocks are done use your hands to combine the flour with the butter by gently rubbing it through your hands. It doesn’t need to be fully incorporated but what your looking for is a bunch of little “butter peas” coated in flour. I’m ghetto and don’t own a pastry cutter but if you have one then small cubed blocks of butter cut in will give you the same effect. I have found that grating the butter gives great distribution in the pastry with a very flaky end result – BINGO! Now add most of the water and blend until just combined. Turn the mixture out onto your working surface and bring together the dough by kneading it into a ball, using more water if needed. Separate the ball into two with one just a bit bigger then other and shape them both into flat-ish discs. Cover separately with plastic wrap and retire them to the fridge to rest for at least an hour.


    Step Two: the filling. (Plus turn on your oven to 425°F now to preheat it)

    5 cups Saskatoon berries – 3 tbsp flour – ⅓ cup sugar – zest of a lemon (optional)

    • Combine everything together, easy-peasy.


    Step 3: build your pie.

    • Take the smaller disc out of the fridge and place it on a floured surface. Grab your rolling pin and push the disc out to about a ¼“ thick and place into your pie plate. Pour those prepped Saskatoons in next! Scatter a few slivers of butter over the top of the berries. Grab the last disc and flatten it out to the same thickness as the bottom, re-flouring the surface if needed. The reason for the last dough disc being a bit bigger is that the filling of your pie usually makes a mini mountain and you want to ensure you’ve got plenty of dough to blanket the whole hill, and then some. Before layering on the dough topper, wet the edge of the bottom dough with water – this helps them stick together. Crimp, roll or pinch the dough layers together. Brush the top of the pie with a beaten egg and slice a few air holes into the top.


    Step Quatro: Bake and wait.

    • Place your pie on a baking sheet and into your preheated oven. Bake at the preheated 425°F for 15 minutes then lower the temperature to 350°F for an addition 45-60min or until the crust is golden brown. Cool on a wire rack.


    Step Five: eat now or freeze for later.

    • I chose to freeze my pie and savor it later this fall with friends when we’re craving a taste of summer. Luckily, I saved a bit of the filling and had just enough left over dough to make 4 mini tarts. They were consumed quite quickly.


    There is a CBC story that recalls a visit by the Duke of Edinburgh to a small town in the Yukon many moons ago. He stops for a meal at a local diner and as the waitress reaches to remove his dinner plate she warmly says to him, “Save your fork Duke, there’s pie”.


    Wives’ tale or not the phrase has stuck with us for generations… and this pie for sure warrants saving your fork.

  • Rhubarb, rhubarb, rhubarb…

    Rhubarb, rhubarb, rhubarb…

    Having already written a couple of posts with sweet recipes I was convinced that my next inspiration would be of the savoury variety. That was until my physio mentioned she had lots of rhubarb growing in her garden (it’s currently in season) and did I know of any recipes.

    Well, that got my inquisitive side poring over Pinterest trying to find the perfect rhubarb recipe for her. I found cakes, pies and mojitos and shared a few I thought easy and suitable. However, some were deemed too complicated and one recipe was overlooked due to the lack of an oven; but not in my kitchen! And so it happened that was the recipe I tried when just the right amount of rhubarb turned up on my doorstep! (Plus the recipe calls for a bundt tin which I have a slight obsession with at the moment!)

    I had been looking for a recipe that I thought would bring out the fresh, slightly tart, flavour of the rhubarb but still with just the right amount of sweetness and this Lemon Rhubarb Bundt Cake, from BC food blogger Warm Vanilla Sugar, fit the bill exactly!

    DSC00089

    Of course, I did not intend to eat this cake all by myself, particularly given the weight loss crusade that I am currently on, so it was shared with friends. Plus a large chunk was also offered back to the rhubarb provider, and well received at that!

    Hopefully you can get your hands on some rhubarb before it is out of season and give this cake a try. I can guarantee it won’t last long!

    PS I promise the next recipe will not be a cake!

    Ingredients

    For the cake:

    • 1 cup (2 sticks) unsalted butter, softened
    • 1 3/4 cup granulated sugar
    • 2 lemons, zested
    • 3 eggs
    • 1 tsp pure vanilla extract
    • 2 1/2 cups + 2 tbsp all-purpose flour, divided
    • 1 tsp baking powder
    • 1 tsp Kosher salt
    • 3/4 cup buttermilk
    • 3 cups rhubarb, diced in 1/2-inch pieces
    For the Lemon Glaze:
    • 2 cups icing sugar
    • 1 lemon, juiced
    • 1 tbsp melted unsalted butter (FYI I didn’t use)

    DSC00074

    Directions:

    1. Preheat oven to 350 degrees F. Grease and flour a bundt cake pan. Set aside.
    2. In the bowl of a stand mixer, or a large mixing bowl, beat together the softened butter, sugar and lemon zest until light and fluffy, about 3-5 minutes. Scrape the sides of the bowl with a spatula and then add the eggs, one at a time, until fully incorporated. Mix in the vanilla.
    3. In a large bowl, whisk together 2 1/2 cups of flour, baking powder and salt. Add 1/3 of the flour mixture into the egg mixture along with 1/3 of the needed buttermilk and mix on low speed. Alternate with flour and buttermilk until both are fully incorporated.
    4. In a medium bow, or large ziplock bag, toss the rhubarb with the remaining two tablespoons of flour until the rhubarb is well coated. Gently fold rhubarb into the batter with a rubber spatula until it’s distributed evenly.
    5. Turn out cake batter into the prepared pan, using a spatula to gently spread and level it out.
    6. Bake for about 60-70 minutes, or until the cake springs back gently when touched and a toothpick inserted into it comes out clean.
    7. Allow cake to sit and cool in the pan on a wire rack for 30 minutes.
    8. Meanwhile, make the glaze by whisking together all the glaze ingredients until smooth. Thin with extra lemon juice or thicken with more powdered sugar as you see fit.
    9. When the cake is cooled, tip it out onto a serving plate and generously drizzle cake with the lemon glaze.
    10. Slice and enjoy.
    11. Yields 12 slices but it depends on how big your slices are! 😉

    DSC00094

  • Mindful Morning Musings •

    Mindful Morning Musings •

    This past month I have been thinking a lot about mindfulness and mindful eating.

    Anngela Leggett (Evergreen Fitness) and I recently ran the Mindful Morning Retreat at Blue House Organics. It was a magical morning consisting of a beautiful yoga practice with Anngela, raw treats, and a circle of discussion around the way we eat and the way we think about food.

    36137574_10157573170533327_3147079793711775744_n

    What an amazing experience it is to openly share your experiences with mindfulness and food with a group of unique and inspiring individuals. I was blown away.

    I knew I wasn’t going to be delivering exactly what people would expect. I was there as a guide, to show people the ball was already in their court, and help them to discover how they could realistically apply mindful eating to support mental health, to their own individual lifestyles.

    As it turns out, I may have learned more from the group than they did from me! I learned new ways to approach mindfulness, I was taught how to be grateful for the action of making dinner for your loved ones, I was taught how to be mindful through your purchases of food, not just at meal times, and I learned just how important these reminders are.

    36177379_10157573170453327_4880108134258966528_n

    I shared this reading with the group from Peace Is Every Step, by Thich Nhat Hanh:

    “One day, I offered a number of children a basket filled with tangerines. The basket was passed around, and each child took one tangerine and put it in his or her palm. We each looked at our tangerine, and the children were invited to meditate on its origins. They saw not only their tangerine, but also its mother, the tangerine tree. With some guidance, they began to visualise the blossoms in the sunshine and in the rain. Then they saw petals falling down and the tiny green fruit appear. The sunshine and the rain continued, and the tiny tangerine grew. Now someone has picked it, and the tangerine is here. After seeing this, each child was invited to peel the tangerine slowly, noticing the mist and the fragrance of the tangerine, and then bring it up to his or her mouth and have a mindful bite, in full awareness of the texture and taste of the fruit and the juice coming out. We ate slowly like that. 

    Each time you look at a tangerine you can see deeply into it. You can see everything is the universe in one tangerine. When you peel it and smell it, its wonderful. You can take your time eating a tangerine and be very happy.”

    36137196_10157573170613327_2397848145066196992_n

    Lisa Richardson writes for the Pique, and had this to say about the Mindful Morning Retreat:

    “They offered to help us connect the dots between food and mood. I went to pick up a few good lifestyle hacks that would help me come away from that moment when I’m standing forlornly in front of the fridge, with a fistful of carrot sticks and a dash of psychic resilience instead of a spoonful of Nutella and a guilty conscience.

    Our guide, Maguire, having survived six years of disordered eating and come out the other side with practical wisdom to partner with her science degree, informed us that there is no such thing as good food and bad food. She invited us to replace that hazardous dichotomy with mindfulness. Self-care and slowing down. The Mindful Morning Retreat wasn’t an intervention, a six-step program or even a specific solution. It was quite simply a beautiful morning of yoga followed by tea and treats, and the chance for a circle of people to sit together and make connections—between our experiences and other people’s experiences, between our eating habits and our emotions. It was the welcome mat to mindfulness. It was the reminder that attention, not willpower, will save us, from pathology, addiction, the downward spiral of self-loathing.”

    Some questions to ponder:

    What does mindfulness mean to you?

    What does mindful eating mean to you?

    How can you realistically apply this to your own life?

    Do you think about food as being ‘good’ or ‘bad’?

    Do you feel guilty after eating certain foods?

    Does social media influence how you feel about food?

    Nutrition Mind Collective

    @nutritionmindcollective

  • Nootka Rose Jelly

    Nootka Rose Jelly

    For me the art of slowing down and smelling the roses has turned into taking advantage of the surplus of this native shrub behind my house, plucking their petals and creating something delicious. As it is in my garden where I rarely follow my planting plans the same holds true to my style of cooking; recipes are but a base. I’ll admit my first batch, from a recipe I followed, did not set. This led me to taking matters into my own hands, going with the flow and trusting my strong sense of jamming. So, queue up some Bob Marley as I guide you to making your very own wild rose jelly.

    INGREDIENTS

    ≈4 cups wild rose petals, lightly packed

    4½ cups boiling water

    ¼ cup fresh lemon juice

    5½ cups sugar

    2 pkgs liquid pectin

    Other: cheesecloth, jars, lids, tops, a big pot & lots of love

    Start by foraging for rose petals: try to pick in areas away from the roadside and pick higher then a dog may pee! Give them a small bath in the sink to get rid of the majority of bigger bugs and pick out any of the greens. Don’t stress too much about getting everything, as you’ll end up straining the lot later. Place them in a nonreactive bowl, cover with the boiling water and allow steep for 1-2hrs. The petals will lose their colour and look quite dull but patience is key here.


    While your petals are steeping prepare your jelly vessels. This recipe makes approximately 8-9 cups of liquid gold; I use a mishmash of 125ml and 250ml jars and usually prepare a few more then what’s needed, just incase. Wash every thing then put the lids and tops in a pot submerged in water and place on the stove over medium-high heat. Jars can go on a cookie sheet in the oven at 250°F. You want these to sit in their respective mediums for at least an hour.

    When you’re satisfied with how long the petals have steeped or you can’t wait any longer get ready for some magic. Add the lemon juice and watch the water go from blah to vibrant pink! It’s science.


    Pour the petals and water through a strainer lined with cheesecloth straight into a big pot squeezing all the liquid out that you can. You want 4 cups of rose water; if you’re a bit short just add a bit of filtered water. I found this recipe made the right amount of water so you should be fine but feel free to measure if you’re not sure. I like to wing things. Add the sugar and bring up to a boil, stirring to ensure all the sugar incorporates into the rose water. Once at a  hard boil keep it here for 2 minutes skimming any foam off the top. After the time has elapsed remove from the heat, add the pectin and stir to combine for 5-6 minutes – no less – more is okay but no less.

    Now you’re ready to put your creation into jars and await the sweet satisfying sound of popping lids. Some recipes call for a water bath to finish the canning process but I’ve never done that. I just go with what my mom taught me, which is what’s outlined here, and it’s never failed me just like her.

    IMG_4022

    This simple tasty treat can be enjoyed may ways but my favourite thus far is on coconut ice cream or straight out of the jar… Happy jammin’!

  • Where There’s Smoke…

    Where There’s Smoke…

    Summer is almost officially here, although it’s basically felt like summer this past month with the weather we’ve been having. The sun is out, the flowers are blooming, and the rain clouds have stayed away for the most part. While this is incredibly enjoyable, it makes one remember what else comes with sunny, dry weather.

    Fire.

    According to the BC Wildfire Service, since April 1st of this year there have already been 242 fires, with an area of over 37,000 hectares affected. And that number is only going to grow. Just last week the historic Ladner Creek trestle bridge went up in flames from a simple, discarded cigarette butt. I will never forget the wildfires from three years ago that caused smoke to hang like a pall over our beloved valley, mixing with the 40°C weather to create an uncomfortable miasma. I imagine that most of you, like me, feel some trepidation when hot weather lingers, and look to the horizon with dread for signs of smoke.

    But thankfully, unlike the old adage, smoke doesn’t necessarily mean fire. If you are heading up Reid road to Mosquito Lake this summer and happen to smell smoke, don’t panic. It’s probably coming from our house, and it’s not a fire.

    My boyfriend’s birthday was this past week, and I gave him a new digital electric smoker. He’s over the moon. Visions of smoking everything from bacon, salmon, trout, and even mac n’ cheese are dancing through our heads. Our first creation was this beauty, smoked pork shoulder, and it couldn’t have been easier. A simple spice rub, a five hour stint in the smoker with some apple and hickory chips, and the occasional spritz with an apple cider vinegar and apple juice mix, and voilà. And yes, it tastes just as good as it looks.

    This summer, I sincerely hope the only smoke I have to reckon with is the kind that produces delicious results like this.

    pork