It seems to be that time of year again! So many people I know are offering up their excess zucchini’s as they have too many and don’t know what to do with them!
So when my neighbour put out a post saying she had some up for grabs I volunteered to take one of her hands. And it was a monster! So much so that I made to make up half as much again of the recipe I found. This meant that I could make four mini-loaves and one standard size loaf. Good job I’m a fan of zucchini bread.
Besides, I gifted back two of the mini-loaves for her, and her family, to enjoy! 🙂
The Mini Zucchini Loaf recipe I found included walnuts which I didn’t have on hand, but the pecans worked just as well!
So, if you have any spare zucchini’s I won’t say no. 😉
Ingredients
2 cups grated zucchini (about 2-3 zucchini)
3 cups all-purpose flour
1 teaspoon kosher salt
1 1/2 teaspoons baking powder
1 1/2 teaspoons baking soda
1 tablespoon cinnamon
1 cup sugar
1 cup packed brown sugar
1 cup vegetable oil
3 large eggs
1/4 teaspoon almond extract
1 cup chopped walnuts
Directions
Preheat oven to 350 degrees. Coat two [or three] 5 1/2 by 3-inch loaf pans with nonstick spray, line with parchment paper, and then spray paper.
To reduce the moisture, press the grated zucchini between sheets of paper towel. When most of the moisture has been absorbed, you can fluff with your hands or a fork and then set aside.
In a small bowl, mix together flour, salt, baking powder, baking soda, and cinnamon.
In a large bowl, combine sugar, brown sugar, vegetable oil, almond extract and eggs and mix until well combined. Stir in the zucchini.
Add dry ingredients to the bowl of wet ingredients and mix well. Fold in nuts. Divide batter between the two mini loaf pans. If you have extra batter, you can drop liners into a muffin pan and make a few zucchini muffins.
Bake for 35-45 minutes. Use a toothpick to test – if it comes out clean, it’s ready to take out. Let cool for about 10 minutes on wire rack before removing from the pan to cool completely.
Hummus is a fantastic summer staple as you can take it camping or somewhere with limited refrigeration and it won’t go off. It is full of vitamins and protein, and vegan to boot. It tastes great accompanied by Pemberton-grown carrots, and the secret ingredient is Pemberton-grown cilantro. You can also make your own tahini by grinding raw sesame seeds with a little olive oil in a high-powered blender.
Cumin and Cilantro Hummus:
Ingredients:
2 cups cooked chick peas
3 peeled Pemberton garlic cloves
1/3 cup tahini
Juice of 2 lemons (must be fresh)
2 tbs water
4 dashes tabasco sauce
1 tsp cumin
¼ cup cilantro leaves
1 tsp pepper
1.5 tsp salt
Method:
Mix chick peas and garlic in food processor.
Add tahini and all remaining ingredients until very smooth. Adjust water amount to desired consistency.
For Christmas my OH surprised with an experience of a 4-hour hands on cooking class at the Dirty Apron in Vancouver. Not, he hastily added, because there is anything wrong with my cooking, but that it may give me tips and the confidence to try new things.
After Christmas I browsed on their website for available dates and to see what course I would like to try based on ingredients used and techniques I could learn.
So on 12th May I headed to Beatty Street for my “BC Dine & Vine – Wine & Food Pairings From Our Own Backyard” class.
Along with 17 other people I first sampled some freshly baked bread with sparkling wine before we got down to the real business at hand.
Each course was individually cooked in front of us by our instructor, giving pointers along the way, ie how to hold the knife when cutting, how to know when your sauce has reduced enough etc, and then we were sent to our stations to cook each course ourselves. The ingredients were all provided, along with the equipment we needed, so all we had to do was cook everything and then we got to eat it, paired with a BC wine. And while we were eating the kitchen fairies came in and cleared everything away in preparation for the next course!
There were four courses in all:
Spot Prawn Gyoza with Dipping Sauce (recipe below)
Crispy Seared Duck Breast with Orange Gastrique and Apple and Green Bean Sauté
Crisp Seared Salmon with Horseradish Crème Fraiche and Scallion Potato Rosti
Apple Almond Tart
What did I learn? How to mince my own garlic so much that it was almost a paste, not to panic when water hits a gas flame (thank god I use an electric ceramic hob!), leave the ingredient in the pan and not move it around constantly (ie have patience) and it’s okay to cheat (ie buy store bought puff pastry!).
If you ever get the chance to head down, either for a demo class or a hands on class, I highly recommend it. Even better if you can get a small group of you together, although I am sure that everything would pretty soon become a competition! 😉
So, as promised, here’s the recipe for Spot Prawn Gyoza with Dipping Sauce:
Ingredients
(Makes 10)
Gyoza Filling
60 g Prawn meat (minced)
15 ml Carrots (finely chopped)
15 ml Leek (finely chopped)
15 ml Celery (finely chopped)
1 pc Green Onion (finely chopped)
1 tbsp Chives (chopped)
2 cloves Garlic
15 g Ginger
10 mL Yuzu Juice
5 mL Soy Sauce
5 mL Sesame Oil
1 tsp Sugar
10 BC Spot Prawns
10 Gyoza Skins
Classic Dipping Sauce
30 ml Soy Sauce
15 ml Rice Wine Vinegar
15 ml Chili Oil
Directions
(For steaming but can be deep fried)
Combine all ingredients into a bowl and mix well.
Heat a pan to medium-high; add enough oil to coat the bottom of the pan.
Place gyoza in pan and sear bottom.
Turn heat down to medium and add ¼ cup of water and place lid on top to steam for 3 – 4 minutes.
Carefully remove from pan with a spatula.
Combine all the dipping sauce ingredients into a bowl and mix.
Folding Gyoza
Place a spoonful of filling off centre on wonton wrapper. Lay peeled Spot Prawn atop filling.
Using fingertip moisten the outer edge of the wrapper with water.
Fold in half, using fingertips to crimp the two sides together, creating a seam on top of gyoza.
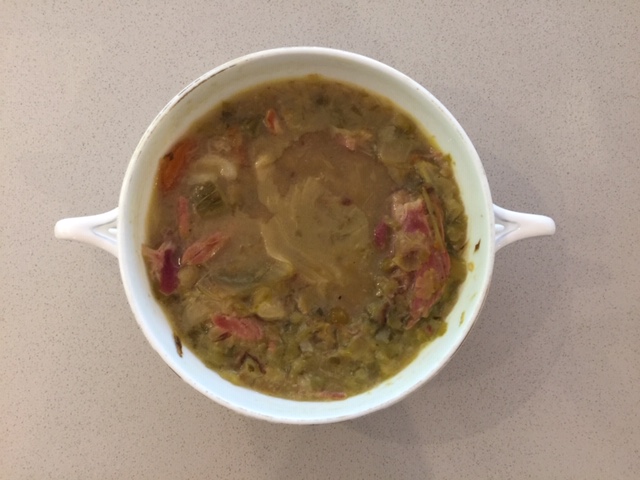
I have experimented for quite a few years with ham and pea soup – switching out the green peas for yellow peas. The yellow peas never softened enough for a good soup and they varied a lot from brand to brand. Green peas soften well. Of course, it helps to simmer your soup for at least 3 hours. A UK friend of mine who used to cater large events called it “the best ham and pea soup I have ever had”. Thanks to that high praise I am posting it today. Pemberton ingredients include carrots, and if you have a source, the ham itself. This soup goes well with a nice piece of warm cornbread. I like the recipe out of the ReBar cookbook by Audrey Alsterburg and Wanda Urbanowicz – an incredibly well-written and inspiring cookbook by two Victoria chefs.
Professional-Quality Ham and Pea Soup:
Ingredients:
1 large ham bone with about 2-3 cups of ham still on it (after baking a 4-5 lb bone-in ham the night prior)
1 bunch green onions, chopped
2 tbs pure olive oil
2-3 cups chopped green cabbage
2 large carrots, chopped
1.5 cups parsley, chopped
8-10 cups water
1 450-gram bag of dried green peas
2 tsp pepper
Method:
Sauté green onion in olive oil.
Add cabbage, parsley, carrots, and pepper and sauté until well caramelised.
Add ham bone, water, and green peas.
Bring to boil.
After soup comes to a boil, turn heat down and simmer 3-4 hours.
Remove ham bone and go through the ham that has fallen into the soup to make sure no gristle or pieces of fat remain in the soup.
Remove all large ham pieces and cut into bite-sized pieces and then put back into soup. Enjoy!
So my OH has been away, galavanting off to the UK and Spain, leaving me with the dog, and the chores, for just over a week on my own. (Don’t get me wrong – it’s been great catching up with episodes of Desperate Housewives and enjoying some peace and quiet!)
It has also left me with the chance to take a day off work just so I can go and collect him from the airport. At least it gets me out of the “bubble”, right?
The flight is due to land in the early afternoon so, with the drive and subsequent stops, on the way back, I thought it would be ideal if I could make something in advance for dinner that I can just reheat and serve when we get home. Luckily, Martha came to my rescue when this recipe popped in to my Facebook feed!
Now, I’d never heard of Chicken Divan before but apparently it’s a chicken casserole usually served with broccoli, almonds, and Mornay sauce that was named after the place of its invention, the Divan Parisienne Restaurant in the New York City Chatham Hotel where it was served as the signature dish in the early twentieth century. So there you go!
I have since seen a few recipes on Pinterest that use Cream of Mushroom Soup but there’s nothing more satisfying than making it all from scratch (time permitting). So, hopefully it tastes great and my efforts will be appreciated!
Note this recipe serves 6 to 8 people – I guess we’ll have plenty of leftovers! 😉
4 tbsps unsalted butter, plus 2 tablespoons melted
Kosher salt and freshly ground pepper
3 tbsps unbleached all-purpose flour
3 cups whole milk, room temperature
255g shredded medium-sharp cheddar (3 cups)
2 tsps Dijon mustard
1 tsp Worcestershire sauce
1/8 tsp cayenne pepper
1/2 cup sour cream
1 cup panko breadcrumbs
Cooked egg noodles or steamed white rice, for serving (or whatever you prefer)
Directions
Preheat oven to 400 degrees. In a large straight-sided skillet, simmer 1/2 cup water over medium-high heat, then add broccoli and a pinch of salt. Cover, reduce heat to medium-low, and cook until crisp-tender, about 6 minutes. Drain well, then transfer to a large bowl; set aside. Wipe out skillet.
Pat chicken dry; season with salt and pepper. Melt 2 tablespoons butter over medium-high heat. Add half the chicken and cook, turning once, until browned and cooked through, about 4 minutes. Transfer to a plate. Repeat with remaining chicken; set aside.
In same skillet, melt 2 tablespoons butter, then add onion and mushrooms. Cook, stirring occasionally, until tender and starting to brown, 6 to 7 minutes. Add flour and cook, stirring, 30 seconds. Slowly add milk, reduce heat to medium, and cook, stirring constantly, until mixture is thick enough to coat the back of a spoon, about 9 minutes. Add 2 cups cheese, Dijon, Worcestershire, cayenne, and sour cream; stir until combined. Season with salt and pepper. Add cheese sauce to bowl with broccoli, followed by chicken and accumulated juices; toss to combine. Transfer to a 2 1/2-quart baking dish.
In a small bowl, combine 2 tablespoons melted butter, panko, and remaining 1 cup cheese. Sprinkle over broccoli-and-chicken mixture. Bake until bubbly and golden, 20 to 25 minutes. Let cool 15 minutes, then serve over noodles or rice.
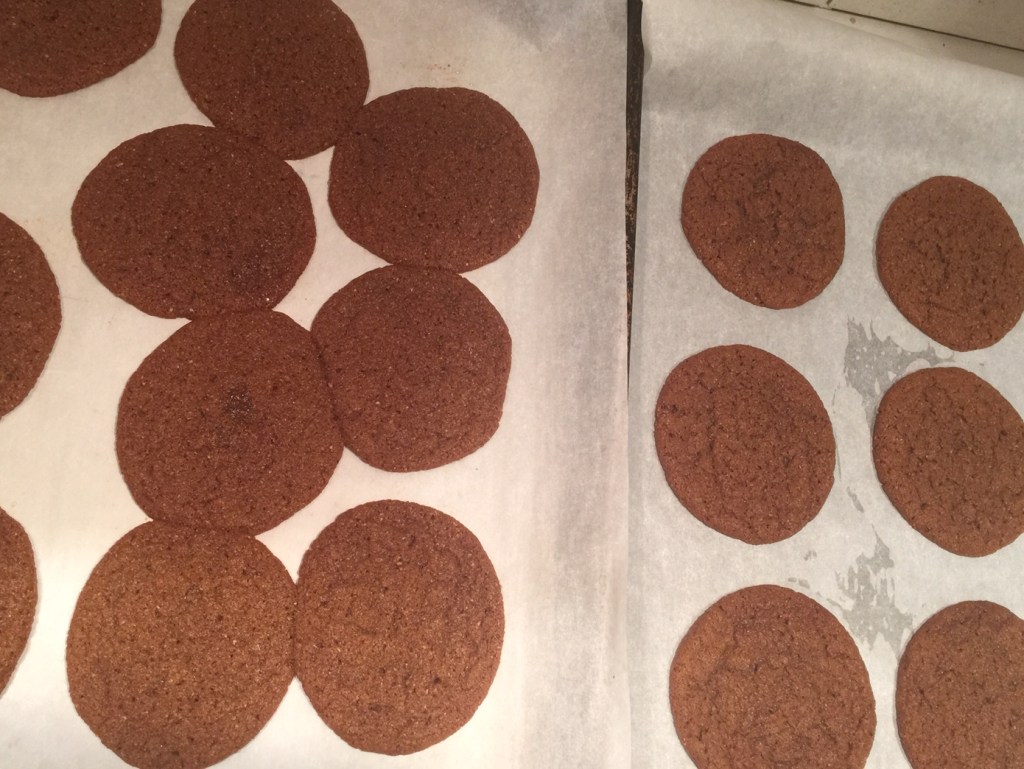
These cookies are adapted from the Silver Palate Cookbook – a staple cookbook in the kitchens of my mother, aunt and gran in the 1980s. I have always loved their “molasses cookies” but in the past few years I have given up baking with white flour. I made this version healthier with 50% less sugar than the original recipe, spelt flour, and also some almond meal. They are very good. They do not feature heavily in Pemberton-area ingredients – except the egg – but today the weather was cold, stormy and winter-like, so ginger cookies seemed like a good match.
Ginger Chews: (Yield: 21 cookies)
Ingredients:
6 oz unsalted butter
½ cup white sugar
¼ cup molasses
1 large Pemberton egg
1 ¼ cups spelt flour
½ cup almond meal
½ tsp baking soda
½ tsp ground cloves
½ tsp ground ginger
½ tsp salt
1 tsp cinnamon
Method:
Preheat oven to 350F. Melt butter on very low heat in a medium saucepan. Add sugar, molasses, and egg and mix well. Then add the rest of the ingredients and mix well. Place 1 tbs balls of cookie dough on 2 parchment-lined cookie sheets. The cookies spread a lot when baking so leave 3 inches in between the cookie dough. Bake for 12-14 minutes. Cool for 15 minutes.
I’d seen this recipe months ago while, undoubtedly, searching for something entirely different on Pinterest.
However, it caught my eye and was one of those cakes I could imagine baking up for team-mates at work or for a large get-together with friends. I mean who doesn’t like banana bread or cream cheese frosting?
So the opportunity to try this recipe came up because we were meeting up with two sets of friends and would be able to share the banana bread love. But then one of the get-togethers we had planned, cancelled at the last minute. This meant that there was far more cake to eat, on our own, than was anticipated! But, as it turned out, this cake is so light and the frosting is so dreamy that it was way too easy to eat more than one serving.
There goes the waistline – again!
Ingredients
For the Banana Bread Cake
1/2cupbutter, softened
1 1/2cupsgranulated sugar
2large eggs
1cupsour creamfull-fat is best
1teaspoonvanilla extract
2cupsall-purpose flour
1teaspoonbaking soda
1/4teaspoonsalt
1cup mashed bananasabout 2 or 3 bananas
For the Cream Cheese Frosting
1/2cupbutter, softened
1bar (8 oz/227 g) cream cheesefull-fat is best
1teaspoonvanilla extract
2 1/2 – 3cups powdered sugar
3-4tablespoonsheavy whipping cream
Directions
Heat oven to 350 degrees. Prepare a 9×13 baking dish and spray with cooking spray. Set aside.
In a large bowl, cream butter and sugar together until light and fluffy. Add eggs, sour cream, and vanilla. Blend together until combined and creamy.
In small bowl, add flour, baking soda, and salt. Whisk together to break up clumps. Add it into the wet batter and stir with spatula just until mixed and no flour pockets remain.
Add mashed banana and gently stir together. Dump batter into the baking dish and spread out evenly. It makes it easier if you dump large spoonfuls of the batter all over the baking dish, instead of just one big pile of batter.
Cook for 25-35 minutes or until toothpick inserted in middle does not come out with wet batter. The edges and top will be light browned. Mine takes about 32 minutes.
Let cake cool completely before frosting.
To make frosting: beat butter and cream cheese together until combined. Add in vanilla extract, 2 cups of the powdered sugar, and 3 tablespoons heavy cream. Beat together until frosting forms. Add more powdered sugar and/or milk until desired frosting consistency is reached.* NOTE: if you use anything other than heavy whipping cream, start with 1 tablespoon and work from there. Heavy cream is so thick that you need more of it, lower fat milks you will need less of.
Cut into squares and garnish each piece with banana slices and chopped walnuts.
Please don’t blame me if this becomes your next favourite Banana Bread recipe! I will certainly be making it again!
Prepping dinner in late February. Note “green onions”, carefully harvested from some storage onions that decided it was time to start sprouting.
Note: This post the product of a farmer itching for the snow to melt, of Lisa Richardson’s gentle encouragement to not be ashamed by my lack of posts since last May, and also a plug for a new page on our farm website that talks about VEGETABLES.
It tries to answer questions like “What’s this?” or “How can I cook that?” or “Can I freeze these?” that I get asked from time to time as a CSA farmer. I also admit to eating cabbage for breakfast on a regular basis. Feel free to have a look if you’d like. http://fourbeatfarm.ca/news/
A breakfast option for the Pemberton loca-vore. Includes an average portion of cabbage, pickled garlic scapes from last summer, and some additions from friends at Spray Creek Ranch.
Now, to ramble…
Last week, the spare room where I store my personal supply of winter produce had its annual conversion into a spring “grow room” for this year’s seedlings. Anyone else have ~8000 allium roommates right now? No? Oh well, just me then. We will be co-habitating for a few weeks until the seedling greenhouse gets set-up and temperatures climb a bit.
Because of this new roommate situation that I have come to believe is normal, I spent a few hours picking through the bins of winter storage vegetables. Since I haven’t been to the produce section of the grocery store all winter, there wasn’t much left. I salvaged the best to cram into the fridge and imminent meals, and that about took care of it. Let me begin by saying that, despite my attention to detail when it comes to processing and storing vegetables in the main farming season (destined for CSA and farmers market shoppers), my winter set-up for personal use is…well…simple. Or lacking. Depends how you look at it. Let’s call it “rustic” to be nice.
It’s a small room in the house. It’s separated off and slightly insulated by a blanket over the doorway to avoid wasting woodstove heat from the hallway. The window stays cracked open to let in cold air and keep the bins of veggies comfy. When we get a cold snap, I make the crack smaller. When we get a mid-winter thaw, I open the window a bit more. If I remember.
This has successfully kept beets, carrots, turnips, watermelon radishes, cabbages, rutabaga, celery root, kohlrabi potatoes and onions in fine shape until at least early March. There are some sprouty bits. Occasionally one will turn to mush and cause a small amount of slime to touch those around it. These now-slimey neighbours get rinsed off and put in soup or fed to the draft horses (onions exempt, they go direct to compost and bypass the horse trough).
Winter storage veggies at their prime for fall CSA members. Mine do not look like this now.
By March, things kept in such un-fancy conditions tend to look a little tired. Rutabagas are starting to sprout wild hairstyles. Celery roots are looking a bit shrivelled. But the cabbages? Oh, the cabbages. They’re like a breath of fresh air. Dozens of them have been sitting in a Rubbermaid bin in the house for nearly four months and they are still crunchy, juicy, sweet, and willing to join in to up the freshness factor of just about any meal.
If you’re looking for ideas about vegetables, recipes, or curious about how this particular farmer likes to eat her veggies year-round, I’d welcome you to check out a resource we are growing to help our friends and CSA members with the age-old question “What is this?” (holds up a cabbage shaped like a cone, an alien-resembling kohlrabi, or a yellow beet).
Seriously though, those cabbages. They’re just what a farmer needs this time of year.
A friend of mine called this a “Winter Glory Bowl”. Not sure if she was joking or not, but we’ll take it. Canned salsa from our summer tomatoes, refried beans from some shelling beans we grew and froze, sweet curry zucchini pickles, and roasted rutabaga. I don’t know if they’ll be serving it at any restaurants anytime soon, but it was a perfect sweet & sour, hearty & crunchy combination of food from the farm for a post-snowshoe lunch.
“I only had one bite but it was amazing.” – Austin, age 9
These mini pot pies were a hit with my age 9-12 year old kids cooking class I teach each week. I also teach a teen class. The pot pies can be adapted to throw in many different veggies, and they might be a good addition to the lunch box. Keeping them open-faced means they are less stodgy, with more protein and veggie filling to focus on, instead of excessive pastry. Enjoy!
Mini Open-Faced Chicken Pot Pies: (Yield: 24 muffin cup-sized pies – you may have leftover filling and pastry for a large standard pie plate-sized pot pie also)
½ cup to 1 cup pure olive oil
3 medium yellow potatoes, finely diced
2 cups parsley, finely chopped
1 large yellow onion, finely chopped
3 stalks celery, finely diced
2 Pemberton carrots, finely diced
1 large red pepper, finely diced
3 cups brown mushrooms finely diced (you could try other varieties)
2 lbs chicken thighs (boneless and skinless) chopped into small pieces about 1 cm in diameter
2 tbs butter
2 tbs pure olive oil
3 cups no-salt chicken broth
2 tbs spelt flour
2 tsp pepper
2 tsp salt
Pastry:
1 box Tenderflake lard
5 cups spelt flour
1 egg
1 tbs white vinegar
2 tsp salt
Water
Method:
Sauté veggies. Heat ½ cup pure olive oil in large pot and sauté all veggies, order not important but all veggies need lots of time to sauté. When well caramelised, add 3 cups of chicken broth and spelt flour.
In separate pan, sauté chicken pieces in 2 tbs butter and 2 tbs pure olive oil, until cooked through. Add 1 tsp pepper. When cooked thoroughly, add chicken to finished veggie mixture.
Make pastry:
Measure flour and salt into large bowl. Add lard. Mix until incorporated. Add one beaten egg in a liquid measuring cup with 1 tbs vinegar and fill the rest to the one-cup mark with water. Mix together. Roll out. Cut into circles about 5 cms wide. Place into muffin cups and press down snugly to form a cup.