Tag: recipes

  • Software for Wild Intelligence

    Software for Wild Intelligence

    “Seeds are software, and we have the seeds” -Representative of the chemical giant Seminis, just before selling out to Monsanto

    Usually, plantain is a quiet, unobtrusive little plant. She is known for her excellent healing properties, her usefulness as a spit poultice, and her excellent nutritional properties. She is generally soft spoken, and most people are surprised to notice she has been underfoot all along. She is like coffeeshops in Vancouver: ubiquitous. But lately plantain, sometimes called ‘white man’s foot’ for the way she has followed our footsteps across North America, has been shouting at me. She is poking me with her seed spears. Every time I turn around, there she is. Usually when this happens it means the particular plant that is ‘shouting’ has some particular medicine I need to pay attention to. My resistance is generally high. You think I would actively cultivate some sort of porosity towards these sorts of encounters, but no. When a plant is trying to get my attention (or most things, for that matter) my first response is resistance. When I finally let plantain in all I do is look at her for a moment, but that look takes a photograph that embeds her in my mind and from there she begins to communicate with me.

    plantain
    Plantain

    Because of the way the summer has gone- hot and dry- Plantain is setting seed earlier than usual, and with an abundance I did not notice last fall. Perhaps she is foretelling the future, but it is more likely her actions are a reflection of the present. (When a plant is stressed, their seed production tends to be prolific. Cue the fallen black cottonwood I stood in the ruins of this past spring, who released her white parachute fluff designed to float her future progeny over the entire province OVERNIGHT WHILE SHE LAY DYING ON THE GROUND, while most of the trees were barely starting to open their little seed casings.)

    But that is not what I want to tell you. What I want to tell you is that I want to cry. Each time a Plantain seed spire touches my ankle it is a reminder that things will never be the way that they were. A reminder that I do not have the time and that I am doing too much, too fast, to really listen, to really hear, to really feel any of it. There is grief in these too-early seed spires. Grief that the world is burning; that part of the morphic field of these seeds will always contain the memory of smoke.

    I believe a plant is a part of a specific ecosystem’s innate intelligent awareness made incarnate, and that a seed is the plant’s answer to the questions of its times. And the answer will be different, even among similar species, if they are growing in different locations. A seed is this wild intelligence made portable, designed for dispersal, a portable currency of consciousness.

    So if we really want to rejoin the dance, if we really want to be a part of what is going up in flames around us, what is burning and the new seeds that will be born out of this fire, we need to eat of the wild, NOW. We need to take a little of the otherly intelligence that is the essence of the natural world into our bodies so that we can start to belong to the place in which we are standing. Perhaps this is the beginnings of true reconciliation. Or at least the seeds with which to begin.

    Please don’t think I am being trite. I am not making small of atrocities that have been committed both by and against humanity. I am not saying that by taking yet another thing from the wild we can heal from the many woundings of the entitlement we have been taught to assume. I am saying that we need to begin to build a bridge to another way of being, of living, of feeling, and that if we can ingest the local wild plants that are doing that all around us in the places where we live, who have not cut themselves off from the responsiveness of the wild innate intelligence of their own sovereignty,  then we begin to take those transforms of meaning into our cells, and that begins to alter us.

    Do you remember at the beginning when I said Plantain shouted at me? Well obviously she didn’t, at least not in words. But when I started to pay attention- when I started to unravel the thread of meaning she held for me- she led me here. When I went out to shoot the pictures for this post I stripped a handful of her seeds from their spire, winnowed their husks away by breathing into my palm, put them into my mouth and chewed. They popped between my teeth like chia seeds, and had a similar mucilaginous texture. They didn’t really taste like much but maybe that’s a good thing. Something about pulling the seeds from their stalk felt familiar, the way I sometimes recognize the face of a stranger I have not known in this life.

    Beside the Plantain (and remaining mostly quiet all this time) was a stand of Dock, with seeds also ready for harvest.

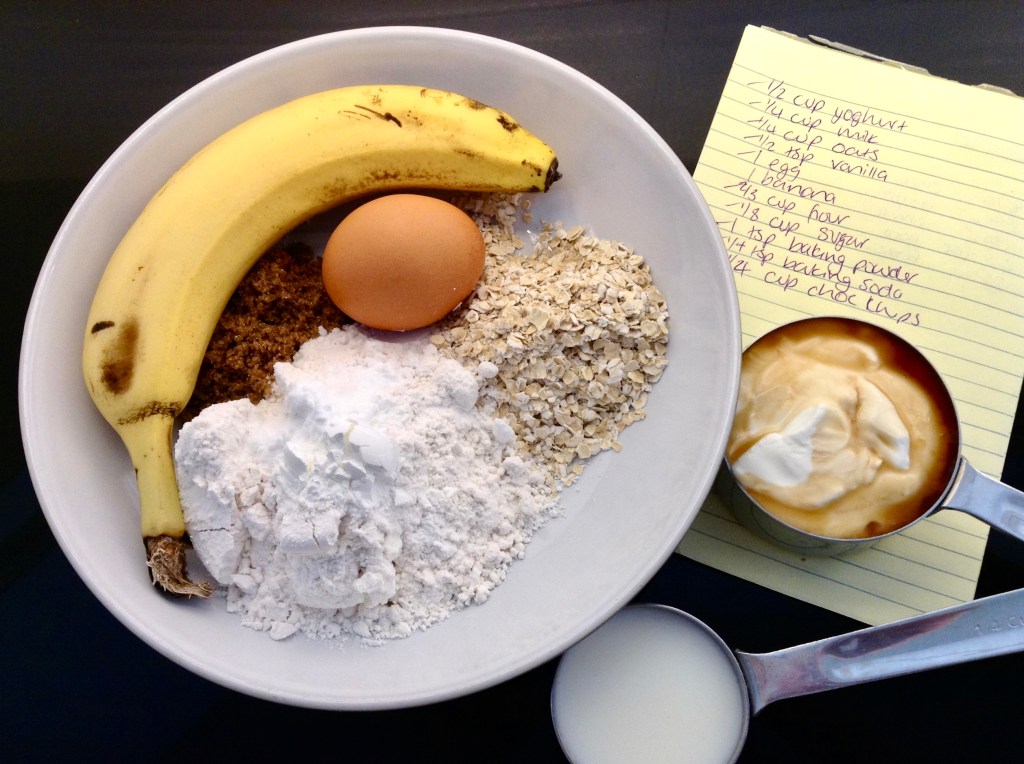
    So here is where we get to the practical and super-actionable and amazing part of this post: you can make flour from both these seeds. Yep, that’s right. SUPER SOVEREIGN INTELLIGENCE WILD MORPHIC FIELD FLOUR WITH BONUS SUPER NUTRITION! (Or as we more quietly call it, Plantain/ Wild Dock Flour.)

    Plantain/Wild Dock Flour

    1. Simply go out and gather as much Plantain and Dock seeds as you have the patience for, checking that the ground the plants grow in is free from contaminants and roadside pollutants. There is no need to winnow (separate) the seeds from the hulls as from both kinds of seeds’ hulls are edible and add extra fibre to your flour, as would happen if you added rice bran. If the seeds do not pull off the seed heads easily when you are harvesting, they are not ripe yet and should be left on the plant to mature. As with all wildcafting/foraging, be considerate of the plant’s needs to reproduce and other animals who may depend on the seeds as a food source. (A good rule is to not harvest more than 25% of the yield of a patch, but in the case of weeds like Plantain and Dock (which are prolific) you can sometimes take a little more without ill effects.
    2. If you wish to increase the nuttiness of the flavour of your flour (OR if you are worried about bugs, OR if you are not sure your seeds are completely dry) you can roast your seeds on a cookie sheet in the oven, stirring several times at 200 degrees  until seeds have darkened slightly.
    3. Store whole in airtight containers until ready for use. Grind seeds and hulls in a coffee grinder until they reach a flour like texture. Substitute 1 for 1 to replace up to 1/2c of flour called for in the recipe to add extra nutritional value and wild intelligence to whatever you are baking.


    Author’s note: The seed harvesting in this piece was originally inspired by Katrina Blair’s book ‘The Wild Wisdom of Weeds: 13 Essential Plants for Human Survival” which is an excellent resource for anyone wanting an accessible way to learn to incorporate edible weeds into their diet!


  • Bring out the Beans this Summer!

    Bring out the Beans this Summer!

    It is midsummer still. I am a big fan of beans in the summer. Why? In dried form they last and last. You can throw a bag of dried lima beans in the pantry and cook them 4 years later and they still taste great. Unless you have access to reliable refrigeration when you are travelling in summer, I would prefer to avoid carting meat around.

    Obviously it is hard to resist the call of BBQ salmon or burgers. But for a regular mid-day meal or evening side dish that many would enjoy – and pretty darn safe in above average temperatures – then it is time to put beans back on the table.

    The following is a dish I turn to every summer when I spend time on one of the islands and have limited or unreliable refrigeration. All you need is a large bag of lima beans or fava beans. Once they have been soaked and cooked you can do a number of things.

    First off, sauté the beans in bacon fat with added olive oil. Sauté them with chopped onion and fresh rosemary and pepper. Throw in a few more finely chopped veggies – such as diced bell peppers for colour. This dish makes a great side dish. Then later – add some veggie broth and turn it into a soup. I LOVE soup! And bean soup I enjoy a lot – even at tepid or room temperature. Again, no worries about meat going off in hot weather. Sometimes I don’t have much of an appetite during the hot spells….so beans are a great option for sustenance.

    Here’s to summer creativity in the kitchen – either camping or at a cabin – and bring out the beans!

    Sautéed Lima Beans:

    One large bag of large-sized lima beans (or fava beans)

    Salt and pepper

    Olive oil and/or bacon fat

    Fresh rosemary

    Method:

    Soak beans for 6 hours, then drain water and cook beans with fresh water covering the lima beans by 3 inches.

    Bring to boil and simmer until beans are tender

    Note: DO NOT RUSH THIS PROCESS. If you take beans off stove too early and before they are fork tender they will NOT cook well later.

    When tender, drain beans and sauté beans in bacon fat and olive oil and chopped onion and other veggies as available. Add 2 tbs of fresh rosemary. The dish is finished when the bacon fat gives a caramelised finish and subtle crust to the beans. Using a large cast iron enameled pot gives a good finish to the beans!

    Serve as side dish or main (maybe add some chopped cooked bacon).

    Option 2:

    Take your leftover sautéed beans and add to a soup stock made strictly with veggie ends, 30 peppercorns, and 2 bay leaves. See broth photo attached. I used the ends/cores from bell peppers, dill stems, onion ends, parsley ends and cauliflower stalks – which were going to go into the “green bin” but I saved. Someone else’s veggie “waste” is my soup stock base!

    Black Bean and Veggie Hash:

    3 cups cooked black beans

    1.5 cups cilantro, chopped

    3 tbs bacon fat and/or olive oil

    1 cup onion

    2 cups thinly sliced zuchini

    1-2 cups corn kernels

    juice of one lime

    1 tbs cumin

    pepper to taste

    Method:

    Saute onion, zucchini, and black beans in fat and/or oil. Add cilantro, cumin and corn. Saute until veggies are soft, caramelized and flavourful. When finished add lime juice and pepper to taste. Makes an amazing lunch or side dish. And you can always add 2-3 cups of veggie broth to leftovers for a delicious soup following day.

    Enjoy the rest of summer and happy slurping!

  • Sunny Sunny Days

    Sunny Sunny Days

    We are all ruled in someway or another by the big burning circle in the sky; we crave it after days go by with out it and we curse it away when it’s too hot. Sweltering days call for cool delicious foods high in water content – as beer and bubbles only keep us mildly hydrated no matter what we tell ourselves.


    Enter watermelon poke.


    If you eat at anyone of our amazing local sushi joints you will probably recognize the “poke” part as a dish commonly made with ahi tuna marinated in a sesame-soy dressing. (Personally, it’s one of my go to’s and I can easily crush an entire bowl to myself.) So when on a blistering hot day one of my favourite blog sites posted a recipe replicating this traditional Hawaiian dish using watermelon I was beyond excited. I immediately biked to the grocery store, bought a watermelon, got extremely sweaty in the process and ate the crap out of the final product… and so has everyone else I’ve fed it too.


    Here’s my take on 101 Cookbooks recipe: the link will take you to the actual recipe if you don’t like free balling like me. I also prefer to make it a day or few hours before consumption to allow the watermelon to marinade and soak up all the sauce.


    Step Uno: Deal with your watermelon.


    • Slice a bunch into small cubes ½“ – 1” cubes, I like a good variety of sizes. Use a small to medium sized melon depending on how many folks your feeding.


    Step Two: Make your sauce.


    • Combine the zest & juice of one lemon (or lime whatever is on hand), some ponzu, rice wine vinegar and sriracha (to taste) then whisk in some sesame oil and avocado oil.


    Step 3: Combine everything together and let sit in the refrigerator until you’re ready to eat!

     IMG_5090

    Step Quatro: Dress it up.


    • Serve topped with green onions, sesame seeds and long ribbons of cucumber or daikon radish.

    IMG_5096

    Don’t forget to save some slices of watermelon for the kids and the hound!

  • Soup for a Future Rainy Day – Curried Lentil Cauliflower Soup

    Soup for a Future Rainy Day – Curried Lentil Cauliflower Soup

    We had a cool period for a bit recently and being on the coast, it was a good opportunity to bring out my soup pot. Back into a heat wave so save this one for the next cool spell. I didn’t get a photo of it but it was a hit with some children I served it to as well as adults. Attached is a photo of some beautiful Squamish salal.

    Curried Lentil Cauliflower Soup with Coconut Milk and Cilantro

    Ingredients:

    3 tbs pure olive oil

    2 leeks, cleaned and chopped

    1 fennel bulb, chopped

    4 tomatoes, chopped

    1 medium cauliflower, chopped

    1 cup cilantro, chopped

    6 cups chicken broth

    1.5 cups red lentils

    2 tsp salt

    2 tsp pepper

    2 tbs cumin

    1 tbs curry powder

    1 can full fat coconut milk

    Method:

    Sauté leeks in olive oil on medium low heat until caramelised. Add all other vegetables and cilantro, and sauté until soft and caramelised.

    Add broth and lentils and coconut milk.

    Bring to boil and simmer 20 minutes.

    Blend half of soup in blender until smooth and adjust salt and pepper to taste.

    Garnish with chopped cilantro if desired.

  • Rhubarb, rhubarb, rhubarb…

    Rhubarb, rhubarb, rhubarb…

    Having already written a couple of posts with sweet recipes I was convinced that my next inspiration would be of the savoury variety. That was until my physio mentioned she had lots of rhubarb growing in her garden (it’s currently in season) and did I know of any recipes.

    Well, that got my inquisitive side poring over Pinterest trying to find the perfect rhubarb recipe for her. I found cakes, pies and mojitos and shared a few I thought easy and suitable. However, some were deemed too complicated and one recipe was overlooked due to the lack of an oven; but not in my kitchen! And so it happened that was the recipe I tried when just the right amount of rhubarb turned up on my doorstep! (Plus the recipe calls for a bundt tin which I have a slight obsession with at the moment!)

    I had been looking for a recipe that I thought would bring out the fresh, slightly tart, flavour of the rhubarb but still with just the right amount of sweetness and this Lemon Rhubarb Bundt Cake, from BC food blogger Warm Vanilla Sugar, fit the bill exactly!

    DSC00089

    Of course, I did not intend to eat this cake all by myself, particularly given the weight loss crusade that I am currently on, so it was shared with friends. Plus a large chunk was also offered back to the rhubarb provider, and well received at that!

    Hopefully you can get your hands on some rhubarb before it is out of season and give this cake a try. I can guarantee it won’t last long!

    PS I promise the next recipe will not be a cake!

    Ingredients

    For the cake:

    • 1 cup (2 sticks) unsalted butter, softened
    • 1 3/4 cup granulated sugar
    • 2 lemons, zested
    • 3 eggs
    • 1 tsp pure vanilla extract
    • 2 1/2 cups + 2 tbsp all-purpose flour, divided
    • 1 tsp baking powder
    • 1 tsp Kosher salt
    • 3/4 cup buttermilk
    • 3 cups rhubarb, diced in 1/2-inch pieces
    For the Lemon Glaze:
    • 2 cups icing sugar
    • 1 lemon, juiced
    • 1 tbsp melted unsalted butter (FYI I didn’t use)

    DSC00074

    Directions:

    1. Preheat oven to 350 degrees F. Grease and flour a bundt cake pan. Set aside.
    2. In the bowl of a stand mixer, or a large mixing bowl, beat together the softened butter, sugar and lemon zest until light and fluffy, about 3-5 minutes. Scrape the sides of the bowl with a spatula and then add the eggs, one at a time, until fully incorporated. Mix in the vanilla.
    3. In a large bowl, whisk together 2 1/2 cups of flour, baking powder and salt. Add 1/3 of the flour mixture into the egg mixture along with 1/3 of the needed buttermilk and mix on low speed. Alternate with flour and buttermilk until both are fully incorporated.
    4. In a medium bow, or large ziplock bag, toss the rhubarb with the remaining two tablespoons of flour until the rhubarb is well coated. Gently fold rhubarb into the batter with a rubber spatula until it’s distributed evenly.
    5. Turn out cake batter into the prepared pan, using a spatula to gently spread and level it out.
    6. Bake for about 60-70 minutes, or until the cake springs back gently when touched and a toothpick inserted into it comes out clean.
    7. Allow cake to sit and cool in the pan on a wire rack for 30 minutes.
    8. Meanwhile, make the glaze by whisking together all the glaze ingredients until smooth. Thin with extra lemon juice or thicken with more powdered sugar as you see fit.
    9. When the cake is cooled, tip it out onto a serving plate and generously drizzle cake with the lemon glaze.
    10. Slice and enjoy.
    11. Yields 12 slices but it depends on how big your slices are! 😉

    DSC00094

  • The Time is Coming Soon…To Pick the First Ripe Saskatoons!

    The Time is Coming Soon…To Pick the First Ripe Saskatoons!

    I never liked saskatoon berries when I moved to Pemberton. What was the fuss about? The little things were grainy and full of seeds. I was not impressed although I knew people who adored them. Years passed, and each year I ignored the little purple berries that grew so plentifully around me. Then one day I looked down in my yard and it was covered in little shrivelled saskatoons. They had dropped off the tree and the sun had dried them out. I popped one in my mouth and the flavour was unexpectedly…fantastic. Like a raisin or currant but better. I scooped up all the berries I could and gobbled them up.

    The next year I purposely dried a few cups of saskatoon berries in a dehydrator and used them in a cracker recipe with rosemary, substituting saskatoons for raisins. Then two years ago I started enjoying the taste of fresh saskatoons. I will now paw through all the trees in my yard like a bear and cram them into my mouth. Yes, my taste buds really have changed. I eagerly anticipate the arrival of these little berries now.

    As a non-gardener (I am pretty much successful with only rhubarb, raspberries, apples, plums and cherries – and possibly parsley and cilantro if I’m lucky) saskatoons are an amazing return on zero investment. No watering, no weeding. My kind of berry!

    My granola recipe which follows is adapted from my aunt’s recipe. We share an enthusiasm for a dry granola (not soggy or moist) that stays crunchy in milk. Many granola recipes call for oil which I think is not a good ingredient in granola. After your granola is baked, add a cup of dried saskatoons for a Pemberton treat!

    Crunchy Almond Granola with Dried Saskatoons:

    2/3 cup unsweetened shredded coconut

    2 cups chopped almonds (almond pieces should be the size of gravel)

    3 cups slow oats

    ½ tsp. salt

    2 tsp. cinnamon

    ½ cup runny honey (warm on very low heat if hardened)

    1 cup dried saskatoon berries

    Method:

    Preheat oven to 300F.

    Combine all ingredients (can use a mixer). When fully combined, add honey. Mix very well.

    Spread onto two parchment-lined rimmed baking sheets.

    Bake for approximately 30 minutes, stirring the granola thoroughly every 10 minutes. You must watch granola carefully as it will burn quickly and every oven is different.

    Cool.

    Add 1 cup dried saskatoons.

    Mix well and store in glass jar in fridge for up to several months. Granola and plain Greek yogurt makes an easy, quick, and nutritious breakfast! Enjoy!

    IMG_6291

  • Nootka Rose Jelly

    Nootka Rose Jelly

    For me the art of slowing down and smelling the roses has turned into taking advantage of the surplus of this native shrub behind my house, plucking their petals and creating something delicious. As it is in my garden where I rarely follow my planting plans the same holds true to my style of cooking; recipes are but a base. I’ll admit my first batch, from a recipe I followed, did not set. This led me to taking matters into my own hands, going with the flow and trusting my strong sense of jamming. So, queue up some Bob Marley as I guide you to making your very own wild rose jelly.

    INGREDIENTS

    ≈4 cups wild rose petals, lightly packed

    4½ cups boiling water

    ¼ cup fresh lemon juice

    5½ cups sugar

    2 pkgs liquid pectin

    Other: cheesecloth, jars, lids, tops, a big pot & lots of love

    Start by foraging for rose petals: try to pick in areas away from the roadside and pick higher then a dog may pee! Give them a small bath in the sink to get rid of the majority of bigger bugs and pick out any of the greens. Don’t stress too much about getting everything, as you’ll end up straining the lot later. Place them in a nonreactive bowl, cover with the boiling water and allow steep for 1-2hrs. The petals will lose their colour and look quite dull but patience is key here.


    While your petals are steeping prepare your jelly vessels. This recipe makes approximately 8-9 cups of liquid gold; I use a mishmash of 125ml and 250ml jars and usually prepare a few more then what’s needed, just incase. Wash every thing then put the lids and tops in a pot submerged in water and place on the stove over medium-high heat. Jars can go on a cookie sheet in the oven at 250°F. You want these to sit in their respective mediums for at least an hour.

    When you’re satisfied with how long the petals have steeped or you can’t wait any longer get ready for some magic. Add the lemon juice and watch the water go from blah to vibrant pink! It’s science.


    Pour the petals and water through a strainer lined with cheesecloth straight into a big pot squeezing all the liquid out that you can. You want 4 cups of rose water; if you’re a bit short just add a bit of filtered water. I found this recipe made the right amount of water so you should be fine but feel free to measure if you’re not sure. I like to wing things. Add the sugar and bring up to a boil, stirring to ensure all the sugar incorporates into the rose water. Once at a  hard boil keep it here for 2 minutes skimming any foam off the top. After the time has elapsed remove from the heat, add the pectin and stir to combine for 5-6 minutes – no less – more is okay but no less.

    Now you’re ready to put your creation into jars and await the sweet satisfying sound of popping lids. Some recipes call for a water bath to finish the canning process but I’ve never done that. I just go with what my mom taught me, which is what’s outlined here, and it’s never failed me just like her.

    IMG_4022

    This simple tasty treat can be enjoyed may ways but my favourite thus far is on coconut ice cream or straight out of the jar… Happy jammin’!

  • Wildflower Gummies!

    Wildflower Gummies!


    20180509_1701241
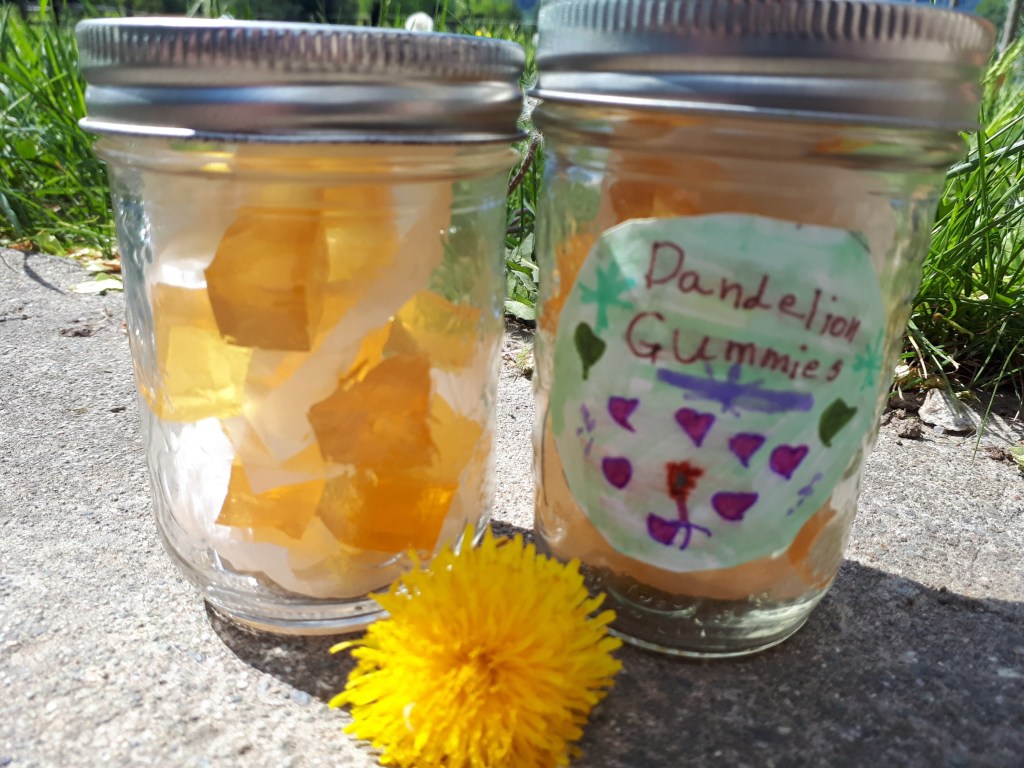
On May 11, I hosted a camp where we were supposed to make dandelion jelly. I had all these beautiful ideas in my head about the kids picking a huge bowl of blossoms out in the back field with the bees and other pollinators, their, fingers becoming stained yellow with pollen… how romantic. Of course, this is not how it happened in real life.

    “Jelly, what’s that?” one of the girls asked.

    “Well, it’s like jam, except there are no chunks in it, and we can make it from flowers!”

    “THAT SOUNDS GROSS!!” They replied in chorus. “EWWWW! WE ARE NOT MAKING THAT!! DISGUSTING!!”

    Well, that stumped me. For a moment.

    “Wait… we could make dandelion GUMMIES. Would that be better?”

    “YES!!” It was unanimous. GUMMIES were obviously WAY better than jelly.

    While we were waiting for our gummies to set in the freezer, we went outside and picked dandelions in the front yard. I showed the girls something my dad taught me when I was a little kid: that if you pick the largest dandelion stem you can find and take off its flower, it makes a noise like a kazoo! It takes a bit of patience to find the right stem, and sometimes you have to break it shorter and shorter before it will start to make  noise. It’s some kind of magic that happens when the dandelion milk in the bottom of the stem starts to vibrate, so it helps to have a juicy one! Two of the girls got bored and wandered away to play tag with Vinnie the sheep. But Avery was very excited about playing dandelions. “This is the best day of my life!” she exclaimed. “Now I can annoy everyone FOREVER!”


    20180511_142337
    Our gummies after being cut into bite sized morsels!

    As we cut up, divided up and packaged our very own homemade dandelion gummies, I realized this gummie making is an incredible way to get even the most squeamish of kids interested in the world that is growing all around them. If seasonal edible flower gummies can lead them to being able to identify a few species growing in their own back yard, then they learn to have a relationship with that particular plant, and that relationship can be a gateway to curiosity. In what other ways that plant can be used? What kind of environment does it like to grow in? Knowing a single plant intimately is enough to make the natural world come alive. I bet that even from reading this post you will notice dandelions more. Your awareness of them will become sharper, more open. And this kind of curiosity- this relatedness- is precious. It leads to a sense of belonging to the maze of green abundant life that exists outside our windows, the same way that knowing a friend in a crowd makes being amongst that many strangers less overwhelming. So if all we need is a few cups of cane sugar to kindle this relationship, then so be it!

    20180511_1432542
    Posing with our finished product!

    And don’t worry, I am going to give you recipes. I am also going to acknowledge I am leading you on a little, as dandelion season is almost completely over in Pemby. Don’t worry, you can use any edible fragrant flower to make your gummies. That means, lilacs = yes. Peonies = yes. And those wild roses that are just starting to bloom? Yes, you can use those too!!

    First, you need to make a flower syrup. I make mine in big batches, as I like to be able to keep some to make into summer drinks (a few tbsp and a bit of mineral water over ice on a hot day = heavenly). Please note that the syrup recipe is not intended to be canned, as the proportions are not tested for safety. So please keep your syrups in the fridge! I am confident you will use them up before they have a chance to go bad. This recipe makes about 6c of syrup, which is quite a lot. You can always halve or quarter the amounts if you want to make a smaller batch.

    Wildflower Syrup:20180509_165901

    2c flower petals

    4c cane sugar

    5c water

    1 organic lemon, sliced

    1. Prepare your flowers. It is best to harvest them in full sun at the height of the day. (From noon to 3 pm.) That way the flowers will retain the most potency and fragrance. Whichever kind of flower you are using, do your best to use only the petals. (In the case of dandelions, this means removing the green base of the flower.) Use flowers as close as you can to the time of harvest, as they will lose potency as soon as they are picked.
    2. Bring the water to a boil and add the cane sugar and stir until dissolved.
    3. Add flower petals and sliced lemon and cover your pot or bowl with a tea towel or cheesecloth to keep out flies, and leave out at room temperature to infuse for 2-4 days, stirring once per day. You want to optimize the length of your infusion without your syrup starting to ferment. If you see lots of bubbles or you are happy with the flavour, it’s time to move onto step 4…
    4. Strain and bottle your syrup. Enjoy!


    Wildflower Gummies 20180511_1440321

    1c flower syrup

    3pkj (3tbsp) gelatin*

    1. Find a mould for your gummies. I used the bottom of a tupperware container and cut them into squares, but you could get super creative here. You don’t need parchment or non stick spray or anything.
    2. Heat your flower syrup until just before boiling. Separate 1/4 -1/2 c of syrup and shake or whisk the Gelatin into it. (I used a small Mason jar and shook it to combine the gelatin, then strained out the residual lumps using a tea strainer as I feel you get less foam this way.)
    3. Add the gelatin mix to the rest of your syrup, stir well to combine, then pour it into your mould. If foam has accumulated on top of your gummy, skim it off with a spoon.
    4. Let your gummies set. I put mine in the freezer, but if you are not in such a rush you can just leave them out.
    5. To get your gummy out of the mould, dip your mould into warm water for a few minutes (being careful not to get water on your gummy). Then run a knife around the edge of your mould and you should be able to pull it right out. Don’t be afraid to use your fingers to pull it out of the mould- you won’t wreck it.
    6. Now you can cut your gummy into shapes with a sharp knife or cookie cutter. You could also roll them in sugar and leave them out for a few days is you want a chewier texture. I was happy with mine as they were as I found them already quite sweet. If you don’t go the additional sugar method, I would keep your gummies in the fridge as they do have quite a bit of moisture in them and will mould if they are not devoured within the first few days. Enjoy!

    *I used Knox Gelatin which comes pre-portioned in little paper packages, but I saw Stay Wild has boxed gelatin that is also gluten free!

  • Counting Points – Banana and Chocolate Chip Mini Muffins

    Counting Points – Banana and Chocolate Chip Mini Muffins

    It had to be done. Well, something had to change, and so on 1st April I re-joined Weight Watchers Online. No joke!

    My goal is to lose 10% of my starting weight and then see what happens from there. One thing that is for sure, I have to make better food choices and become a fitter, healthier version of myself. The hard part will be keeping it off and not allowing myself to go back to where I was, and where I was heading. But I have done it before so can do it again, and learn better habits this time round.

    I know that Weight Watchers is not for everyone, and in this village, many people lead such an active lifestyle that they don’t suffer with weight problems. At least they don’t appear to. But for some of us we need to track what we eat so that we can see where we are going wrong and then make a conscious decision to do better.

    The Freestyle programme is different to the plan that I was on before and I am having to learn it all again but, so far, it has encouraged me to eat more fruit for snacks, instead of the junk I was tucking into before. Also I don’t eat meat, with the exception of turkey, chicken and fish which are all zero points on this plan, so I am learning to eat more balanced meals throughout the day. And having the new puppy has helped me become more active as he needs to go for walks every day. I no longer have an excuse!

    However, sometimes a treat is in order, so I looked for a recipe on the Weight Watchers site and found this one for Banana and Chocolate Chip Mini Muffins. They did the trick and were a healthy option. (I even made them better for me as I didn’t have any chocolate chips to hand – bonus! Plus I made a half batch and then shared them with friends so they wouldn’t be hanging around in my kitchen providing an unnecessary temptation). So, I am pleased to share this recipe in an effort to show that diet food doesn’t have to be just salads and that everything in [reduced fat and sugar] moderation can help move the number on the scales in the right direction! Look out for more healthier recipes over the next coming months.

    Ingredients

    • cup low fat vanilla yogurt
    • 1cup fat free skim milk
    • 1cup uncooked quick oats
    • 1tsp vanilla extract
    • large egg, beaten
    • large banana, mashed
    • 11cups all-purpose flour
    • 1cup unpacked brown sugar
    • tsp baking powder
    • 1tsp baking soda
    • 1tsp table salt
    • 1cup mini chocolate chips, divided

    Directions

    1. Preheat oven to 375ºF. Coat 36 mini muffin holes with cooking spray (use three 12-hole pans).
    2. In a large mixing bowl, combine yogurt, milk, oats, vanilla extract and egg and set aside 5 minutes for oats to soften and then stir in banana.
    3. In a separate bowl, stir together flour, brown sugar, baking powder, baking soda and salt. Stir flour mixture into yogurt mixture to moisten ingredients (do not beat – the dough will be very thick). Reserve 1 tablespoon chips; stir in remaining chips.
    4. Spoon batter by heaping tablespoons into prepared muffin holes; sprinkle each with a few reserved chocolate chips. Bake until golden brown and a tester inserted in centre of a muffin comes out clean, about 15 to 18 minutes.
    5. Yields 1 muffin per serving which equals 2 Weight Watchers Freestyle points. (Or 1 point if you leave out the chocolate chips! 😉)

  • New puppy = new cake recipe!

    New puppy = new cake recipe!

    I think I mentioned in my first post that I have a love of baking. I don’t get to bake very often though as that would mean eating it all afterwards, but for visits with friends or special occasions I can make an exception. Well, those two things just happened to collide this past weekend.

    You see, this week my husband and I drove up to Fort St. John, and back, to collect our new puppy. And yes, before you ask, we do both believe in #adoptdontshop but the breed we love is not regularly found at a shelter and we did research our breeder and were satisfied that they were not a puppy farm. Besides, he is a cutie.

    IMG_5053

    And so, for this occasion, it seemed appropriate to bake a cake to take round our friends house while introducing them all to the new puppy. Plus I wanted another excuse to try my Bundt tin!

    I had saved several Bundt cake recipes on Pinterest but this One-Bowl Chocolate Buttermilk Bundt Cake seemed like just the right thing and looked very appetizing in the pictures. I hoped my version would look, and taste, as good.

    Version 2

    Ingredients

    Cake

    • 3 cups all purpose flour
    • 2 cups sugar
    • 2/3 cup cocoa
    • 1/2 tsp salt
    • 1 tbsp baking soda
    • 2 large eggs
    • 1 1/4 cup low fat buttermilk (or standard will do)
    • 1 cup vegetable oil
    • 1 cup boiling hot water
    • 1 tbsp vanilla

    Glaze

    • 1 cup sugar
    • 1/3 cup cocoa
    • 1 tbsp cornstarch (I used 2 tbsp to make the glaze a bit thicker)
    • 1 cup boiling hot water
    • 1 tsp vanilla extract
    • ¼ cup butter

    Directions

    Cake

    1. Preheat your oven to 350F.
    2. Thoroughly grease a bundt pan and then sift cocoa powder over and set aside.
    3. Add all cake ingredients to a large bowl and mix until well blended using a hand mixer.
    4. Bake for an hour (check at 50 mins) or until the cake springs back when touched lightly with a finger.
    5. Remove from oven and let cool completely before frosting.

    Glaze

    1. In a medium saucepan, whisk together the sugar, cocoa, cornstarch and hot water.
    2. Cook, stirring often over a medium heat until thickened slightly.
    3. Remove from the heat and add the vanilla and butter, and stir until the butter melts.
    4. Set your cake over a rack with something to catch all the drips and then pour the frosting over the cake.
    5. Let the frosting set a little before adding sprinkles.
    6. Let set for at least an hour before eating and enjoying.

    I was very happy with the results. It took minutes to put together and everyone really seemed to enjoy it, even going back for seconds (which is good as it meant less to take back home with me). Oh, and everyone loved the puppy too!

    fullsizeoutput_824