Category: pemberton

  • A Bee Journey Vol 2

    A Bee Journey Vol 2

    If you recall from my first post (A Bee Journey Vol 1), I mentioned that getting into beekeeping is not cheap. So how did a frugal girl reduce her start-up costs? She asked her carpenter boyfriend to help her make bee boxes instead of buying them! So, on a Saturday in April, we stopped at Home Depot for wood and spent 5 very productive hours in the workshop, cutting enough wood to make 4 bee hives. While he cut, I gave cutting directions and sanded the newly cut pieces. The total savings were $300, which was about the amount that I had to spend on frames (this is where the bees store their honey, eggs, pollen, etc.) I needed to buy 120 frames for only for 4 hives. Imagine how many you’d need for a 50-hive apiary (that’s around 1500 frames!).

    Then came the fun part, picking paint colours! My favorite colour is teal, so three shades of teal it was. Bees see blue, green and ultraviolet, which means they see colours differently than we do (humans see red, blue and green). So any colour in their spectrum works, but not red. Bees don’t like red! You don’t want too dark a paint as it will increase the internal hive temperature, which will make the bees have to work harder to keep the hive at 34C. This will cause them stress and we don’t want that. Many factors affect honeybee survival and it’s the beekeeper’s job to manage factors that can cause them stress.

    So, now I had unassembled hive boxes and paint. We spent a good portion of a day gluing, nailing and screwing the boxes and frames together. Then another afternoon of painting. And I think they turned out pretty good. Now I just have to be patient and wait for the bees!

    20180505_100027
    The kids started sanding on their own!
    20180428_160430
    Frames, frames and more frames!

    20180505_111059

    20180505_154807
    The finished goods!
  • It’s time to talk Farm Fashion

    It’s time to talk Farm Fashion

    The time has come for a column on farm fashion. All the chick farm columnists eventually get around to a “what to wear” piece, don’t they? This one is all about what happens when fashion is slave to function and haute couture ain’t in it.

    When choosing an outfit for the day, I consider the potential for getting dirty, wet, cold, greasy, dusty, sun-burned, heat-stroked, or photographed for Elle magazine.

    Helmers1_S6A3181
    The cows have very exacting standards. In forage. In fashion, they’re a bit more chill. Unless, of course, you’re wearing leather.

    Evaluation complete, I don yesterday’s work pants, (hopefully, but unlikely) complete with small crescent wrench and pen-knife in the pockets, clean work shirt, work boots (rubber or leather), and make obvious weather-related adjustments. A seasonal ball cap or toque, with occasional forays into wide brimmed sun hats, offers warmth, shade, and hair control. I don’t bother with make-up.

    There are two items in my functional farm-chic wardrobe to which a more detailed examination is due. They score particularly low on fashion but shoot the lights out on functionality; a by no means unusual description for just about everything I wear out there. Let us then consider coveralls, and the mosquito bag net.

    13124927_10153945295231311_8492489048310326032_n
    Anna Helmer gets into her bee-suit, and someone takes a photo and puts it on Facebook.

    Until I went to welding class in the city, where we were required to wear coveralls, I had decided against that look for myself.  I tried wearing them a few years ago and felt about as alluring as an old hockey bag. Never having been what you might call an instinctively feminine dresser, I felt wearing coveralls would sever completely any connection to my embattled femininity. I had to draw the line.

    In welding school I was not given any choice in the matter and I initially bemoaned my baggy figure. Eventually however, I noticed that my good jeans (worn mistakenly to class) stayed clean, protected by the Big Blues (pet name for my coveralls) which got sooty and smoky. Perhaps, I began to think, there was yet wine to be squeezed from this stone.

    rootdown-organic-farm-2
    Sarah and Simone from Rootdown Organics demonstrate the key farm fashion accessories: soiled pants, rubber boots, cute baby who is actually in charge.

    I have come to realize that the coveralls represent a new opportunity for me. I can stay a little cleaner on the farm, and not arrive home resembling a diesel spill in a dust bowl. Not only can I look presentable at the end of the day, but if Elle magazine does happen to show up for a photo shoot, I can be assured of a clean outfit underneath. They will still have to bring their own make-up person.

    plentywildheader
    Alyssa and David from Plenty Wild Farms must have had enough time to shower before their photo shoot. Do farmers really ever look this clean when out in the fields?

    Turning now to the mosquito bag net; my choice for most essential farm fashion accessory.

    In my net I am bug-free; I blithely disregard the scornful sniggering of other slaves to fashion on the farm, slathered as they are in dodgy chemicals, and/or in a high state of denial over the level of torment they endure as bag-less labourers in mosquito country. There is no bigger slap in the face to high fashion than dropping a bag over your head, but neither can I countenance flies in my eyes.

    acrosscreekheader
    Bruce Miller models the ultimate in Pemberton farm fashion, the Slow Food Cycle Sunday t-shirt.

    To conclude, it would be nice to point to an item in my farm wardrobe that is more fashion than function, but I am at a loss. I suppose my pink John Deere ball cap tilts the balance slightly in favour of glam, but looses ground as its grubbiness increases with every passing day of summer. In an uncharacteristic eruption of reckless consumerism, I have purchased a brand new one for this summer.

    Anna Helmer believes farmers are under-represented on the fashion run-way but sort of sympathizes.

    Not being able to stage a photo shoot of Anna’s farm fashion moments during planting season, we’ve poached these illustrative photos of Pemberton’s organic farmers in their sartorial best, from BeyondYourEye.com photography, via the BC Organic Farmers.

  • Bees?   Why not!

    Bees? Why not!

    Several years ago my Aunt had honey bees. My sister Lia, @pembeehives, was cuckoo about those bees. I thought they were pretty cool until I started walking up to the hive and had a massive panic attack. I was certain they could feel my fear and that the whole hive would ascend on me and sting me to death. Death by bees, no thanks!! Since then I have had ZERO interest in raising bees. My sister, on the other hand, has only grown more fond, more bee crazy.

    Last fall, my kids and I moved back into my childhood home. A little house on 2 acres. A small green patch of freedom to plant, grow, raise, and love. I brought my chickens, added a few more to the flock, and then a few more and maybe a few more after that! I also got 2 more horses so that my boy Banjo wouldn’t be lonely.

    B1E27E28-83AD-42F7-93F9-FC24B9F49373

    Horses and chickens, dogs, cats, rats and kids. I was set, and I am busy!!  Then I had a thought. My sister loves bees, maybe she would like to get some bees and they could have a little spot here and she could be the crazy bee lady and I will be the crazy chicken lady and everything would be fantastic!

    Bees? Why not!!

    I forgot about the fact that I was terrified of a colony of bees coming after me while I weeded my garden or fed my horses, stinging me while I was just minding my own business. Lia, @pembeehives, was all in! She was already dreaming of hives, long before I offered.  She and Alex built hives, they brought them up and she painted them with my kids.

    DD4B840E-22C3-4837-9183-7452E7E6B4DF

    The 2 nucs (boxes of bees) were ordered and the site for the hives planned, changed, replanned, changed and planned again. Still, here I am scared of bees. Terrified.

    604D0238-4D5B-40E3-B555-077B48827A2B

    On Saturday, Lia and I went up to Delores’ for a bee keeping workshop. A few hours of listening to Delores talk about bees, watching her take the hives apart, standing closer to a swirl of bees than I ever thought I would, and I discovered that I am no longer afraid of bees!  They are fascinating!

    9A1E2AB7-B7FF-421A-9729-4E6FC3662614

    When I first put our names down for this bee-keepers’ workshop, I was going into it as a non-interested party. I was going for my sister, so that when she wasn’t around I would have a bit of knowledge and if anything needed to be done while she was in Vancouver I could help the hive out.

    In the end, I have had the chance to face my fears and now I can go into this as a partner, not just a watcher. I can go into this beekeeping adventure with less fear and more enthusiasm, though I think I will let Lia hold the reins, and stick, for the most part, to being a crazy chicken lady.

    2F4C3888-B17D-4BD2-91D0-982037710278

    Meg
    Once a farm girl, always a farm girl.

    Follow my farm adventures on Instagram @once_a_farm_girl


  • May Two-Four

    May Two-Four

    There are essentially a couple groups you would’ve fallen into this past weekend: camping, working or planting your garden (ideally a combo). No doubt in my younger years I was way more into packing the truck with a tent, sleeping material, coolers full of beer, sausages, buns, ketchup, cans of beans and chips – lots of chips – and getting the hell outta of Dodge. Now as I age “gracefully” my focus has changed or maybe temporarily wandered and there is also that work thing. The exception is chips; there will always be lots of chips.

    But let’s focus on gardening… What is it about the May long weekend, no matter where you are in Canada, it’s viewed as “the time to plant your garden”? Surely it’s some sort of phenomenon or maybe a myth.

    Firstly, I’d like to draw your attention to a key fact. Our growing zone here in Pemberton is radically different from that of my family in Kenora, Ontario and those in Nova Scotia and Newfoundland. Yet, we all assume it’s totally kosher to plant tomatoes and basically everything else outside the same weekend. We can all also agree that one of our garden’s biggest nemeses is frost. So really, by accepting this planting time frame we are all pretty much assuming that frost is off the plate as of May long weekend. Hereby committing our plants to a life outside producing us a bountiful harvest.

    It’s as if the universe is giving us a chance to all exist on the same plane for a mere moment in time; I’ll take it.

    Here in Pemberton the mercury levels on our thermometers have been reading higher then normal for May. Which has made it easy to get crazy and just start sowing things. And, of course, I am all for this and 100% participated. It speaks to that whole experimental element in gardening that I love. You just have to be ready to face the fact that some things may not survive. Like a game of Monopoly; sometime you pass go and collect $200 and sometime you go to jail. I’m willing to bet the vegetables that prefer the cooler growing season of spring are probably wondering this year like the rest of us why it’s July’ing in May.

    IMG_3880

    Early direct sow experiment with Borage… Status: alive & thriving. Stoked to have this gem in my garden this season.

    Don’t get me wrong, I’m not complaining about the sunshine and the extra early lake dips but I am hot and bothered that my garden already needs to be watered twice a day… I genuinely miss Spring – She was super cool.

  • The trouble with procrastination

    The trouble with procrastination

    One thing I need to tell you right now is this – if you are going to go foraging for stinging nettles do not wear sandals. The other thing I need to tell you is if you want to go foraging for stinging nettles you may have to wait until the spring of 2019.

    Which leads me to the point of this month’s post. Procrastination is not your friend if you want to forage.

    I have been known to procrastinate, especially when it comes to anything I would categorize outside of “work”. This spring I enrolled in a year-long course designed by local Natalie Rousseau called 13 Moons -and I have been learning about foraging and “kitchen witching”. The recipes are so inspiring, and I am excited about deepening my connection to the land and the seasons by incorporating more native plants into my diet.

    nettle tea_May2018

    So far, I have been able to get out there for two stinging nettle harvests and one elderflower harvest. The nettles were steeped into teas and blended into smoothies that I believe have drastically reduced my usual hell storm of hay fever symptoms. The elderflower blossoms were infused into a delightful cordial that has been mixed with Pemberton Distillery gin and soda for drinks on the deck with friends, prosecco for an elegant cocktail at a Mother’s Day gathering and sparkling water for a refreshing lunchtime drink…all with delicious results!

    Checker_elderflower

    I was hoping to get dandelions and lilacs for more cordials and tea infusions but fear I may have missed my opportunity…but maybe I can gather some this weekend? And therein lies the problem, the native plant does not wait for the procrastinator. It may be best to pin my hopes on the next round of edibles on my list – wild roses. I plan to use the petals to make a herbal honey, to infuse with oil for skincare, and to dry for tea blends.

    If you go out foraging:

    • Be sustainable and ethical – don’t overharvest or strip entire plants. Try to harvest small amounts from numerous plants so your forage doesn’t harm the plant and leaves plenty of food for the insects and animals that rely on it for a food source. Always make sure you are prepared to process your harvest properly so it doesn’t go to waste.
    • Be safe – it is always good to cross-reference a couple of resource books and if possible, learn from a real life person who has been wildcrafting or foraging for a long time. Thanks to Dawn Johnson for taking me out on an elderflower adventure!
    • Learn more about Wildcrafting and Foraging from 7song.com (thanks to Natalie Rousseau for sharing this great resource!)
  • Wildflower Gummies!

    Wildflower Gummies!


    20180509_1701241On May 11, I hosted a camp where we were supposed to make dandelion jelly. I had all these beautiful ideas in my head about the kids picking a huge bowl of blossoms out in the back field with the bees and other pollinators, their, fingers becoming stained yellow with pollen… how romantic. Of course, this is not how it happened in real life.

    “Jelly, what’s that?” one of the girls asked.

    “Well, it’s like jam, except there are no chunks in it, and we can make it from flowers!”

    “THAT SOUNDS GROSS!!” They replied in chorus. “EWWWW! WE ARE NOT MAKING THAT!! DISGUSTING!!”

    Well, that stumped me. For a moment.

    “Wait… we could make dandelion GUMMIES. Would that be better?”

    “YES!!” It was unanimous. GUMMIES were obviously WAY better than jelly.

    While we were waiting for our gummies to set in the freezer, we went outside and picked dandelions in the front yard. I showed the girls something my dad taught me when I was a little kid: that if you pick the largest dandelion stem you can find and take off its flower, it makes a noise like a kazoo! It takes a bit of patience to find the right stem, and sometimes you have to break it shorter and shorter before it will start to make  noise. It’s some kind of magic that happens when the dandelion milk in the bottom of the stem starts to vibrate, so it helps to have a juicy one! Two of the girls got bored and wandered away to play tag with Vinnie the sheep. But Avery was very excited about playing dandelions. “This is the best day of my life!” she exclaimed. “Now I can annoy everyone FOREVER!”


    20180511_142337
    Our gummies after being cut into bite sized morsels!

    As we cut up, divided up and packaged our very own homemade dandelion gummies, I realized this gummie making is an incredible way to get even the most squeamish of kids interested in the world that is growing all around them. If seasonal edible flower gummies can lead them to being able to identify a few species growing in their own back yard, then they learn to have a relationship with that particular plant, and that relationship can be a gateway to curiosity. In what other ways that plant can be used? What kind of environment does it like to grow in? Knowing a single plant intimately is enough to make the natural world come alive. I bet that even from reading this post you will notice dandelions more. Your awareness of them will become sharper, more open. And this kind of curiosity- this relatedness- is precious. It leads to a sense of belonging to the maze of green abundant life that exists outside our windows, the same way that knowing a friend in a crowd makes being amongst that many strangers less overwhelming. So if all we need is a few cups of cane sugar to kindle this relationship, then so be it!

    20180511_1432542
    Posing with our finished product!

    And don’t worry, I am going to give you recipes. I am also going to acknowledge I am leading you on a little, as dandelion season is almost completely over in Pemby. Don’t worry, you can use any edible fragrant flower to make your gummies. That means, lilacs = yes. Peonies = yes. And those wild roses that are just starting to bloom? Yes, you can use those too!!

    First, you need to make a flower syrup. I make mine in big batches, as I like to be able to keep some to make into summer drinks (a few tbsp and a bit of mineral water over ice on a hot day = heavenly). Please note that the syrup recipe is not intended to be canned, as the proportions are not tested for safety. So please keep your syrups in the fridge! I am confident you will use them up before they have a chance to go bad. This recipe makes about 6c of syrup, which is quite a lot. You can always halve or quarter the amounts if you want to make a smaller batch.

    Wildflower Syrup:20180509_165901

    2c flower petals

    4c cane sugar

    5c water

    1 organic lemon, sliced

    1. Prepare your flowers. It is best to harvest them in full sun at the height of the day. (From noon to 3 pm.) That way the flowers will retain the most potency and fragrance. Whichever kind of flower you are using, do your best to use only the petals. (In the case of dandelions, this means removing the green base of the flower.) Use flowers as close as you can to the time of harvest, as they will lose potency as soon as they are picked.
    2. Bring the water to a boil and add the cane sugar and stir until dissolved.
    3. Add flower petals and sliced lemon and cover your pot or bowl with a tea towel or cheesecloth to keep out flies, and leave out at room temperature to infuse for 2-4 days, stirring once per day. You want to optimize the length of your infusion without your syrup starting to ferment. If you see lots of bubbles or you are happy with the flavour, it’s time to move onto step 4…
    4. Strain and bottle your syrup. Enjoy!


    Wildflower Gummies 20180511_1440321

    1c flower syrup

    3pkj (3tbsp) gelatin*

    1. Find a mould for your gummies. I used the bottom of a tupperware container and cut them into squares, but you could get super creative here. You don’t need parchment or non stick spray or anything.
    2. Heat your flower syrup until just before boiling. Separate 1/4 -1/2 c of syrup and shake or whisk the Gelatin into it. (I used a small Mason jar and shook it to combine the gelatin, then strained out the residual lumps using a tea strainer as I feel you get less foam this way.)
    3. Add the gelatin mix to the rest of your syrup, stir well to combine, then pour it into your mould. If foam has accumulated on top of your gummy, skim it off with a spoon.
    4. Let your gummies set. I put mine in the freezer, but if you are not in such a rush you can just leave them out.
    5. To get your gummy out of the mould, dip your mould into warm water for a few minutes (being careful not to get water on your gummy). Then run a knife around the edge of your mould and you should be able to pull it right out. Don’t be afraid to use your fingers to pull it out of the mould- you won’t wreck it.
    6. Now you can cut your gummy into shapes with a sharp knife or cookie cutter. You could also roll them in sugar and leave them out for a few days is you want a chewier texture. I was happy with mine as they were as I found them already quite sweet. If you don’t go the additional sugar method, I would keep your gummies in the fridge as they do have quite a bit of moisture in them and will mould if they are not devoured within the first few days. Enjoy!

    *I used Knox Gelatin which comes pre-portioned in little paper packages, but I saw Stay Wild has boxed gelatin that is also gluten free!

  • Garden Journals

    Garden Journals

    Hello everyone, my name is Anni Kolbe and I work for the Sea to Sky Community Services (SSCS) in Pemberton.  My job title for SSCS is a Settlement and Outreach worker for the Pemberton Multicultural Network. So what that means is I help immigrants settle into life in Canada and meet other people.

    In order for people to meet I plan and implement life skill workshops.  Throughout the years I have learned that people in Pemberton will attend your workshops if it relates to food and gardening.


    I wanted to share a workshop I did a few weeks ago at the Pemberton Public Library on garden journals and companion planting.


    A garden journal is a great way to keep track of important information about your garden such as the weather, pests, what you planted and when you planted.  Those are just a few things you can keep track of.

    Take a peek through the slide show to get more ideas of how to keep a garden journal.

    PMN new good logo

  • The Joy of Hummingbirds

    The Joy of Hummingbirds

    The first time I saw a hummingbird was in Sooke, on Vancouver Island, while visiting my boyfriend’s parents. They had several feeders around their property, and the first time one of these minuscule, zippy birds approached, I was completely rapt. I’ve found them fascinating ever since, but we lived in Vancouver, where no hummingbirds dared venture.

    When Nathan and I moved to Pemberton four years ago, his mother Lisa gave us a hummingbird feeder as a housewarming gift. It was December at the time, and I couldn’t wait for spring to arrive to set up our feeder.

    hummingbirdAnd now every year, as much as I look forward to spring for the fresh green scent of new growth and the return of warmer weather, what I really look forward to is the return of the hummingbirds. I get immense joy from putting out fresh, homemade nectar for these precious visitors, and take special care to ensure my feeder is always stocked. (I haven’t planted my garden yet, but I’ve already refilled my feeder twice.)

    Part of my joy comes from being able to watch these fascinating birds closely, as the feeder is located right by our living room window. But a good portion of this joy is from the feeling that I’m helping these tiny creatures by providing them with food. Especially at this time of year, when the flowers are still just returning and nectar is low, and they are vying for the attentions of potential mates. (It must take a lot of energy to execute those dive-bombing shows the males use to impress the ladies.) Since moving here, I’ve learned there’s plenty of wildlife you shouldn’t feed, but thankfully the hummingbirds aren’t one. It gives me joy to feed these birds, while they in turn feed my joy.

    Hummingbirds can be seen as a symbol of lightness, for the incredibly light way they move about their world. They can help remind us to try to use similar lightness in the way we move through our world. To leave gentle footprints on the Earth, to care for one another, and to treat everyone with gratitude and respect. So here’s to spring, here’s to joy, and here’s to the hummingbirds.


  • Unexpected Lessons on Permaculture and Community

    Unexpected Lessons on Permaculture and Community

    When I used to think about permaculture, I thought of it more like the “old way of gardening”. Less intensive, lots of diversity, a closed loop system that tries to reduce our impact on the earth. A systems thinking that uses everything in multiple ways. Gut Gardening. Intuitive.

    But, as I was reminded earlier this month during the (FREE) one day course on permaculture by Permaculture Design at Quest University, permaculture principles are rooted in science, and way more complex.


    Doing the right thing for the planet, for the patch of soil you are stewarding, is backed by scientific research. For my rational Western mind that sometimes needs things to be “scientifically proven,” that goes a long way. Science, fused with community. Science, fused with growing food, shelter, plants and systems that are good for the earth. Science, and changing our thinking patterns. Taught by the dynamic duo Delvin Solkinson and Kym Chi, the opportunity to attend with a carful of amazing girlfriends and kick ass gardeners was the recipe for a perfect day. Yes please.

    image005

    The term permaculture was coined back in the 70’s by founder Bill Mollison. The Permaculture Research Institute tells us that permaculture

    “is the conscious design and maintenance of agriculturally productive ecosystems which have the diversity, stability, and resilience of natural ecosystems. It is the harmonious integration of landscape and people — providing their food, energy, shelter, and other material and non-material needs in a sustainable way.”

    image001

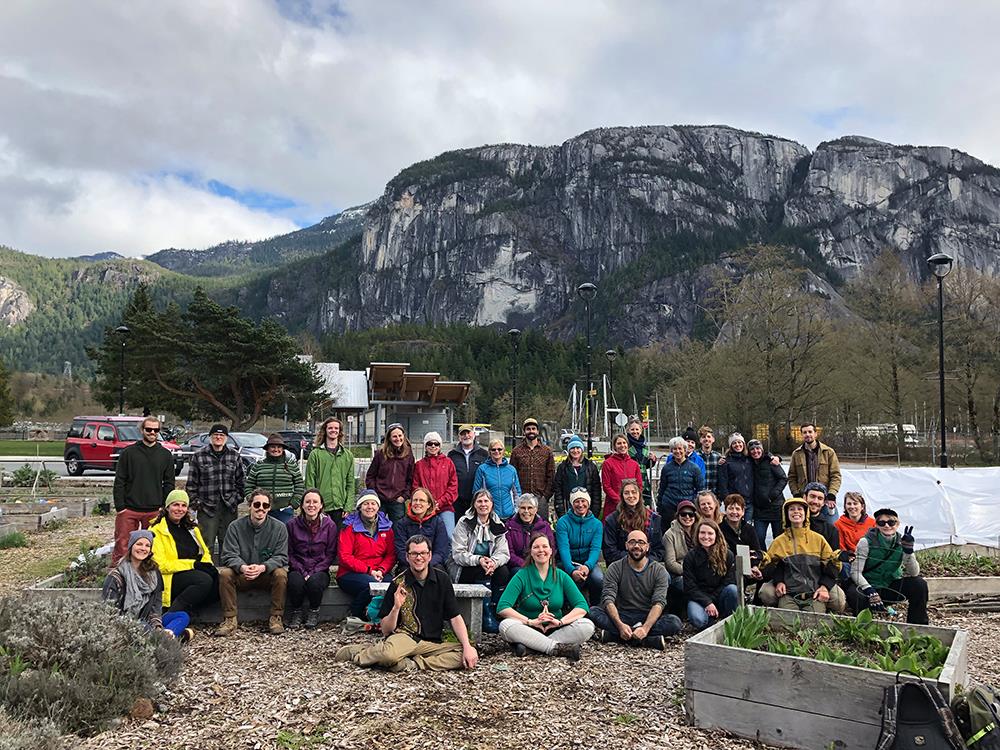
    At the start of the day, fifty-five people sat in a circle – from all walks of life, many young, fresh students, but also many people in their later years. We shared what brought us there. It was everything from wanting to learn how to better compost, to learning more about plants that can help heal the earth. Gardeners who operate more in their heads and want to operate more from their hands/hearts. Pioneers who want to explore the feelings of plants. I admit I was guarded in that space. It had been a while since I had sat in a room with chimes to focus our attention and teachers who ask us to take a deep breath and sit with our thoughts. It took a bit for me to settle into the vibe and be open to the experience. Clearly, I need to re-establish my yoga practice!

    Kym and Delvin said over and over during the course of the day: think about the “problems” as opportunities. Have weeds? How can we use them? (Living mulch, compost, re-evaluate if they are actually a problem. Feed your chickens…) A challenging slope on your land? Why not plant an orchard and incorporate bioswales to manage your irrigation challenges and needs?

    image002


    But what resonated so strongly had less to do with gardening and more to do with community. That, and this statement made by one of our teachers that gave us permission to be OK with where we were, as individuals, and society. “Don’t shit on yourself for not knowing, not doing. Don’t shit on others for not knowing, not doing.” Another yes please.

    But by the end of the day the shift was apparent, empowering, and so positive I was actually  moved to tears. Yes – lots of great permaculture tips that apply to any space. But what I loved the most was the warrior cries from people fed up with bullshit happening on a day to day basis that we all know is wrong. People inspiring each other, revolutionizing on a micro or macro scale. People swapping problems for solutions.

    image004

    At the end of the day we shared what we got from the course, what we wanted to do. A grey-haired lady cried: “I am telling my council that I AM putting a garden on that strata lot!”

    From others I heard,

    “Put the earth first!”

    “I am going to plant a garden in that round-a-bout!”

    “If you listen, music is everywhere!”

    “I am going to make a spiral garden!”

    As I reflect on this experience now, almost a month later, I wonder about the seeds that may have been planted that day, ideas sitting below the soil surface needing the heat, the light, the energy to transform into action. How many ideas passed that tipping point? Who is going to start the permaculture food forest in Pemberton? Turn a strip of downtown Squamish dirt into a haven for bees, food for families? Change the thinking patterns of the stuffy strata intent on ridiculous lines, rules, pavement? Who wants to raise a permaculture “army” with me?

    So thank you from the bottom of my heart to Delvin and Kym. The work that you are doing is crucially important. Absolutely inspiring. For anybody who missed that magical day at Quest, I would like to bring this team to Pemberton in June. (Please get in touch with me if you are interested, or want to help fund this). They also have more free days coming up.

    image003

    And until then, Pemberton – don’t forget about the Women’s Institute Plant Sale coming up soon on a Saturday 5 May, 9am to 12 noon at the Legion Parking Lot – the sign with the date is up at the concrete barren round-a-bout. Oh, did someone say round-a-bout? Warrior-guerilla-gardener-lady, if you are listening, we, and the world, need you!
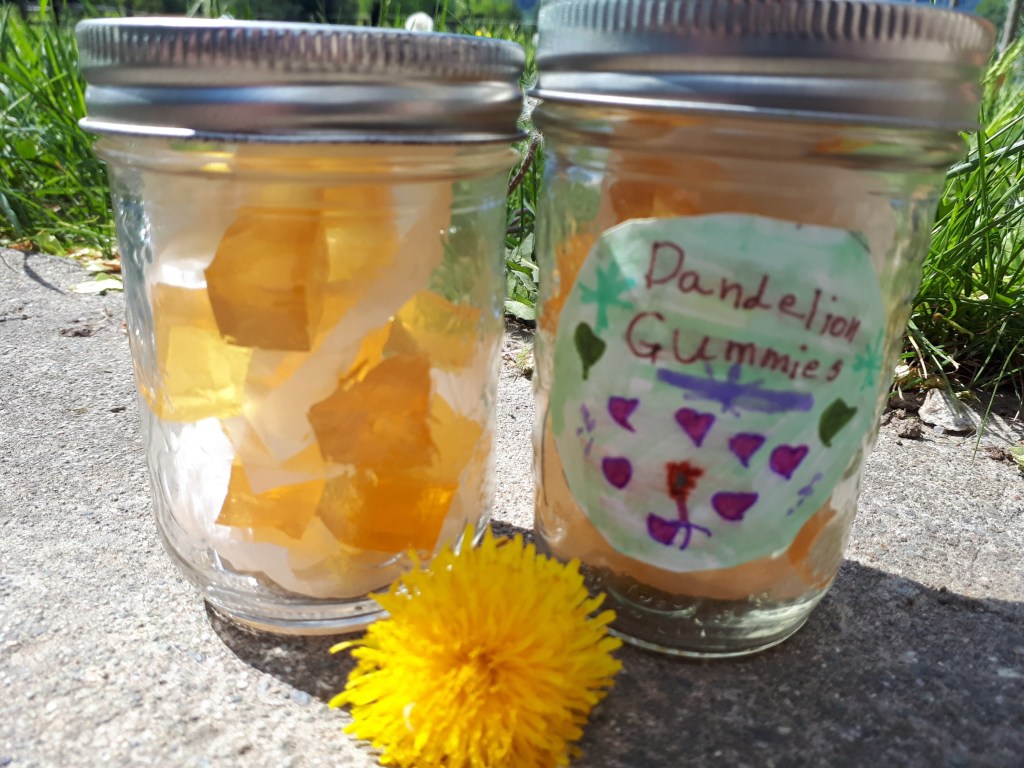


  • A Bee Journey Vol. 1

    A Bee Journey Vol. 1

    I’m very good at multi-tasking.

    I’m writing this while at a three day craft market in Vancouver selling my handcrafted shrubs (Thirsty Whale Elixirs – small batch cocktail mixers made with organic apple cider vinegar, fruit, and cane sugar) and sending emails for my full time job. You might say, “I’m busy as a bee!” – so why not add another hobby on top of sewing, crafting, making sourdough and helping with our family’s brewery (Pemberton Valley BeerWorks)?!

    I have always wanted to have bees. Growing up, my Grandfather had bees (Don Miller of Miller Meadow Farms – now Across the Creek Organics). I have memories of his hives out by the rhubarb and grape vines – little white boxes of magic. Memories of full gallon jars of liquid gold in Grandma’s pantry. Memories of covering her homemade biscuits in sugary love. He eventually had to stop beekeeping as he developed a bee sting allergy (And this being Pemberton in the ‘80s with no EpiPens available and only a small clinic a 15 minute drive away, I totally understand why he stopped.).

    My first time “getting my hands dirty” or sticky in a hive was about 8 years ago on the farm when my Aunt got her first hive. I had no idea what I was doing, but no one got stung and we harvested 11 liters of amazing honey. Unfortunately, the hive didn’t survive the winter and now I have inherited some of her equipment.

    Beekeeping is not a cheap hobby, but if you are lucky and not too greedy you can make some money selling honey to family and friends. Why not be greedy? Well, bees collect flower nectar and convert it into honey, (honey is their carbohydrate and pollen their protein), so they need to store enough of both to last through the winter.

    In preparation for receiving my first two bee nucs (or nucleus, a small bee colony made from larger ones) at the end of May, I have taken a three day beekeeping course, read four books, talked to local bee keepers, watched countless educational videos online, and I still don’t know anything!

    The real learning will come once I get my hands sticky again. And then even after a few years, I still probably won’t know enough.

    All I can say is that I’m fascinated by Apis Melifera (the Western/European Honey Bee) and I can’t wait to learn more and share my journey with anyone who wants to read about it!

    You can follow my journey on Instagram @Pembee_Hives.