Author: Erica Osburn

  • Professional-Quality Ham and Pea Soup

    Professional-Quality Ham and Pea Soup

    I have experimented for quite a few years with ham and pea soup – switching out the green peas for yellow peas. The yellow peas never softened enough for a good soup and they varied a lot from brand to brand. Green peas soften well. Of course, it helps to simmer your soup for at least 3 hours. A UK friend of mine who used to cater large events called it “the best ham and pea soup I have ever had”. Thanks to that high praise I am posting it today. Pemberton ingredients include carrots, and if you have a source, the ham itself. This soup goes well with a nice piece of warm cornbread. I like the recipe out of the ReBar cookbook by Audrey Alsterburg and Wanda Urbanowicz – an incredibly well-written and inspiring cookbook by two Victoria chefs.

    Professional-Quality Ham and Pea Soup:

    Ingredients:

    1 large ham bone with about 2-3 cups of ham still on it (after baking a 4-5 lb bone-in ham the night prior)

    1 bunch green onions, chopped

    2 tbs pure olive oil

    2-3 cups chopped green cabbage

    2 large carrots, chopped

    1.5 cups parsley, chopped

    8-10 cups water

    1 450-gram bag of dried green peas

    2 tsp pepper

    Method:

    Sauté green onion in olive oil.

    Add cabbage, parsley, carrots, and pepper and sauté until well caramelised.

    Add ham bone, water, and green peas.

    Bring to boil.

    After soup comes to a boil, turn heat down and simmer 3-4 hours.

    Remove ham bone and go through the ham that has fallen into the soup to make sure no gristle or pieces of fat remain in the soup.

    Remove all large ham pieces and cut into bite-sized pieces and then put back into soup. Enjoy!


  • Ginger Chew cookies – Healthified!

    Ginger Chew cookies – Healthified!

    These cookies are adapted from the Silver Palate Cookbook – a staple cookbook in the kitchens of my mother, aunt and gran in the 1980s. I have always loved their “molasses cookies” but in the past few years I have given up baking with white flour. I made this version healthier with 50% less sugar than the original recipe, spelt flour, and also some almond meal. They are very good. They do not feature heavily in Pemberton-area ingredients – except the egg – but today the weather was cold, stormy and winter-like, so ginger cookies seemed like a good match.

    Ginger Chews: (Yield: 21 cookies)

    Ingredients:

    6 oz unsalted butter

    ½ cup white sugar

    ¼ cup molasses

    1 large Pemberton egg

    1 ¼ cups spelt flour

    ½ cup almond meal

    ½ tsp baking soda

    ½ tsp ground cloves

    ½ tsp ground ginger

    ½ tsp salt

    1 tsp cinnamon

    Method:

    Preheat oven to 350F. Melt butter on very low heat in a medium saucepan. Add sugar, molasses, and egg and mix well. Then add the rest of the ingredients and mix well. Place 1 tbs balls of cookie dough on 2 parchment-lined cookie sheets. The cookies spread a lot when baking so leave 3 inches in between the cookie dough. Bake for 12-14 minutes. Cool for 15 minutes.

    Enjoy!

  • Mini Open-Faced Chicken Pot Pies

    Mini Open-Faced Chicken Pot Pies

    “I only had one bite but it was amazing.” – Austin, age 9

    These mini pot pies were a hit with my age 9-12 year old kids cooking class I teach each week. I also teach a teen class. The pot pies can be adapted to throw in many different veggies, and they might be a good addition to the lunch box. Keeping them open-faced means they are less stodgy, with more protein and veggie filling to focus on, instead of excessive pastry. Enjoy!

    Mini Open-Faced Chicken Pot Pies: (Yield: 24 muffin cup-sized pies – you may have leftover filling and pastry for a large standard pie plate-sized pot pie also)

    ½ cup to 1 cup pure olive oil

    3 medium yellow potatoes, finely diced

    2 cups parsley, finely chopped

    1 large yellow onion, finely chopped

    3 stalks celery, finely diced

    2 Pemberton carrots, finely diced

    1 large red pepper, finely diced

    3 cups brown mushrooms finely diced (you could try other varieties)

    2 lbs chicken thighs (boneless and skinless) chopped into small pieces about 1 cm in diameter

    2 tbs butter

    2 tbs pure olive oil

    3 cups no-salt chicken broth

    2 tbs spelt flour

    2 tsp pepper

    2 tsp salt


    Pastry:

    1 box Tenderflake lard

    5 cups spelt flour

    1 egg

    1 tbs white vinegar

    2 tsp salt

    Water

    Method:

    Sauté veggies. Heat ½ cup pure olive oil in large pot and sauté all veggies, order not important but all veggies need lots of time to sauté. When well caramelised, add 3 cups of chicken broth and spelt flour.

    In separate pan, sauté chicken pieces in 2 tbs butter and 2 tbs pure olive oil, until cooked through. Add 1 tsp pepper. When cooked thoroughly, add chicken to finished veggie mixture.

    Make pastry:

    Measure flour and salt into large bowl. Add lard. Mix until incorporated. Add one beaten egg in a liquid measuring cup with 1 tbs vinegar and fill the rest to the one-cup mark with water. Mix together. Roll out. Cut into circles about 5 cms wide. Place into muffin cups and press down snugly to form a cup.

    Fill cups with veggie and chicken mix.

    Bake at 400F for 20-25 minutes.

    Cool and eat. Enjoy!!

  • A Six O’Clock Solution for Deer Meat…You’re Welcome.

    A Six O’Clock Solution for Deer Meat…You’re Welcome.

    After many years of trying to incorporate deer meat into quick last-minute dinner dishes – and failing – I am happy to report that I have a solution to those last-minute woes. The answer is a jar of Classico pasta sauce – the Italian sausage variety! By chance I tried it one night and it actually complements deer meat.

    I have turbo-charged it with a whole cauliflower and some parsley for flavour. But this is an easy last-minute dinner for anyone with deer meat in the freezer. Unfortunately I’ve had to throw out many deer meat experiments over the years. So here’s hoping you enjoy this one, as deer meat has a particular flavour that does NOT mesh well with any old jarred sauce!

    Quick & Delicious Pasta Sauce for Deer Meat:

    3 tbs pure olive oil

    1 large yellow onion, small dice

    1 cup chopped parsley

    1 whole medium cauliflower, small dice

    1 tsp pepper

    Salt to taste

    1 lb ground deer meat

    1 jar Classico pasta sauce (Italian sausage, peppers and onions variety)

    Method:

    Sauté onion parsley and cauliflower in olive oil over medium low heat until caramelised. Add pepper.

    In separate fry pan, brown deer meat.

    Add meat to cauliflower mixture.

    Add sauce.

    Simmer 5-10 minutes.

    Serve over a whole grain pasta such as spaghetti or penne. Enjoy!

  • A Veggie-Laden Twist on Shepherd’s Pie 

    A Veggie-Laden Twist on Shepherd’s Pie 

    Shepherd’s Pie is another great dish for experimenting with. It is also great comfort food on a winter evening! Lately I have been omitting tomatoes and garlic from my recipes. I don’t love garlic in particular and I am cutting back on acidic tomatoes. Eliminating these two ingredients is a challenge, as they pack a lot of flavour.

    With a lot of time in a good cast iron Dutch oven, you can bring out the flavour in SO many veggies. For shepherd’s pie you can experiment, but this time I used: 1 cup diced green cabbage, ½ an eggplant, a large yellow onion, 2 cups parsley, and several healthy dashes of Worcestershire sauce – as well as S&P.

    If you sauté those veggies at a low-medium heat for a good ½ hour – or more, you will have the flavour you want. And not have to resort to tomatoes for zing, or the usual garlic! The other veggie-friendly thing I did was steam a whole cauliflower and then mash it along with 8 fingerling potatoes, with plenty of butter and salt and the cauliflower steam water. All in all, this shepherd’s pie was a hit, and had tons of servings of nutritious veggies in it to boot. This is my re-boot of the usual “carrots, peas and corn” shepherd’s pie – which by my palate has had its day!

    Veggie Turbo-Charged Shepherd’s Pie:

    Ingredients:

    3 tbs pure olive oil

    ½ eggplant, small dice

    1 cup green cabbage, small dice

    2 cups parsley, chopped

    1 large yellow onion, small dice

    1 tsp pepper

    2 tbs Worcestershire sauce

    1 lb ground Pemberton-area deer meat, or grass-fed lean ground beef

    1/3 cup unsalted butter

    1 medium cauliflower

    8 small yellow potatoes (Pemberton Sieglindes are a treat)

    Salt to taste

    Method:

    Sauté all veggies (except cauliflower and potatoes) until well cooked and caramelised in cast iron Dutch oven.

    Brown deer meat/ground beef in a separate cast iron fry pan, then and add to veggie mixture.

    Add ½ cup chicken broth and 2 tbs cornstarch. Mix well. Mixture should thicken nicely.

    Boil potatoes until very fork-tender.

    Steam cauliflower.

    Puree steamed cauliflower in food processor fitted with steel blade until very smooth.

    Blend cauliflower and potatoes together in stand mixer with butter, salt and cauliflower steam water until you have a smooth consistency.

    Pour veggie mix into 9×13” casserole dish and spoon mashed potatoes/cauliflower over top. Spread well.

    Bake 350C for ½ hour.

    Enjoy!

    ** Leftovers: next day add a good splash of chicken broth to a serving of shepherd’s pie and it forms a stew that is very satisfying in a Thermos for lunch on the go.

  • Turbo-charged Veggie Deer Curry

    Turbo-charged Veggie Deer Curry

    This recipe is adapted from Shelley Adam’s Curried Lamb and Lentil Soup from Whitewater Cooks at Home. I turbo-charged it with way more veggies, but I owe the amazing spicing and core concept of this recipe to Shelley Adams, whose cookbooks, especially the first two, changed the way I cook, and made cooking exciting for me.

    The main difference from Shelley’s original recipe is I’ve added half an eggplant, a full 2 cups of blanched spinach, and 2 cups of chopped green cabbage. You can also add ½ a cauliflower! I also added half a parsnip and took out the garlic cloves and her can of diced tomatoes. I’ve swapped out the lamb for deer.

    I hope Shelley approves. I am driven to create hearty dishes that complement veggies. In winter I prefer my veggies well cooked and spiced. Ideally, they are in a good hearty soup!

    Turbo-Charged Veggie Deer Curry:

    2 tbs pure olive oil

    1 tbs fresh ginger, minced

    ½ tsp red pepper flakes

    1 tsp turmeric

    1 lb Pemberton deer stew meat

    6 cups water

    1.5 cups green lentils, rinsed

    2 tbs pure olive oil

    1 large yellow onion, small dice

    ½ eggplant, small dice

    2 cups chopped cilantro

    2 cups green cabbage, finely chopped

    ½ parsnip, small dice

    2 cups blanched spinach or chard, chopped

    1 red pepper, small dice

    ½ yellow pepper, small dice

    2 carrots, small dice

    ½ cauliflower, small dice (optional)

    1 tbs cumin

    1 tsp coriander

    1 tsp garam masala

    2 tsp salt

    1 tsp pepper

    Method:

    Sear deer meat in dutch oven or stainless soup pot on medium-high heat with ginger, chili flakes and turmeric until meat is well browned. Add lentils and water.

    Bring to boil, then reduce heat and simmer 45 minutes.

    In another large soup pot, add olive oil at medium heat. Add fenugreek and mustard seeds and cook until they pop. Then add ALL other veggies: onion, turnip, peppers, eggplant, blanched spinach, cilantro, etc. Sauté low and slow until soft and translucent and/or caramelised. Then add cumin, coriander and garam masala.

    Finally add the deer and lentil mix to the veggie mixture and simmer for another 20 minutes or so. Add salt and pepper to taste.

    Enjoy!


  • When Life Hands You Pemberton Pumpkins…Make Pumpkin Bread!

    When Life Hands You Pemberton Pumpkins…Make Pumpkin Bread!

    I am submitting my November entry early because I cannot bear to think people are going to chuck their Halloween pumpkins into the compost or attend a pumpkin-smashing event to get rid of their creations. As long as your carved pumpkin hasn’t been mauled by wildlife or is going moldy then why not consume it?

    What to do:

    Take your carved pumpkin and slice it into manageable pieces. Lay the pieces skin side down onto baking dishes with a couple inches of water in them. Bake at 350F until soft and mushy. Then scoop out flesh into a large bowl and cool. Then freeze in 2-cup portions. You can make pumpkin soup, muffins, or pumpkin bread. Here is a great recipe for pumpkin bread that is very moist and also freezes well. I adapted it from Susan Mendelson’s recipe from her 1980 cookbook Mama Never Cooked Like This (which also contains a delicious banana bread recipe). In short – respect your pumpkin! Its use extends far beyond decorating your porch on Halloween night.

    Pumpkin Bread (yield: 2 loaves)

    Ingredients:

    2 cups mashed cooked Pemberton-grown pumpkin (no need to puree first)

    2.5 cups spelt flour

    3/4 cup almond meal

    2 cups white sugar

    4 eggs

    1 cup grapeseed oil

    2/3 cup water (can use the water from bottom of pumpkin baking pans)

    2 tsp baking soda

    1.5 tsp cinnamon

    1.5 tsp nutmeg

    1 tsp cloves

    1 tsp ginger

    1/5 tsp salt

    1 tsp cardamom (optional)

    Method: Preheat oven to 350F. Mix all ingredients well in stand mixer. Pour batter into 2 well-greased standard-size bread loaf pans. Bake 60-70 mins. Done when skewer inserted in centre of loaf comes out clean.

    **Note: this bread often sticks to the bottom when removing, so grease pans very well and consider flouring the pans too. Silicone loaf pans are a better choice than pyrex.

  • Down to the Dregs of the Apples…Use Them Up!

    Down to the Dregs of the Apples…Use Them Up!

    If you are not lucky enough to have effective cold storage, your harvest supply of apples may be looking a little tired right now. If so, I have two fantastic recipes that take advantage of less than perfect, small, slightly shriveled apples that you might be tempted to compost.

    Also, I made tarte tatin recently with a fresh supply of delicious coastal apples that were perfectly ripe, and freshly picked. The recipe was from Martha Stewart’s Baking Handbook and is available at the Pemberton Library. I adapted her Pate Brisee recipe by using spelt flour and the results were tasty!

    We are also onto the “dregs” of cricket chirping. Cricket chirping is one of my favourite sounds. They started in late July and almost mid-October I hear a forlorn cricket or two at night. They sound kind of lonely. Cheers to the persistent crickets who usher in shorter days and frosty weather.

    Here are two recipes to use when you have processed all your nice large apples and are left with tiny ones that aren’t much use. These recipes just call for tiny pieces of apple and you don’t need to peel them first. Also the tuna patties are super quick, and also portable for lunch on the go. The rice pudding recipe is cooked for 6 hours in the slow cooker and is so easy and a real treat on a frosty evening. One is fast, one is slow, but both simple and easy.

    Quick Tuna Burger Patties:

    2 cans drained flaked tuna in water

    ¼ cup real mayonnaise

    ¼ cup almond meal

    1 egg

    1 tbs Dijon mustard

    ½ tsp salt

    ½ tsp pepper, or to taste

    ¼ cup chopped fresh dill

    ¼ cup finely chopped apple, unpeeled

    Method:

    Mix all ingredients together and form into 6 patties. Fry on medium low heat in 2-3 tbs olive oil until nicely browned on each side. The longer they cook, the better they will hold together so don’t rush the frying.

    Slow Cooker Rice Pudding:

    2.5 cups whole milk

    ½ cup whipping cream

    1/3 cup Arborio rice

    1 tsp cinnamon

    ¼ cup white sugar

    ½ cup finely chopped apple, no need to peel first!

    1 tsp vanilla

    Method:

    Place all ingredients in a 2 quart soufflé dish and put that dish into a slow cooker crock. Cover with lid and cook on LOW for 6 hours. (Do not cook on high heat as the milk won’t cook as nicely.)


    Tarte Tatin recipe can be found in Martha Stewart’s Baking Handbook, published by Clarkson Potter and available at Pemberton Library.

    IMG_9589.JPG
    Rice pudding prior to cooking
    IMG_9810.jpg
    Tarte Tatin: doesn’t look as good as a slice of pie, but the flavour is rich and texture is dense!
  • Fall in Pemberton: a Full Fridge and Pantry!

    Fall in Pemberton: a Full Fridge and Pantry!

    Hello everyone and happy fall. Welcome back to routines and merino wool clothing! Yay!! There are lots of new faces walking around town. This makes me happy. A few years ago it seemed everyone was leaving this valley.

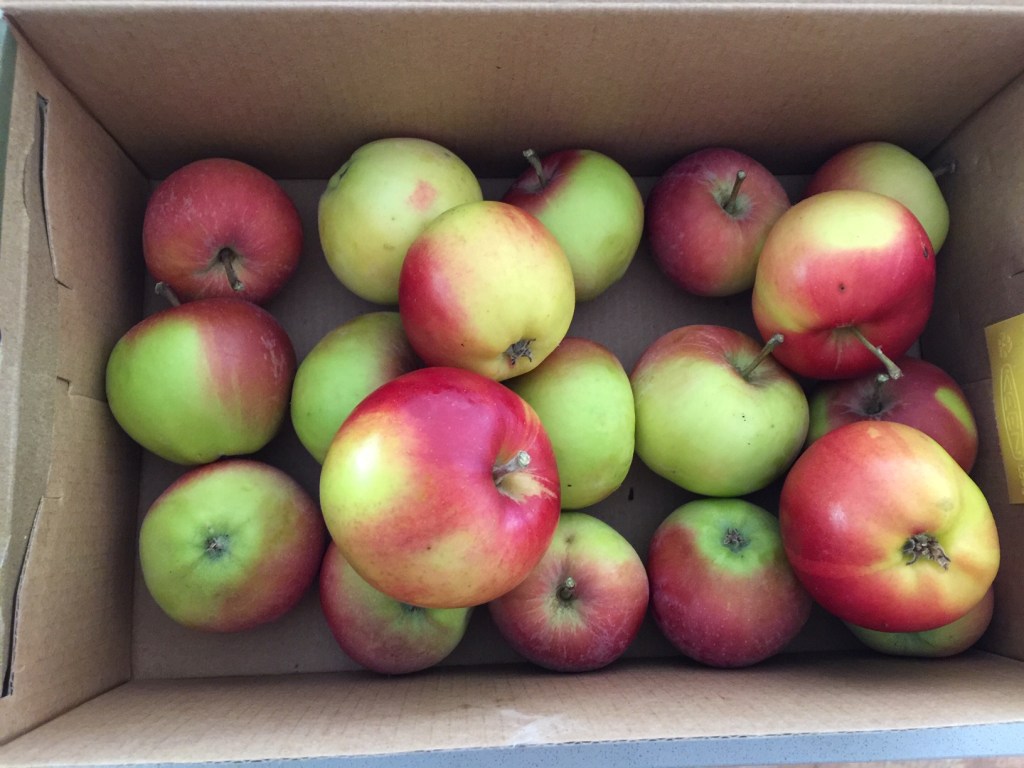
    This is the time of year that a ton of stuff is ripening: apples, pears, zucchini, beets, chard, winter squashes, Lillooet tomatoes (yay!) and grapes. Also hazelnuts – which are my kind of harvest: no weeding or watering!

    In light of the abundance of food ripe and ready at our farmers markets and our own backyards I have a seasonal recipe this month plus a few tips for newcomers.

    First the tips:

    In Pemberton, fall is the time that field mice want to find a warm and cozy place to call home for winter. They leave the fields and will set up nest in your home if they can. If you live near a field be extra vigilant. This is NOT the time to store cardboard boxes of granola bars or Stone Wheat Thins in your garage fresh from a Costco trip. Or for that matter, any paper towel or toilet paper. If a mouse and his or her relatives find a way into your garage, this nice supply of items will be destroyed. I know all about this from personal experience. Keep your TP in a dry and clean place in your house proper, not the garage. Keep cardboard packages of food in your kitchen cupboards, or, if in a pantry, you may want to consider storing these items in hard plastic salad boxes or Tupperware bins.

    Second tip: If you keep a yard compost bin and put apple trimmings in it or other fruit waste, your yard may attract bears. So at this time of year I usually avoid putting fruit waste in the compost bin, and use the compost bin for coffee grounds and other non-bear attractant compost.

    Finally: do not discard beet tops: Blanch them and freeze in Ziploc bags. They can be added to soups all winter – when you cannot face the depressing looking and expensive imported greens!

    Recipes: Pemberton Fall Samosas

    I recently made a fresh batch of samosas – this time using seasonal ingredients – any time I can use up large zucchinis I will. They were delicious.

    Dough recipe can be found here.

    Filling:

    1 large onion, small dice

    3 cups yellow zucchini, small dice

    2 cups chick peas

    2 cups cooked chicken, small dice

    2 cups cilantro, finely chopped

    ½ can full fat coconut milk

    2 tsp cumin

    2 tsp coriander

    2 tsp allspice

    1 tsp turmeric

    2 tsp salt

    2 tsp pepper

    Method:

    Make dough according to directions in this post. I use spelt flour instead of wheat.

    Make filling by sautéing all the veggies and spices, until soft and caramelised. After this has occurred, add your coconut milk, chick peas and chicken.

    Stir and cool.

    When dough is ready cut out 6-inch diameter circular squares of dough and fill with ¼ cup filling and fold dough over in a half moon shape and pinch the rounded side so it is sealed. You may have leftover filling to freeze for another batch later.

    Bake in a 350C oven for 30 minutes.

    These make great portable lunches and snacks!!

    For dessert:

    Track down Shelley Adams first cookbook: Whitewater Cooks, and make Joey’s Apple Cake. It is an amazingly moist and flavourful spiced apple cake.

    Another one to try is Tarte Tatin. Recipes can be found online. I made it recently but the pastry was not flaky enough for my taste, so I won’t share that one, but I am going to attempt a Martha Stewart version soon and see if it is better. Tarte Tatin is an upside down apple tart baked in a cast iron fry pan.

    Best of luck with your fall produce!!

  • Bring out the Beans this Summer!

    Bring out the Beans this Summer!

    It is midsummer still. I am a big fan of beans in the summer. Why? In dried form they last and last. You can throw a bag of dried lima beans in the pantry and cook them 4 years later and they still taste great. Unless you have access to reliable refrigeration when you are travelling in summer, I would prefer to avoid carting meat around.

    Obviously it is hard to resist the call of BBQ salmon or burgers. But for a regular mid-day meal or evening side dish that many would enjoy – and pretty darn safe in above average temperatures – then it is time to put beans back on the table.

    The following is a dish I turn to every summer when I spend time on one of the islands and have limited or unreliable refrigeration. All you need is a large bag of lima beans or fava beans. Once they have been soaked and cooked you can do a number of things.

    First off, sauté the beans in bacon fat with added olive oil. Sauté them with chopped onion and fresh rosemary and pepper. Throw in a few more finely chopped veggies – such as diced bell peppers for colour. This dish makes a great side dish. Then later – add some veggie broth and turn it into a soup. I LOVE soup! And bean soup I enjoy a lot – even at tepid or room temperature. Again, no worries about meat going off in hot weather. Sometimes I don’t have much of an appetite during the hot spells….so beans are a great option for sustenance.

    Here’s to summer creativity in the kitchen – either camping or at a cabin – and bring out the beans!

    Sautéed Lima Beans:

    One large bag of large-sized lima beans (or fava beans)

    Salt and pepper

    Olive oil and/or bacon fat

    Fresh rosemary

    Method:

    Soak beans for 6 hours, then drain water and cook beans with fresh water covering the lima beans by 3 inches.

    Bring to boil and simmer until beans are tender

    Note: DO NOT RUSH THIS PROCESS. If you take beans off stove too early and before they are fork tender they will NOT cook well later.

    When tender, drain beans and sauté beans in bacon fat and olive oil and chopped onion and other veggies as available. Add 2 tbs of fresh rosemary. The dish is finished when the bacon fat gives a caramelised finish and subtle crust to the beans. Using a large cast iron enameled pot gives a good finish to the beans!

    Serve as side dish or main (maybe add some chopped cooked bacon).

    Option 2:

    Take your leftover sautéed beans and add to a soup stock made strictly with veggie ends, 30 peppercorns, and 2 bay leaves. See broth photo attached. I used the ends/cores from bell peppers, dill stems, onion ends, parsley ends and cauliflower stalks – which were going to go into the “green bin” but I saved. Someone else’s veggie “waste” is my soup stock base!

    Black Bean and Veggie Hash:

    3 cups cooked black beans

    1.5 cups cilantro, chopped

    3 tbs bacon fat and/or olive oil

    1 cup onion

    2 cups thinly sliced zuchini

    1-2 cups corn kernels

    juice of one lime

    1 tbs cumin

    pepper to taste

    Method:

    Saute onion, zucchini, and black beans in fat and/or oil. Add cilantro, cumin and corn. Saute until veggies are soft, caramelized and flavourful. When finished add lime juice and pepper to taste. Makes an amazing lunch or side dish. And you can always add 2-3 cups of veggie broth to leftovers for a delicious soup following day.

    Enjoy the rest of summer and happy slurping!